This procedure describes how to set up your Control-M environment and start planning your workflows![]() A series of visually connected jobs in Control-M that execute at specific times, in a specific sequence, and under specific conditions..
A series of visually connected jobs in Control-M that execute at specific times, in a specific sequence, and under specific conditions..
To convert existing workflows from your current scheduling tool to Control-M, see Conversion.
Begin
-
Log in to Control-M, as described in Logging in to Control-M.
-
Install the required Agents
 A Control-M component that is installed on a host and runs, executes, and monitors jobs., as described in Agent Installation.
Agents are Control-M components that are installed on the hosts where your jobs
An execution unit, such as a script or command, that executes at the operating system level, or as part of a third-party business application. run. Agents submit jobs for execution by the hosts, monitor jobs, perform post-processing analysis of completed jobs, and send the completion status and analysis results back to the server. For more information, see Agent Management. -
Install the required plug-ins, as described in Plug-ins.
Plug-ins extend Control-M functionality to third-party applications like Hadoop or SAP, or add functionality like Control-M Managed File Transfer. For more information, see Plug-ins.
-
Define connection profiles, as described in Creating a Centralized Connection Profile.
For your installed plug-ins to work, you must define connection profiles that enable Control-M to connect to the required third-party application.
-
Define users and roles, as described in User and Role Authorizations.
Users are granted permissions based on their assigned role. Role definitions enable you to limit the Control-M features that a user is authorized to view or manage.
-
Create and run your first workflow, as described in Creating and Running Your First Workflow.
-
Analyze and troubleshoot the workflow, as described in Analyzing and Troubleshooting a Workflow.
-
Generate and view reports, as described in Reports.
The Reports feature enables you to create and generate ad hoc reports that provide information about definitions and operational issues in your Control-M environment.
Logging in to Control-M
This procedure describes how to log in to Control-M.
Begin
-
From a web browser, type the URL provided to you.
-
If a warning message appears that states that this URL is not secure, verify that the server is trusted and proceed to the URL.
-
Do the following:
-
In the User field, type your username.
-
In the Password field, type your password.
-
-
Click Sign In.
-
Click Restore to restore any open tabs from your last session.
Creating and Running Your First Workflow
This procedure describes how to create and run your first workflow. In this procedure you create two jobs and combine them into a workflow.
Begin
-
Log in to Control-M, as described in Logging in to Control-M.
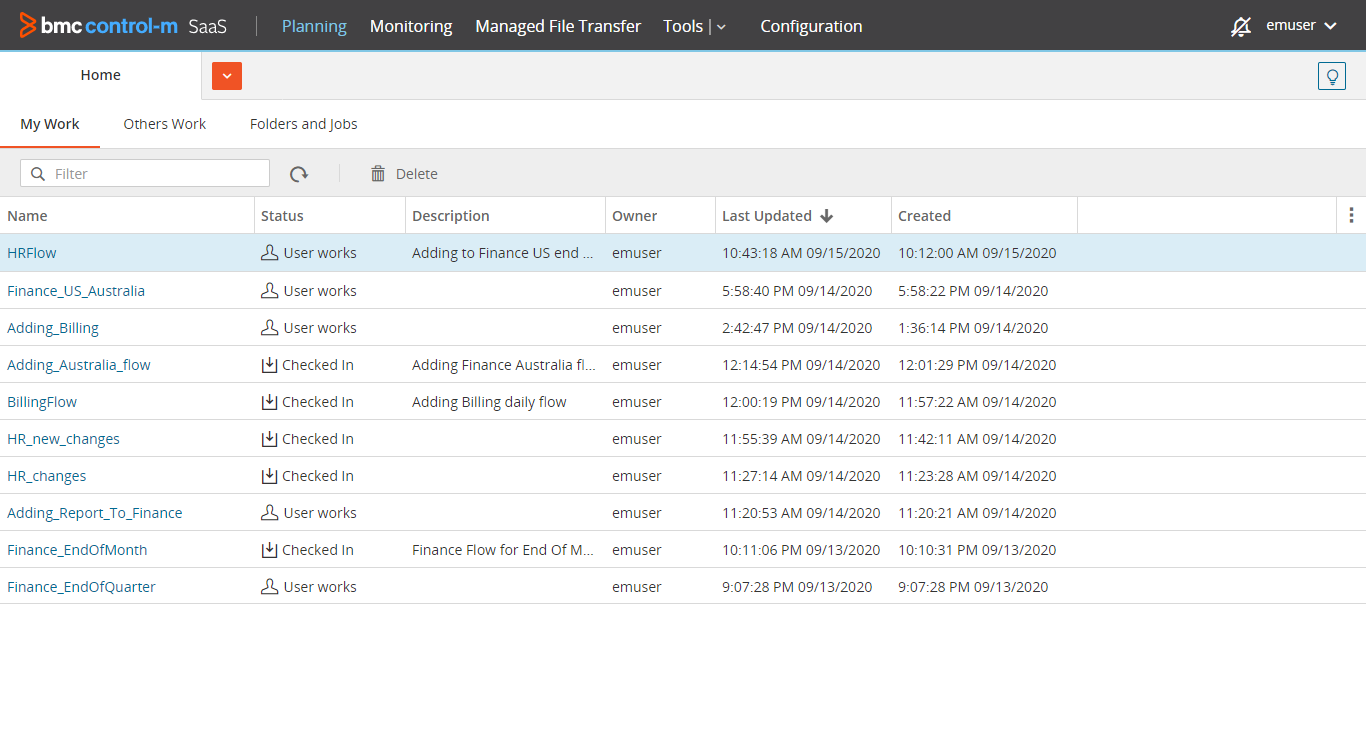
A screen similar to the following image appears:

-
Click Planning to verify that you are in the Planning domain.
-
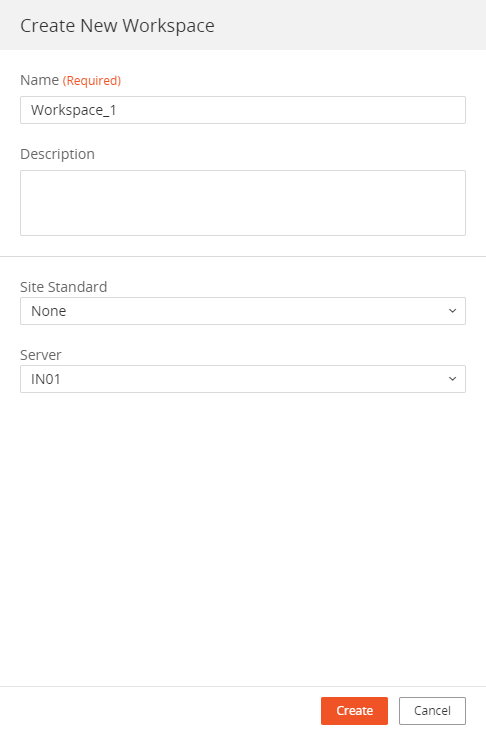
Click
 and select Add New Workspace.
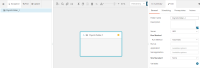
The Create New Workspace pane appears, as shown in the following image:

-
In the Name field, type a meaningful name and click Create.
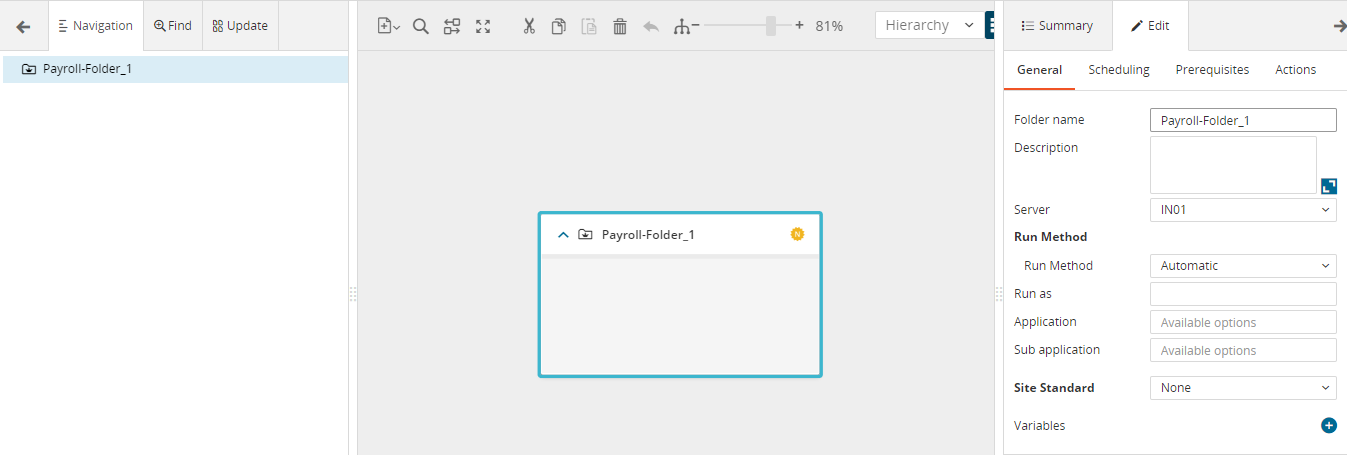
The new workspace appears with an empty SMART folder
An executable container of jobs and sub-folders that passes its definitions to the included jobs and sub-folders., whose definitions appear in the right pane. For more information about other fields in the Create New Workspace pane, see Workspaces.
-
In the Folder Name field, type a meaningful name.
For more information about folders and their attributes, see Creating a Folder.
-
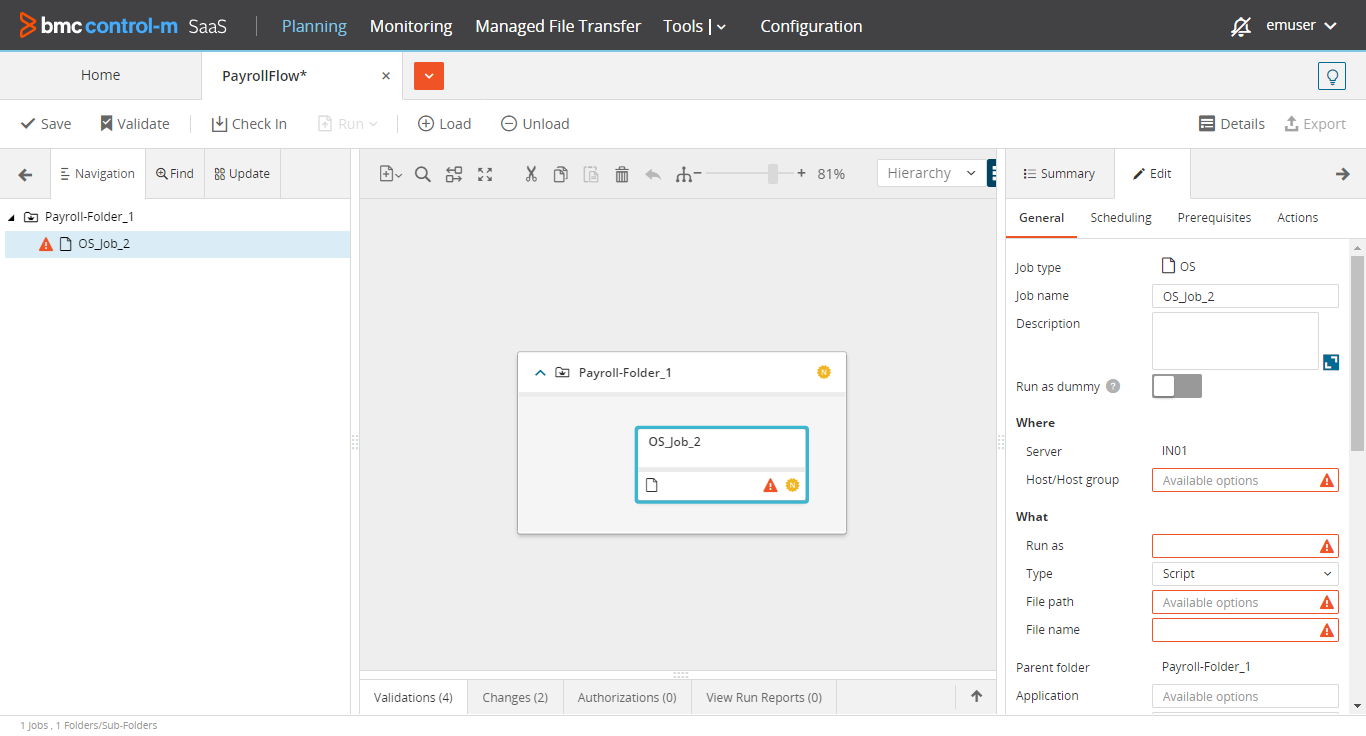
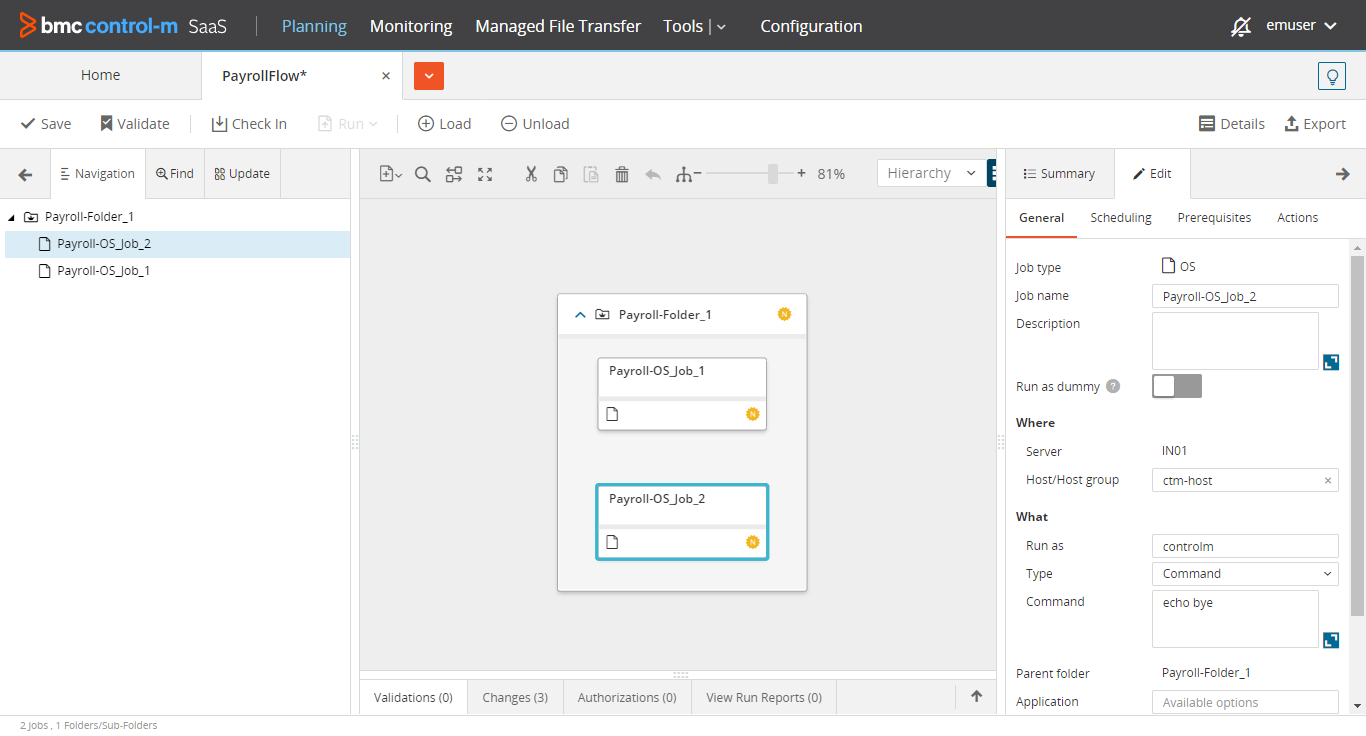
Click Add Job drop-down list, and then click and drag an OS job into the SMART folder.
The new OS job appears in the SMART folder, and the job definitions appear in the right pane. You must define attributes that are marked with a
 . Jobs placed inside a folder inherit the folder attributes.
-
In the right pane, in the General tab, define the following job attributes:
- Job Name: Defines a meaningful job name.
-
Host/Host Group: Defines the Agent hostname, Agentless Host name, empty host machine, or host group where the job executes. This is the same host where you installed Control-M/Agent in Getting Started.
-
Run as: Defines the operating system account username that is authorized to execute the job.
-
Type: Determines what the OS job executes, as described in OS Job. Select Command, and then in the Command attribute, type echo hello.

For more information, see the following topics:
-
Add another OS job to the SMART folder and define this job as you did the previous one, but instead of the command echo hello type echo bye.
-
From the toolbar, click
 to automatically rearrange the jobs in the folder.
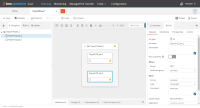
-
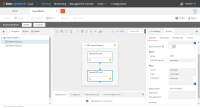
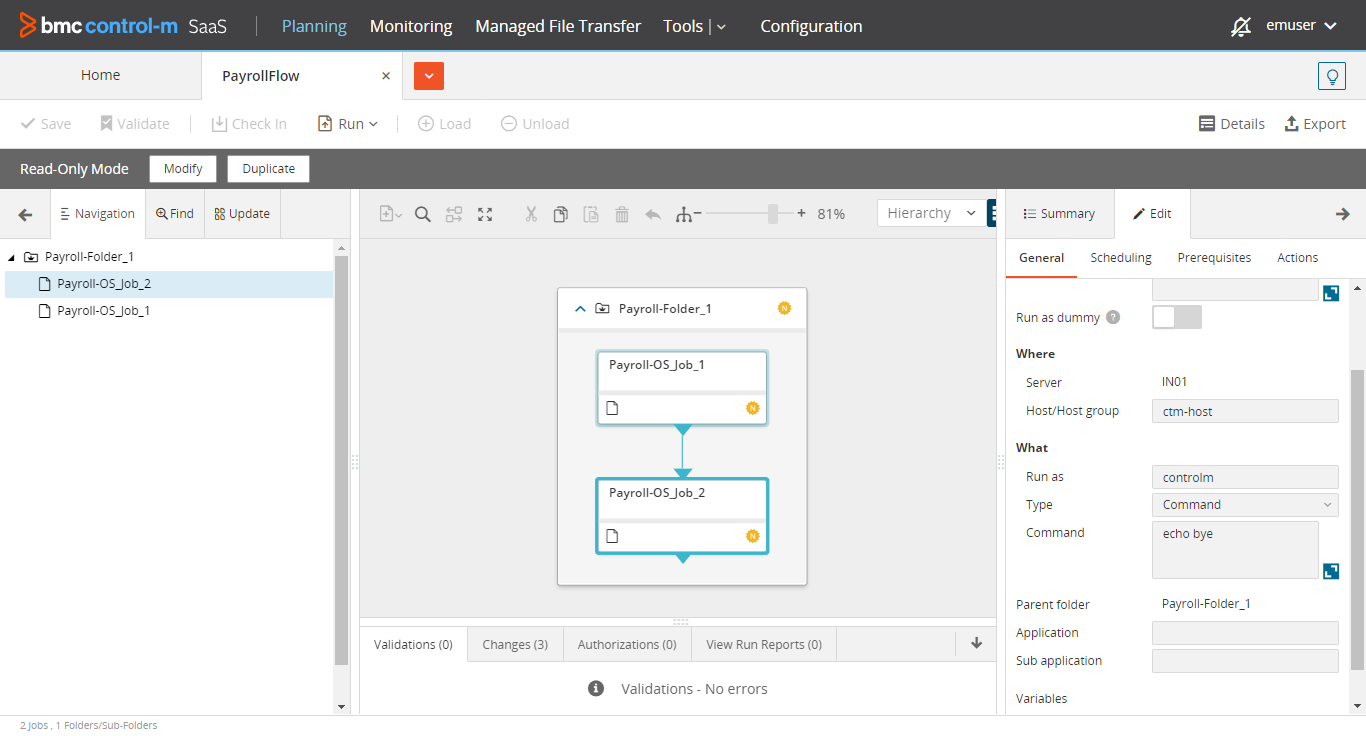
Hover over the bottom of the first OS job and drag the arrow that appears to the second OS job.
This creates a dependency between the jobs that affects the progress of the workflow, as described in Events. The second job does not begin to execute until the first job successfully completes execution (ends OK, as described in Job Status). This directs the workflow sequentially from one job to the next.

-
Click Check In and confirm.
The Check In button is disabled and the workspace appears in Read-Only Mode.
The workflow runs automatically, according to its scheduling criteria. Jobs are set to run every day at
-
Run the SMART folder, as described in Running a Workspace, Folders, or Jobs.
-
Do the following to view the workflow in the Monitoring domain:
-
Click Monitoring.
The Viewpoints pane appears in the Monitoring domain, as described in Viewpoints.
-
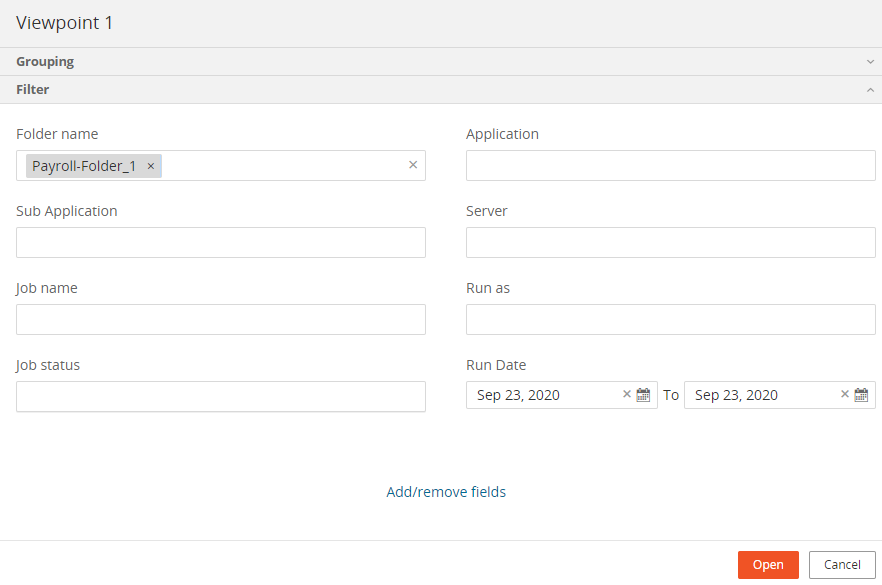
Click Add Viewpoint.
The Add Viewpoint dialog box appears.
-
In the Folder Name field, type the folder name that you defined.
-
Click Add Attribute and in the search field type Run Date, click Run Date, and then in the From field type the current date, and then click Open.
The viewpoint that contains the workflow that you just ran appears.

-
-
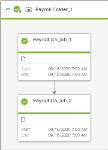
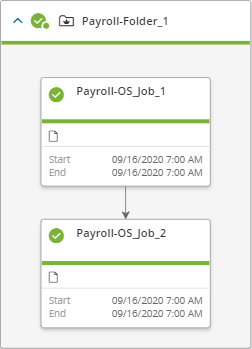
View the job colors.
A green check mark and border appears on the SMART folder and jobs, which indicates successful completion, as described in Job Status.


Analyzing and Troubleshooting a Workflow
This procedure describes how to analyze and troubleshoot a workflow. In this procedure, you create a workflow that fails, analyze why it fails, and then you fix it.
Begin
-
From the Planning domain, define the following two jobs, as described in Creating and Running Your First Workflow.
- Job 1, Command Eco: Define this job with the command eco hello—because eco is incorrect syntax, the job fails.
- Job 2, Command Echo: Define this job with the command echo bye.
-
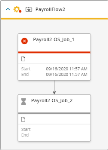
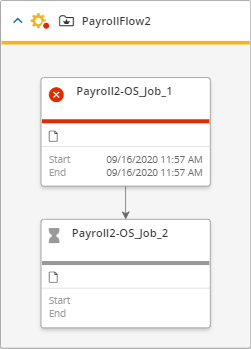
Run the jobs and review the results in a viewpoint, as described in Creating and Running Your First Workflow.
In the viewpoint, the first job appears red, which indicates that it did not successfully complete. The second job appears gray, which indicates that it is waiting for an event.
-
Do the following to see a more detailed description of the job statuses:
-
Select the first job.
Status
 Ended Not OK appears in the Run Information section, in the Summary tab of the job definitions pane.
-
Select the second job.
Status
 Wait for Event appears in the Run Information section.
-
-
Select the first job and click the Log
The activity log of a job, which lists every job status change, such as job execution start and completion times, and how the job ended. tab in the job definitions pane.The log appears and states the following:
-
The job started executing, which means that the Host/Host Group and Run as attributes were correctly configured.
-
The job ended with state NOT OK.

-
-
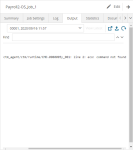
In the job definitions pane, click the Output tab.
The output appears and indicates that the command eco is not recognized, which indicates that this command syntax must be checked.
-
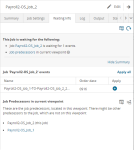
Select the second job and in the job definitions pane, click the Waiting Info
A tab in the job properties pane in the Monitoring domain, that lists the events, resources, and job predecessors that the selected job is waiting for before it can begin execution. tab.The Waiting Info tab appears and indicates that the second job is waiting for the first job to End OK before it can begin execution. The second job cannot begin execution until the event is released from the first job. After you fix the mistake in the first job, both jobs can successfully execute.
-
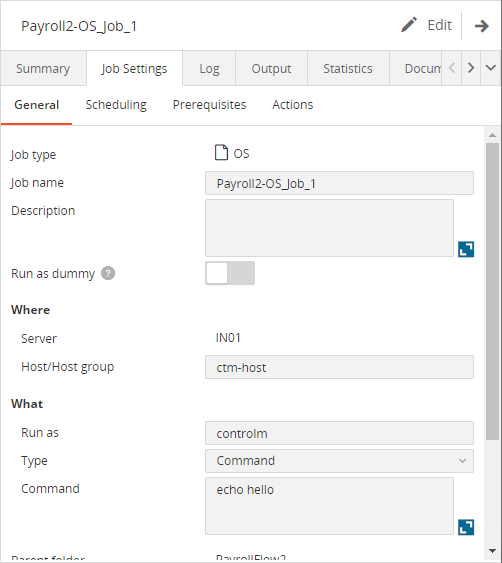
In the right pane of the first job, view the Job Settings tab.

The command syntax is incorrect: eco must be echo.
-
In the right pane of the first job, click Edit.
Change eco to echo and then click Save.

The command syntax is now correct.
To verify that the jobs are fixed, you must rerun the first job.
-
Select the first job and then click Rerun.
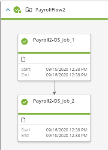
Watch as the jobs execute and the colors change to green.
For more information about the actions you can do in the Monitoring domain, see Monitoring.


Resetting Your Password
This procedure describes how to reset your password if you want to change it or your password expired. If the password expires, you must delete the existing user and recreate the user.
If you log in to Control-M with an Identity Provider, contact your System Administrator to reset your password.
Begin
-
Navigate to the login page, as described in Logging in to Control-M.
-
Click Forgot Your Password? and follow the instructions until you have a new password.
Logging Out of Control-M
This procedure describes how to log out of Control-M.
Begin
-
From the Home page in the upper right corner, from the username drop-down list, select Log Out.
You are now logged out of Control-M. To log in, see Logging in to Control-M.
 YouTube
 Facebook
 LinkedIn