Control-M Trial
Control-M is a workload automation solution that enables you to schedule and execute business workflows![]() A series of visually connected jobs in Control-M that execute at specific times, in a specific sequence, and under specific conditions. across various platforms and applications from a single point of control. Every organization relies on many processes to execute on time and without fail. This helps organizations to run effectively and competitively. Control-M enables you to define how these critical processes are automated and when they run.
A series of visually connected jobs in Control-M that execute at specific times, in a specific sequence, and under specific conditions. across various platforms and applications from a single point of control. Every organization relies on many processes to execute on time and without fail. This helps organizations to run effectively and competitively. Control-M enables you to define how these critical processes are automated and when they run.
The Control-M Trial includes all Control-M features that enables you to test, navigate, and experience the entire solution that meets your organizational needs.
In addition, the trial includes the following predefined workflows that demonstrate the scope and power of Control-M:
-
AWS Data Pipeline Workflow Simulation: Simulates a data oriented pipeline, which checks in job definitions in an AWS data pipeline workflow and shows them running in a Monitoring workspace. This demonstrates how Control-M handles multi-step processes, monitors execution, and handles dependencies.
-
Control-M Trial: Enables you to set up and run a real workflow with a pre-defined Agent and job definitions. This enables you to integrate Control-M with your own environment to test Control-M's ability to meet your organizational needs and requirements.
-
Installing an Agent: Enables you to install a local Control-M/Agent in your environment to test Control-M using your workflow scenarios.
The following lists terms that are used throughout this trial:
-
Job: An execution unit, such as a script or command, that executes on an Agent.
-
Agent: A Control-M component that is installed on a host and runs, executes, and monitors jobs.
-
Workspace: A working area in the Planning domain where you define and edit jobs.
-
Viewpoint: A customizable view of job workflows in the Monitoring domain.
AWS Data Pipeline Workflow Simulation
The AWS data pipeline workflow simulates a data oriented pipeline, which checks in job definitions and shows them running in a Monitoring workspace. This demonstrates how Control-M handles multi-step processes, monitors execution, and handles dependencies.

This table describes the job types that are used to simulate the AWS data pipeline workflow.
|
Job Name |
Job Type |
Description |
|---|---|---|
|
Upload Files to S3 |
File Transfer |
Transfers the customer_data.csv file to an Amazon S3 bucket where the workflow is initiated. |
|
Import Data into DB |
AWS Dynamo DB |
Loads the data into a database from the S3 bucket, which ensures that the data can be queried and structured for processing. |
|
Process Data |
AWS Glue |
Processes the data on DynamoDB, retrieves the required information and provides a new file in parquet format, which is stored on a S3 Bucket. This process prepares the data for consumption in both analytics and applications. |
|
Update Data Catalog |
AWS Athena |
Updates the data catalog with metadata about the processed dataset. This enables other services to use the data. |
|
Update Web Portal |
AWS Lambda |
Updates a web portal to provide users with access to the processed data. This ensures the data is available for reporting or dashboard tools. |
|
SLA Checkpoint |
SLA Management |
Validates that all tasks completed within the agreed time and quality thresholds. This provides operational assurance for reliability and compliance. |
Running the Hello World Workspace
This procedure describes how to run the jobs that you updated in the Hello World workspace and view their status in the Monitoring domain.
Begin
-
From the Hello World workspace, click Run > Run Worksapce.
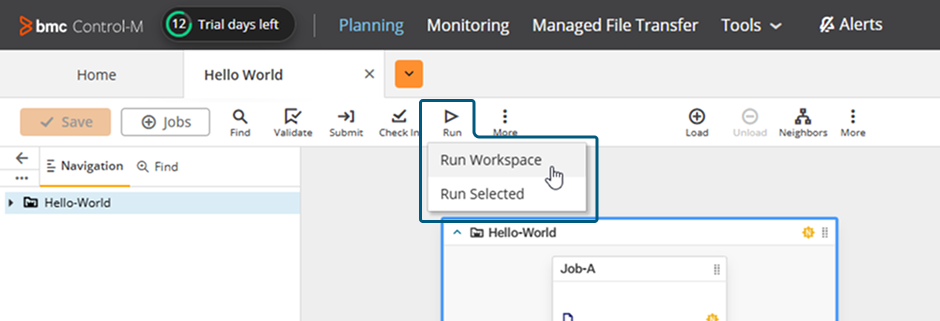
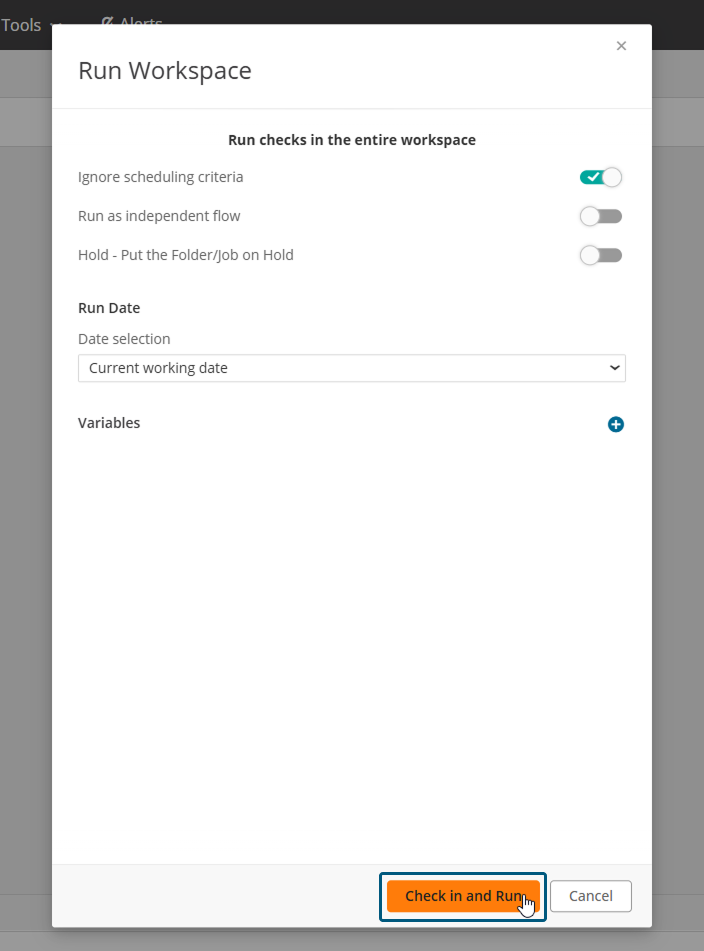
-
Click Check in and Run.

-
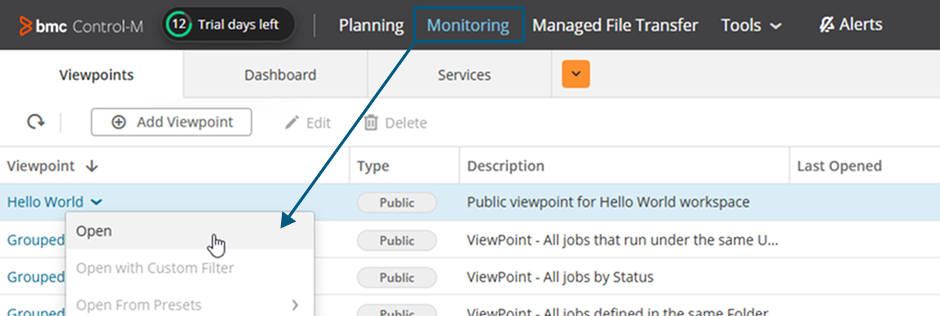
From the Viewpoints tab in the Monitoring domain, open the Hello World viewpoint.

-
Analyze the jobs via the job output and see that they completed successfully.

Installing an Agent
This procedure describes how to install an Agent on a Windows or UNIX host, which you can use to test Control-M in your environment.


Before You Begin
- Verify that you have met all requirements, as described in Agent System Requirements for Windows.
- Verify that Java is installed on the Windows host, as described in Control-M External Java Installation.
Begin
-
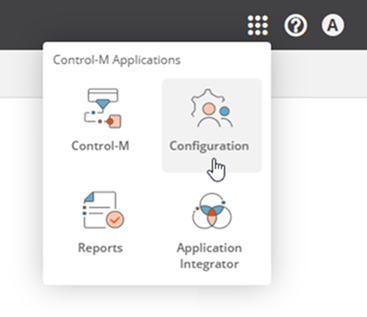
From the
 icon, select Configuration.
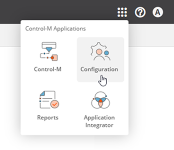
-
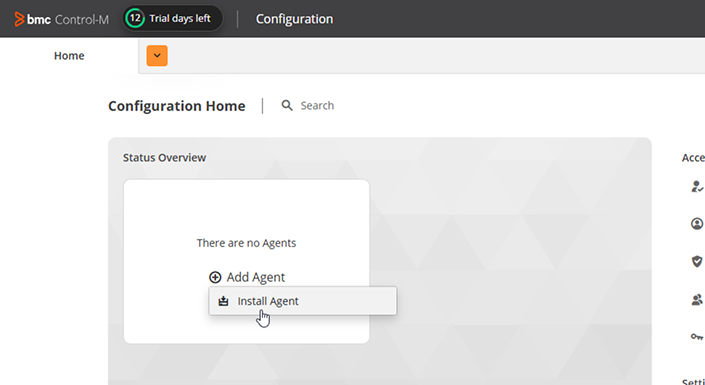
From the Add Agent drop-down list, select Install Agent.
-
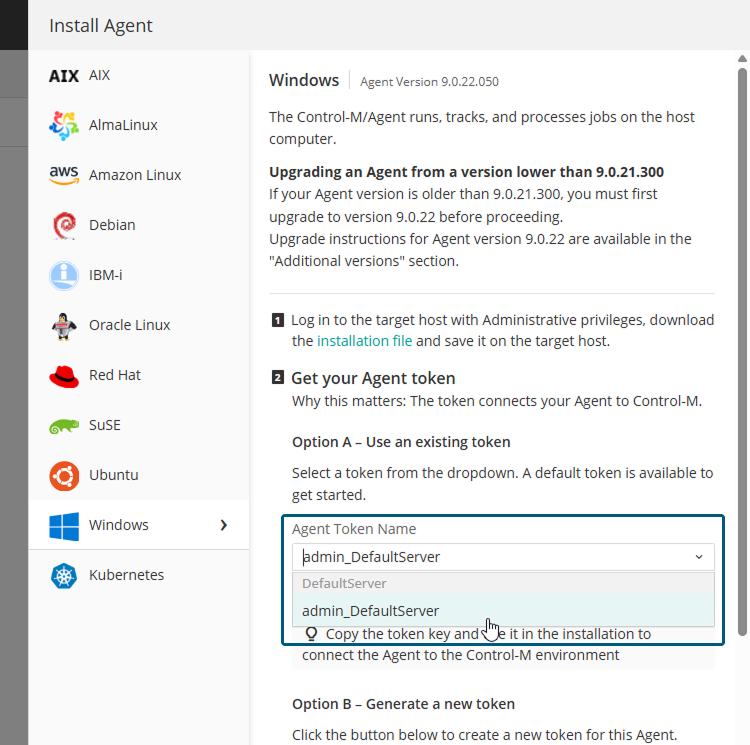
From the Install Agent pane, select Windows and download the installation file.

-
Log into the target host with Administrative privileges and save the downloaded file.
-
On the target host, set the Java environment variable, by typing the following from a command prompt:
set BMC_INST_JAVA_HOME=”<Java_Directory>”

The <Java_Directory> must not contain any spaces. Otherwise, Control-M might fail to properly install.
-
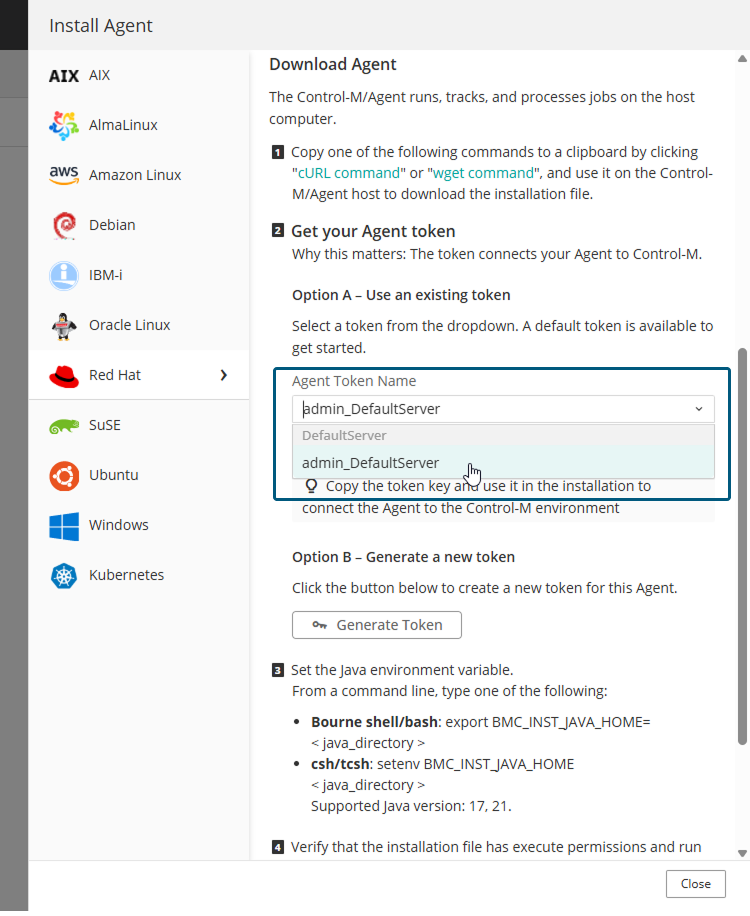
From the Install Agent pane, do the following:
-
From the Agent Token Name drop-down list, select admin_DefaultServer.
-
Copy the token to the clipboard.
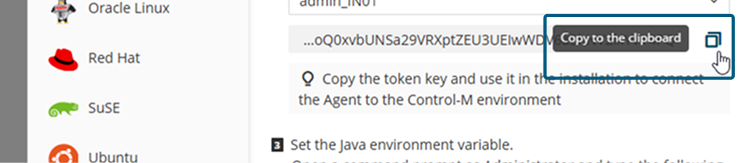
You need this token key to perform the installation and connect the Agent to the Control-M environment.
-
-
On the target host, run the following installation file that you downloaded:
<file_path >/FZ4.9.0.22.000_windows_x86_64.exe
-
Follow the on-screen instructions until the installation is complete.
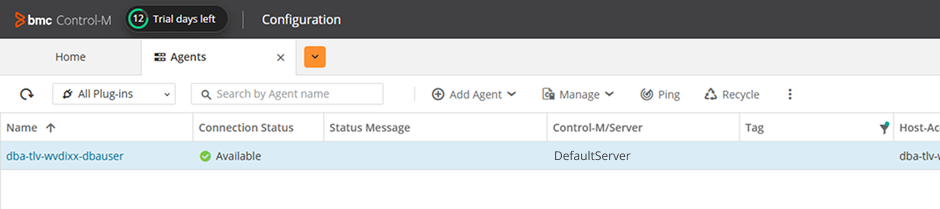
After the installation is complete, the Agent appears in the Agents tab.


Before You Begin
- Verify that you have met all requirements, as described in Agent System Requirements for UNIX.
- Verify that Java is installed on the Windows host, as described in Control-M External Java Installation.
Begin
-
Configure a user account on UNIX, as follows:
-
Do one of the following:
-
Run the following command to create a group:
/usr/sbin/groupadd <user_group>
-
Run the following command to create a user account:
/usr/sbin/useradd -u <numeric_user_id> -g <user_group> -d <user_home>
-
-
Do the following to verify that the HOST environment variable is defined on all shells:
-
Run the following command:
env
-
If the HOST environment variable is not defined, contact your system administrator.
-
-
Run the following command to set permissions to 755:
chmod
-
-
From the
icon, select Configuration.
-
From the Add Agent drop-down list, select Install Agent.
-
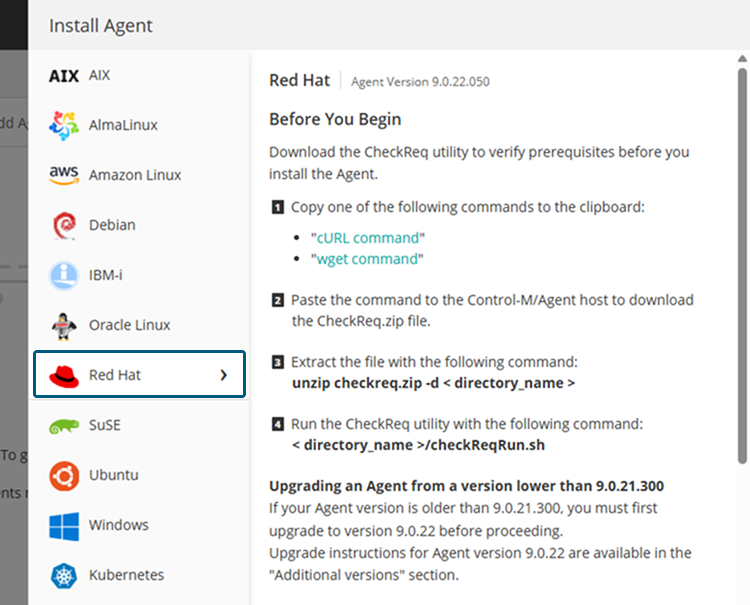
Select the UNIX operating system where you want to install the Agent.

-
Download the CheckReq utility to verify prerequisites before you install the Agent, as follows:
-
Copy the cURL or wget command and run it on the Agent host
-
Extract the file by typing the following command:
unzip checkreq.zip -d < directory_name >
-
Run the CheckReq utility by typing the following command:
< directory_name >/checkReqRun.sh
-
-
Copy the cURL or wget command and run it on the Agent host to download the installation file.
-
On the target host, set the Java environment variable, by typing one of the following commands:
-
Bourne shell/bash: export BMC_INST_JAVA_HOME=<java_directory>
-
csh/tcsh: setenv BMC_INST_JAVA_HOME <java_directory>
-
-
From the Install Agent pane, do the following:
-
From the Agent Token Name drop-down list, select admin_DefaultServer.
-
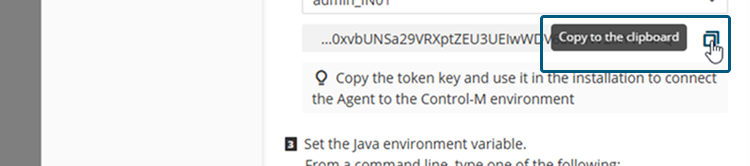
Copy the token to the clipboard.

You need this token key to perform the installation and connect the Agent to the Control-M environment.
-
-
On the target host, verify that the installation file has execute permissions and run one of the following installation files from the same session where the Java environment variable was defined:
-
Linux: <file_path >/FZ4.9.0.22.000_Linux-x86_64.BIN
-
UNIX: <file_path >/FZ4.9.0.22.000_AIX_64.BIN
Verify that the file has execute permissions.
-
-
Follow the on-screen instructions until the installation is complete.
After the installation is complete, the Agent appears in the Agents tab.
-
Create a credential to store the UNIX/Linux account name authentication settings, as described in Adding a Run as User.

Related Topics
For more information about Control-M and how to set up a full workflow, see the following:
 YouTube
 Facebook
 LinkedIn