Implementation Hints
This chapter contains the following topics:
Overview
This chapter of the guide is designed for those who are already familiar with the basic concepts of Control-V, who have read Introduction and Online Facilities, and who have gained some experience with indexing, decollating, migrating, viewing and using the Control-V Online facility.
The purpose of this chapter is to provide some guidelines for implementing Control-V at your site. For demonstration purposes, a simplified model of a bank is used throughout this chapter.
Defining the Recipient Tree
The Recipient Tree is a list of all possible report recipients, arranged according to the organization’s hierarchy. A properly designed Recipient Tree can speed up the process of implementing Control-V. However, the Recipient Tree can be modified at any time and the initial tree definition can be modified and developed as experience is gained using various product options.
The Recipient Tree definition is built in two stages:
-
Defining the levels of the organization.
-
Inserting recipient information in the tree.
Defining the Levels of the Organization
'30' 'DIVISION'The levels must be in ascending sort order (for example, 10, 20, 30). The descriptive name is in free format. The bank example is used below to demonstrate the different considerations in defining the levels.
The bank is divided into two major groups: the branches and the head office divisions. The tree is constructed to represent the bank structure:
                                  OPERATIONS
                                      |
                                  PRESIDENT
                                      |
                     ---------------------------------
                     |                               |
                 REGIONAL MGMT                   DIVISION
                     |                               |
                 BRANCH                          DEPARTMENT
                     |                               |
                 BRANCH-DEPT                     SECTION
                     |                               |
                 BRANCH-WORKER                   WORKERS
Now let’s assign levels to the bank structure:
                               10 OPERATIONS
                                     |
                               15 PRESIDENT
                     --------------------------------
                     |                               |
              20 REGIONAL MGMT                  50 DIVISION
                     |                               |
              25 BRANCH                         55 DEPARTMENT
                     |                               |
              30 BRANCH-DEPT                   60 SECTION
                     |                               |
                     --------------------------------
                                     |
                                70 WORKERS
Notice that the workers level used is the same for the branches and the head office divisions. A single worker can be directly under any of the levels in the organization (for example, under a branch, a branch department, a section).
The definition of the tree can be modified any time. New levels can be added without affecting Control-V operation. Changing the level code, however, may be more complex; this requires a global change in the current definition of the Recipient Tree and the report decollating missions. Therefore, it is highly recommended to maintain an interval between successive levels so that there is a place to insert additional levels in the future.
The levels of the tree are defined in Control-D installation parameters in the IOA PARM library. The member must be assembled and linked each time it is modified, and then copied to a Linklist library (see the INCONTROL for z/OS Installation Guide).
When a change is made to the level definition (for example, a new level is defined), the Control-D monitor must be shut down and brought up again. It is also recommended that users of the Online facility log off and log on again. This is only necessary when the tree structure is modified (not when a new user is defined in an existing level).
Defining Report Recipients
After the levels of the Recipient Tree have been defined, you can fill the tree with data (that is, the report recipients’ names) using the Online facility (option T). For a full description of how to define report recipients using the Online facility, see Online Facilities. The purpose of this chapter is to present some guidelines for defining the contents of the Recipient Tree, and to demonstrate its use by the various components of Control-V.
The following information can be defined for each recipient:
Parameters marked with the symbol M can have many occurrences.
Required Fields
Table 282 Required Fields for Defining Recipients
|
Field |
Description |
|---|---|
|
RECIPIENT |
Name of the user-recipient (1–8 characters) – must be unique. |
|
RECIPIENT LEVEL |
Level of the recipient. |
|
PARENT |
Name of the recipient’s parent. |
|
PARENT LEVEL |
Level of the recipient’s parent. |
Optional Fields
Table 283 Optional Fields for Defining Recipients
|
Field |
Description |
|---|---|
|
DESCM |
Description of the recipient. |
|
SYNONYMM |
Another name for the recipient. Each synonym can have a maximum of 20 characters. Synonyms may be non-unique and may contain embedded spaces. Any number of synonyms can be defined. |
Implementation hints for the above fields are discussed immediately following this list of tree definition fields:
Table 284 Tree Definition Fields
|
Field |
Description |
|---|---|
|
AUTHORIZEM |
Name (or prefix) of users authorized to view or receive the reports of the recipient. |
|
$SYSDATAM |
Specifies whether or not the authorized user is also authorized to see $SYSDATA entries. (For more information see $SYSDATA Records.) |
|
ADDRESSM |
Location where the report is sent after it is printed. Address can have a maximum of 10 lines and can be printed in the user banner. |
|
INDEX |
Specifies whether or not a report index should be printed at the beginning of the user bundle. |
|
USER BANNER |
Specifies whether or not to print a user banner at the head of the user’s bundle. |
|
REPORT BANNER |
Specifies whether or not to print a report banner at the head of each report in the bundle. |
|
DEF DEST |
Default destination of printed reports for the recipient. For additional information regarding parameter DEST, see JOB DEFAULTS DEST: Decollating Parameter (decollating mission). For implementation hints, see Specifying Report Destination. This parameter is taken into account at decollation time, it does not affect reports that are already decollated. |
|
PC Parameters |
Specifies information related to downloading reports to Control-D/WebAccess Server. |
Recipient Tree Recommendations
Let’s start from the top – the user or recipient name. Only one user should be defined at the highest level of the recipient tree. This is usually an operations user who is (by default) authorized to see all reports.
In our example, the branches are organized in groups under regional management. Each branch is composed of a few functional departments (for example, foreign currency, stock exchange, loans, and so on). A functional department is usually composed of one or very few bank workers. Therefore, in many cases, a department is the final destination of the report. The division of the reports between two workers in the loans department of a bank branch is done manually by the workers themselves. However, in the main branch, each department is quite large, and there are functional differences which justify putting specific workers as the designated report recipients in the tree.
Concerning naming conventions, branches are usually assigned a number. You can decide that the name of the branch is the number itself (for example, 129). However, this can lead to ambiguity problems, for example, if there is also a section 129. Each user name must be unique; therefore, confusion can be caused by a report decollating statement such as:
DO USER 129It is recommended that all the branches start with a fixed prefix (for example, BR129, BR130, BR135, and so on). This enables easy and unique identification of the user in all the screens and reports.
Let’s now review the use of the Recipient Tree by report decollating missions.
Report Decollating Missions and the Use of the Recipient Tree
Report decollating missions are instructions on how to process the reports of a specific job. It is assumed that the reader of this section has a basic familiarity with the format of the Report Decollating Mission screen. Below are a few examples of various report decollation problems.
Example 1
Assume all the branches have been defined under the relevant regional managements. The following example describes how the decollating instructions are defined. Consider a report which contains the following string beginning in line 2 column 120:
BRANCH nnn (where nnn is the branch number)
One way of defining the decollation criteria for such a report is:
Figure 457 Defining Decollation Criteria and Use of the Recipient Tree – Example 1
WHEN LINE 00002 - 00002 COL 00120 - 00129 PRINT   REF NXT   CT     AND/OR
     STRING BRANCH 129
  DO USER   = BR129                   LVL    LINE     COL     -     S A T
                                      SYNONYM =       CONCAT =
  DO
WHEN LINE 00002 - 00002 COL 00120 - 00129 PRINT   REF NXT   CT     AND/OR
     STRING BRANCH 130
  DO USER   = BR130                   LVL    LINE     COL     -     S A T
                                      SYNONYM =       CONCAT =
  DO
WHEN LINE 00002 - 00002 COL 00120 - 00129 PRINT   REF NXT   CT     AND/OR
     STRING BRANCH 131
  DO USER   = BR131                   LVL    LINE     COL     -     S A T
                            .
                            .
                            .
This method requires a lot of work. A similar definition must be used for every report which is distributed to the branches. When a new branch is added, it must be added to all the report definitions. This method of defining report decollating parameters is used by most report distribution systems.
The Recipient Tree provides a better solution for this problem. It is possible to define a synonym for each branch that contains the branch number. For example:
A synonym is added to the user definition in the tree:
25 BR129     The north county branch
   SYNONYM   129
The report decollating criteria are defined as:
WHEN LINE 00002 - 00002 COL 00120 - 00125 PRINT   REF NXT   CT     AND/OR
     STRING BRANCH
  DO USER   = *                      LVL 25 LINE     COL 127 - 129 S   T
                                      SYNONYM =       CONCAT =
The effect of this definition is as follows:
-
If the string BRANCH is found in the second line of the page between columns 120 – 125, then take the branch (level 25) name from columns 127 – 129 of the report.
-
By using one simple definition, you can define the distribution criteria of this report for all the branches. If a new branch is added in the future, there is no change to the report decollation criteria (in any of the jobs). The only requirement is to add the new branch to the Recipient Tree.
Example 2
Our sample bank has old reports which do not contain the branch number, but rather the old branch name (in text format). To solve this problem, only a small manipulation of the Recipient Tree is required. For each branch, define an additional synonym containing the name of the branch in text format. The synonym can have a maximum of 20 characters and can contain blanks.
For example:
25 BR129     The north county branch
   SYNONYM   129
   SYNONYM   North County
As you can see, using the Recipient Tree and the decollating criteria is quite simple and the parameters can easily be updated and maintained.
The Recipient Tree provides a default security feature. Because the users are organized in a tree, the regional manager is allowed (by default) to view all the reports of the branches in their region. This may be very helpful for daily operations. For example, the regional manager can review the status of a certain account (in the branch’s report) without printing a single copy of the report.
Example 3
Each morning the bank branch receives bags full of mail and reports. Someone at the branch has to sort them according to the branch department which handles them (for example, loans, foreign currency, savings). This process takes time and security leaks can occur when certain data should remain confidential between departments. Because Control-V allows the bank workers to view reports online, the potential for a security leak can be a real factor to consider. It would be much better if the package of reports arriving to the branch each day could be sorted according to the different departments in the branch, with each worker only being able to view that department's reports. This can be done using Control-V.
"Primitive" Method
Define the branch departments as users in the tree and specify a WHEN statement for each department. Example of the tree:
Figure 458 Defining Decollation Criteria and Use of the Recipient Tree – Primitive Method – Example 3
25 BR129     The north county branch
   SYNONYM   129
   SYNONYM   North County
   30 BR129LO   The Loans department
   30 BR129FC   The Foreign Currency department
   30 BR129SA   The Savings department
Example of WHEN statement specifications:
WHEN LINE 00002 - 00002 COL 00120 - 00129 PRINT   REF NXT   CT     AND/OR
     STRING BRANCH 129
  DO USER   = BR129LO                 LVL    LINE     COL     -     S A T
                                      SYNONYM =       CONCAT =
  DO
WHEN LINE 00002 - 00002 COL 00120 - 00129 PRINT   REF NXT   CT     AND/OR
     STRING BRANCH 130
  DO USER   = BR129LO                 LVL    LINE     COL     -     S A T
                                      SYNONYM =       CONCAT =
  DO
WHEN LINE 00002 - 00002 COL 00120 - 00129 PRINT   REF NXT   CT     AND/OR
     STRING BRANCH 131
  DO USER   = BR130LO                 LVL    LINE     COL     -     S A T
As you can see, we now have the same problem discussed in Example 1. We have to define a specific definition for each branch department. This problem can be avoided if the Recipient Tree is used to do the job.
"Better" Method
Define a synonym for each branch department:
Figure 459 Defining Decollation Criteria and Use of the Recipient Tree – "Better" Method – Example 3
25 BR129    The north county branch   SYNONYM  129
   SYNONYM  North County
   30 BR129LO   The Loans department
      SYNONYM   BR-LOANS
   30 BR129FC   The Foreign Currency department
      SYNONYM   BR-FOREIGN-CURRENCY
   30 BR129SA   The Saving department
      SYNONYM   BR-SAVINGS
The same synonyms are then defined for all the branch departments in the bank. For example:
25 BR129
   30 BR129SA   The Savings department
      SYNONYM   BR-SAVINGS
25 BR130
   30 BR130SA   The Savings department
      SYNONYM   BR-SAVINGS
25 BR131
   30 BR131SA   The Savings department
Example of decollation criteria:
WHEN LINE 00001 - 00001 COL 00020 - 00100 PRINT   REF NXT   CT     AND/OR
     STRING = NEW SAVINGS ACCOUNTS FOR
  DO
WHEN LINE 00002 - 00002 COL 00120 - 00125 PRINT   REF NXT   CT     AND/OR
     STRING = BRANCH
  DO USER     = *                     LVL 25 LINE 002 COL 127 - 129 S   T
                                      SYNONYM =       CONCAT =
  DO USER     = BR-SAVINGS            LVL 30 LINE     COL     -     S A T
                                      SYNONYM =       CONCAT =
  DO NAME     = NEW-SAVINGS_ACC              LINE     COL     -
The report is identified by two WHEN statements with an AND relation between them. The branch (level 25) name is taken from the contents of the report. A user named BR-SAVINGS should also get the report. A search is carried out under the branch in the tree for a recipient whose name (or synonym) is BR-SAVINGS. If such a user is located under the branch, then that user receives the report. Using this simple approach, the reports can be decollated and packaged according to the branch departments.
In the previous example, it is essential that all the branches contain the synonym. Otherwise, when Control-V does not find user BR-SAVINGS under a branch, it looks for it under that branch’s siblings in the Recipient Tree (that is, under other branches that perhaps should not receive the report). See Example 4.
Example 4
As illustrated in Example 3, one does not need to type many instructions in order to specify complex decollation criteria. However, if that method is used as described, it requires very careful maintenance of the Recipient Tree. An error in the Recipient Tree could result in a distribution error. It is possible to overcome this problem by using the *FORCE– option.
If the DO USER statement starts with the string *FORCE– followed by a user name or *, it means some special processing should be performed by Control-V. It forces the user or level specified in the statement. It prevents Control-V from searching the recipient tree above the user defined in the *FORCE statement. The decollation criteria specified in Example 3 should be:
Figure 460 Defining Decollation Criteria – Example 4
WHEN LINE 00001 - 00001 COL 00020 - 00100 PRINT   REF NXT   CT     AND/OR
     STRING = NEW SAVINGS ACCOUNTS FOR
  DO
WHEN LINE 00002 - 00002 COL 00120 - 00125 PRINT   REF NXT   CT     AND/OR
     STRING = BRANCH
  DO USER     = *FORCE-*              LVL 25 LINE 002 COL 127 - 129 S   T
                                      SYNONYM =       CONCAT =
  DO USER     = BR-SAVINGS            LVL 30 LINE     COL     -     S A T
                                      SYNONYM =       CONCAT =
  DO NAME     = NEW-SAVINGS_ACC              LINE     COL     -
If Control-V finds a branch (level 25) without a BR-SAVINGS department under it (level 30), the search of the tree is forced to stop at the branch (level 25). The report page is distributed to the branch itself.
The use of the *FORCE– option is highly recommended when the identification of the user is performed by a combination of more than one USER statement. Notice the use of the *FORCE option in Example 5.
Example 5 – Use of User Exit CTDX016
Assume the following (partial) distribution list:
Figure 461 Use of User Exit CTDX016 – Example 5
CORP     CENTER NUMBERSUSER
835      1060GUST
835      1200-1281GUST
835      1400-1450GUST
835      1360-1399RIJNVIS
835      2100-2120HAMVD
835      2190-2199HAMVD
835      2300-2379HAMVD
835      8600-8620HAMVD
The above specifies that all reports for corporation 835 with center numbers 1200 through 1281 should go to user GUST, while all reports for corporation 835 with center numbers 8600 through 8620 should go to user HAMVD. Although it is possible to build a user tree with thousands of synonym entries, it is not recommended (and not convenient).
An alternative solution is illustrated in the following sample tree:
Figure 462 Use of User Exit CTDX016, Alternate Solution – Example 5
30 835BROER                    This is the definition for corporation
835   SYNONYM BROER
   SYNONYM 835
 40 835GUST
    SYNONYM GUST
    SYNONYM 1060
    SYNONYM 1200 TO 1281
    SYNONYM 1400 TO 1450
 40 835RIJNV
    SYNONYM RIJNVIS
    SYNONYM 1360 TO 1399
 40 835HAMVD
    SYNONYM HAMVD
    SYNONYM 2100 TO 2120
    SYNONYM 2190 TO 2199
    SYNONYM 2300 TO 2379
    SYNONYM 8600 TO 8620
Assume the following sample report decollating mission:
WHEN LINE       -       COL       -       PRINT   REF NXT   CT     AND/OR
     STRING =
  DO USER     = *FORCE-*              LVL 30 LINE 007 COL 001 - 003 S   T
                                      SYNONYM =       CONCAT =
  DO USER     = *                     LVL 40 LINE 012 COL 001 - 004 S   T
                                      SYNONYM =       CONCAT =
  DO                                         LINE     COL     -
Under normal user and synonym search rules, if line 12 position 1-4 contains the string 8611 (for example), the user name is not located in the tree and the page is directed to the default user.
However, you can use Control-V Exit CTDX016 to overcome this problem. The exit is activated when a string from the report is compared with a recipient name or synonym in the tree. The exit can check that 8611 is between 8600 and 8620 and OK the user identification for HAMVD.
Notice the use of the *FORCE option for level 30. If for some reason, a center number is not located under the corporation in the tree (for example, because somebody forgot to update the tree with a newly opened center), then the report is distributed to the corporation. The tree is not searched for a center with the same number under another corporation.
Example 6
A certain page in the report has to be sent to all the branches (that is, many copies of the same page are needed). This requirement is common to many reports. What is the best way to solve the problem?
"Primitive" Method
Report decollating parameters:
Figure 463 Defining Decollation Criteria and Use of the Recipient Tree – "Primitive" Method – Example 6
WHEN LINE 00001 - 00001 COL 00020 - 00100 PRINT   REF NXT   CT     AND/OR
     STRING = FOREIGN CURRENCY RATES
  DO NAME     = FC-RATES                     LINE     COL     -
  DO USER     = BR129FC               LVL 30 LINE     COL     -     S A T
                                      SYNONYM =       CONCAT =
  DO USER     = BR130FC               LVL 30 LINE     COL     -     S A T
                                      SYNONYM =       CONCAT =
  DO USER     = BR131FC               LVL 30 LINE     COL     -     S A T
                                      SYNONYM =       CONCAT =
This presents the same problem again. It requires that you repeat all the user names for all the report pages that have to be distributed to a large number of users.
"Better" Method
It is possible to define a generic user name (such as BRANCHES). This name defines decollation criteria for a large number of users (in our case all the foreign currency branch departments in the bank). For example:
Figure 464 Defining Decollation Criteria and Use of the Recipient Tree – "Better" Method – Example 6
WHEN LINE 00001 - 00001 COL 00020 - 00100 PRINT   REF NXT   CT
     AND/OR     STRING = FOREIGN CURRENCY RATES
  DO USER     = *BRANCHES                    LINE     COL     -
For more details about defining generic user name lists, see the Control-D and Control-V chapter of the INCONTROL for z/OS Administrator Guide, and see Generic User Name.
Defining the Recipient Tree Operations Control Subtree
Since the Recipient Tree is one of the most important operations control tools, it is recommended to create within the tree a subtree for special report processing control purposes. For example:
10 (operations) OP-MNGR
   90 (CD-control) CD-MNGR
      95 (op-user) NULL
      95 PRODCNTL
      95 UNIDENT
The user NULL serves as a destination for reports that should be identified but are never printed. This user should never be included in a printing mission.
User PRODCNTL receives all the JCL/SYSPRINT (MSGCLASS) messages of the jobs so they can be reviewed online.
The user UNIDENT receives every unidentified page in the reports.
Additional special purpose users can be defined to solve specific problems at your site.
Recipient Tree and Security
The Recipient Tree can be used as a security mechanism for filtering the reports listed in User Report lists (screen U). When an online user enters a User Report list, only those reports which the user is authorized to access, as defined in the Recipient Tree, are listed.
Online users (for example, TSO, CICS, VTAM and IMS users) can be authorized to access the reports of a recipient by specifying their ID or prefix in the AUTHORIZE field of the Recipient Definition screen. This AUTHORIZE field is used by security module CTDSE04 and user Exit CTDX004 to filter the list of reports. For more information about the AUTHORIZE field of the Recipient Definition screen, see Recipient Definition Screen. For more information about user Exit CTDX004, see the Exits chapter in the INCONTROL for z/OS Administrator Guide.
Decollation Without the Recipient Tree
If the number of potential recipients is very high or the names of the recipients change frequently, it may be desirable to not define all recipients in the Recipient Tree because:
-
Defining and maintaining recipients in the tree can become a time-consuming task.
-
The time required to load and search a very large tree can degrade the performance of some Control-V components.
By default, report pages of users who are not found in the Recipient Tree are sent to a "default recipient." This default is not appropriate if user names are intentionally not defined in the Recipient Tree. Therefore, alternative methods are required which:
-
Decollate report pages to an extracted recipient name even if the name is not in the tree. A method to do this is described in 1.
-
Enable report pages to be viewed by an online user even if the user is not defined in the tree. Methods to do this are described in 2.
Certain recipients must not be omitted from the Recipient Tree. Recipients whose entries include special information (for example, recipient's address, synonyms, Control-D/WebAccess Server authorization, $SYSDATA access, special default destination) must be defined in the Recipient Tree.
To enable report decollation and viewing without defining all users in the Recipient Tree, follow these instructions:
-
In the report decollation mission definition, specify the value A in the T (type code) parameter of the DO USER statement. When the T parameter is set to A, a recipient name is accepted even if it is not in the Recipient Tree. For more information about the T parameter, see DO USER: Decollating Parameter (Decollating Mission).
-
Provide a mechanism which enables online users who are not defined in the Recipient Tree to access reports they are authorized to access. The most efficient mechanism depends on whether meaningful pseudo-recipients can be defined, which security products are used at the site, and whether or not information about recipients is maintained in other files or databases. The following items describe such mechanisms:
-
Specify pseudo-recipients in the tree that represent groups of actual recipients (that is, a small number of pseudo-recipients can "receive" reports on behalf of a large number of undefined actual recipients).
This mechanism can be used when each pseudo-recipient name can be a prefix formed by the first characters of the names of actual recipients followed by an asterisk (*). The AUTHORIZE fields for each pseudo-recipient should contain the name, prefix or mask of online users authorized to access reports of the actual recipients.
For example: If the Recipient Tree contains an entry with a RECIPIENT field set to CLERK*, an AUTHORIZE field set to X123, and a second AUTHORIZE field set to Y??5???, then reports belonging to all recipients whose names start with CLERK can be accessed by users X123, YAA5, YZZ5123, and others whose names match the mask Y??5???.
-
Use your site’s security product (RACF, Top Secret, CA-ACF2/SAF) to determine which reports can be displayed in the user report list for the current online user. This mechanism is especially useful when the reports for all online users can be allocated to a relatively small number of report access categories and/or the names of the users cannot be properly grouped by a user ID prefix.
Specify the required information by authorizing online users to access entity
Copy$$REPLST.qname.recnamewhere recname is the name of a recipient whose reports are available to the appropriate users. Set the DUSERLST parameter to NO and the DREPLST parameter to YES in the CTDSECP member in the SECSRC library. Then, recompile the CTDSE04 security module using the appropriate job (CTDSRAC1, CTDSACF1, and so on).
This method does not check the AUTHORIZE field. However, it may cause significant overhead in the User Reports List screen (Screen U) because all recipients whose reports appear in Control-D Active or Permanent or History User List files are checked via the security product. Performance can be improved by implementing method C in addition to or instead of method B.
-
Use function USERLIST of User Exit CTDX004 to create a list of recipients available for each online user. This mechanism is especially useful when up-to-date user ID information is maintained in other files or databases at the site.
Sample Exit CTDX004U in the SAMPEXIT library shows how to build such a list of recipients. Exit CTDX004U creates a list by checking the AUTHORIZE field in the Recipient Tree and adding the name of the current online user to the list. This exit can be modified for extracting a list of recipients from a site database or for building the list based on various rules.
The list of recipients can contain prefixes (such as XX*), but usage of short prefixes can cause significant overhead since they are expanded by scanning the User Report List files. Sample Exit CTDX004U is useful for implementing simple rules such as ‘each online user can access the reports of the recipient with the same name.’
-
Decollating Criteria Considerations
This section discusses decollating criteria considerations for different report sources and report types.
Report Sources
Control-V can decollate reports from the following sources:
-
spool (held and non-held)
-
compressed datasets
Decollating from the Spool
Decollation from the spool has the following characteristics:
-
Decollation is only carried out on classes specified in the job decollation criteria (that is, not necessarily all outputs of the job).
-
SYSOUTs are always copied to Control-V compressed datasets using the CDAM.
-
If the sysout is in a non-held output class, it is deleted (purged) from the spool.
-
If the sysout is in a held output class, it remains on the spool.
-
Control-V retrieves the printing characteristics from the spool and automatically maintains this information (for future printing).
-
For JES3, Control-V retrieves regular printing characteristics (for example, FORM) but not laser printing characteristics (for example, MODIFY, BURST). If you want to keep the original laser printing characteristics for SYSOUTs decollated from the spool, you have to specify them in the job decollation parameters (in the PRINT/CDAM PARMS field).
Decollating from Compressed Datasets
Decollation from compressed datasets that have been created directly from a job (using parameter SUBSYS) has the following characteristics:
-
Decollation is only carried out on the compressed datasets specified in the job decollation criteria (that is, not necessarily all outputs of the job).
-
It is possible to select reports for decollation by step name and DDname of the job.
-
Control-V maintains all the printing characteristics (including laser) that were specified in the DDstatement that created the SYSOUT. Therefore, there is no need to specify any data in the PRINT/CDAM PARMS field.
Sometimes it is necessary to test the decollation criteria of a large report that cannot be easily produced for testing. There is a simple technique that allows both decollation by Control-V and normal printing by operators, without having to rerun the job that produces the report.
The JCL OUTPUT statement allows you to route a SYSOUT to more than one destination by defining one copy for LOCAL printing and another for DEST Uxxxx or one copy to the regular output printing class and the other to a held output class. (Refer to your JCL manual for further details.) The report is deleted from the spool after Control-V has decollated it, and the printer has printed it. For example:
Figure 465 JCL Output Example
//JOBCARD
//OUT1 OUTPUT DEST=LOCAL
//OUT2 OUTPUT DEST=U1001
  .
  .
  .
//SYSPRINT DD SYSOUT=A,OUTPUT=(*.OUT1,*.OUT2)
  .
  .
  .
Decollation of Report Types
Control-V can decollate the following report types:
-
Text reports.
-
Binary reports.
-
Print stream reports with transformation.
Text Reports
Control-V performs the following decollation functions for EBCDIC text reports:
-
Sets the ownership on reports or parts of reports.
-
Sets the lifecycle and storage of reports.
-
Distributes reports or parts of reports (printing).
-
Splits reports for different recipients.
-
Provides end-user viewing, including quick access through indexes.
Binary Reports
Control-V performs the following decollation functions for binary reports:
-
Decollates binary reports to one user, with one name (indexing and splitting are not available).
-
Sets the binary report and extension according to the CDAM ASSOC parameter (for example, ASSOC is set to DOC for Word documents).
-
Allows for end-user viewing using Control-D/WebAccess using the appropriate application (for example, DOC files are read with Word, and PDF files are read with Adobe Acrobat).
Print Stream Reports Using Transformation
When print stream reports are decollated using transformation, Control-V can perform the same decollation functions for print stream reports that it does for text reports.
Transformation is the process used in decollation to extract the text from print stream reports (as illustrated in Figure 466) as it appears in print reports (as illustrated in Figure 467).
Figure 466 Print Stream Displayed in Raw Format
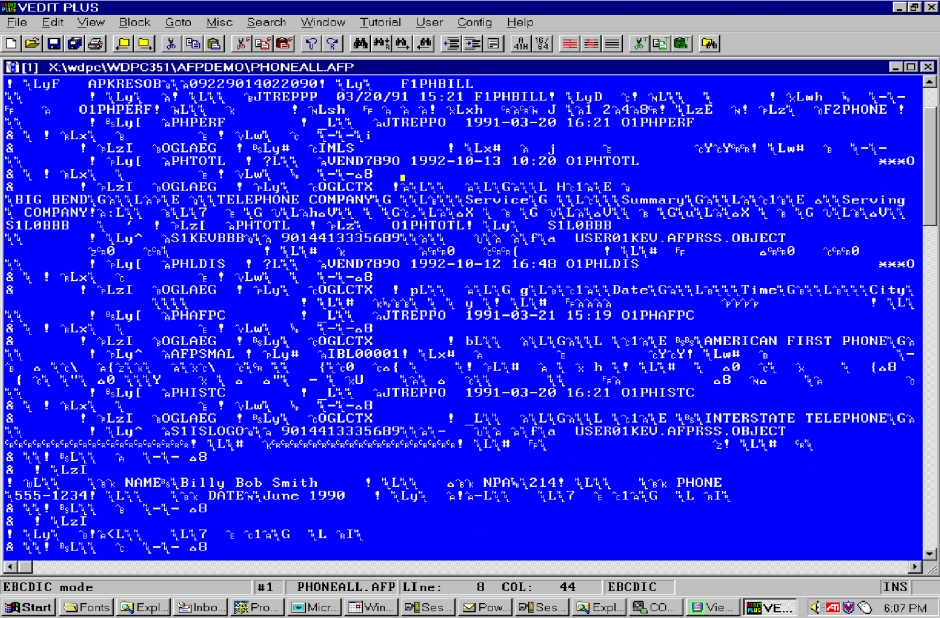
Figure 467 Print Stream Displayed in Print Format
As Figure 466 illustrates, it is not simple nor practical to locate the text directly from a raw formatted print stream report. To accommodate this, the transformation process performs the following three actions on a print stream report:
-
Creates a Text Version of the Page: This page includes all the data for the current page of the report in text format. The decollation definition uses this page to locate specific text on the current page of the report.
-
Creates a Normalized Page: This page includes all references to resources for the current page. The Normalized page allows you to view a single page of a report, or part of the report, without having to view the entire report. Print stream report pages may use resources from previous pages of the report to display the page, while the Normalized page references all resources for each individual page.
Specifically, the Normalization process does the following:
-
For AFP Reports:
-
Normalized AFP reports have additional 2 NOP (comment) records for each page. These records include the IMM that is active for the page, and indicate whether the page is a front page or back page for duplex reports.
-
All Group information and TLE records are removed from the Normalized report.
-
-
For Xerox Reports:
-
Normalized Xerox reports are always Metacode, with DJDE lines in EBCDIC for each page.
-
All reports use the same JSL (PROMETA) and the same JDE. During the creation of the Normalized report STARTON is used, and for viewing the Normalized report NMOJOB is used.
-
If the original report was an LCDS report, after Normalization it becomes a Metacode report.
-
-
-
Provides Resource Management: During the transformation process, all of the resources used for decollating the report are stored by the Control-D Resource Manager. This manager maintains the resources for each report in a resource library and in the Permanent User File, including the following information about the resource:
-
Format (AFP or Xerox).
-
Name
-
Type (font, logo, and so on).
-
Unique checksum.
This information enables you to view a report using the same resources that the report used during decollation.
If a report resource changes, a new version of that resource is stored in the resource library. After the changed resource is stored, all subsequent versions of the report use the new version of the resource when you view the report. Earlier versions of the report continue to use the previous resource as defined for them. This enables you to view or print a report with its own original resource, even after the original resource is no longer in use.
During the report decollation process, a special Resource Set record associated with the report is created in the Permanent User File, whose key is stored in an associated SYSDATA record. The Resource Set record references all resources used by the decollated report. Duplicate Resource Set records are not created, so that the SYSDATA record points to the existing Resource Set record if the current decollation uses the same set of resources as one of the previous decollations. Record Set records can be accessed through the Resource Sets (DO.2) screen. For more information on the DO screen as related to Resource Sets, see Resource Sets.
-
Implementing Decollation with Transformation
The process of creating a decollation definition for a print stream report involves many more steps than creating a decollation definition for a regular text report.
In general, the process involves creating the following two preliminary decollation definitions that are used to create the final decollation definition:
-
The first temporary decollation definition is used to check that all the resources are available and that the Report Clique definition used in the decollation definition is correct.
-
The second temporary decollation definition is used to create the correct text version of the report.
These preliminary decollation definitions may be deleted later.
Specifically, the following steps are used to implement a decollation with transformation:
-
Identify and collect all needed resources for the report. For more information see Identifying and Collecting Resources.
-
Create the Report Clique. For more information see Creating Report Cliques.
-
Create a decollation mission including a Report Clique. This is the first preliminary decollation definition. For more information see Creating a Decollation Mission with a Report Clique (First Temporary Decollation Definition).
-
View the report for verification. For more information see Viewing Normalized Reports using Control-D/WebAccess Server.
-
Check the Report Clique parameters are correct. For more information see Verifying Report Clique Parameters.
-
Create a text report from the print stream report. This is the second preliminary decollation definition. For more information see Creating a Text Report from the Print Stream Report (Second Temporary Decollation Definition).
-
Check and adjust the text report. For more information see Checking and Adjusting the Text Report.
-
Define the decollation according to the text report. This is the final decollation definition. For more information see Defining the Final Decollation Definition.
-
View the decollated report. For more information see Viewing the Final Version of the Report.
Identifying and Collecting Resources
To transform print stream reports, first identify and make available all report resources (either for AFP or Xerox) needed for the decollation. Do this by defining the Resource Library names in the $$TRNRES member of the CTD PARM library. For more details about the $$TRNRES member see the chapter about managing resources in the INCONTROL for z/OS Administrator Guide.
Creating Report Cliques
Create Report Cliques as needed. They are created and maintained using the DO.1 screen. For information on how to create Report Cliques, see Report Cliques.
Creating a Decollation Mission with a Report Clique (First Temporary Decollation Definition)
Create the first temporary decollation definition in order to the check that the transformation is defined correctly, using the following guidelines:
-
The decollation definition should contain one DO NAME statement, and one DO USER statement with a temporary or administrator recipient.
-
BMC recommends creating a short version of the report (only a few pages), and to use the ON TRNCLASS statement so that temporary CDAMs are not created.
-
Specify the Report Clique using the CLIQUE parameter.
Viewing Normalized Reports using Control-D/WebAccess Server
If the decollation mission ends successfully, you can view the normalized report with transformation using Control-D/WebAccess Server version 3.2.00 or later, and use indexes to view the report.
The report can be viewed in one of the following formats:
-
PDF (Document mode).
-
HTML (Page mode).
For information on the Report Clique rendering parameters used to transform reports to PDF or HTML, see Rendering Parameters—Unique to Text Report Cliques.
When you request to view a report with transformation, a transformer is activated under the Control-D/Delivery Server and creates the transformed report in either PDF or HTML format.
The transformer uses the Resource Set of the report to get the list of all the resources that were used in the decollation. If a resource is not found in the local Resource Manager of the Control-D/Delivery Server interface, the resource is taken from the OS/390 Resource Manager. It then resides on the local File System Resource Manager of the Control-D/Delivery Server interface, and does not need to be taken again from the OS/390 Resource Manager in the future.
All the parameters that were defined in the Report Clique and relate to rendering are used when viewing reports with transformation. For example, the Font Mapping Table is used to map the original fonts of the report to TrueType fonts. For more information, see Report Cliques.
PDF Format
When a report is transformed to PDF format, the whole report, or an index section, is transformed as one PDF file. For this reason, transformation to PDF is not recommended for large reports without indexes.
HTML Format
When a report is transformed to HTML, the report is transformed only a few pages at a time. This allows the user to view print stream reports in page-by-page mode in a similar way to text reports.
Verifying Report Clique Parameters
If the report is displayed correctly, all Report Clique parameters were defined correctly and all resources are available.
-
If a report is extremely large, transformation can take a long time. In such cases, try to create a special, smaller report with the same structure.
-
When you decollate a PDF report with a Report Clique, if the original PDF report contains a digital signature, the signature is removed during decollation.
If a problem occurs, either the Report Clique must be fixed, or missing resources must be added. Repeat the process of verifying and collecting resources and/or creating Report Cliques, as necessary, until the report is displayed correctly.
Creating a Text Report from the Print Stream Report (Second Temporary Decollation Definition)
After reviewing the result of the first temporary decollation definition, modify that decollation definition by adding the GROUP parameter set to COLUMNIZE. The GROUP parameter creates a text version of the report, containing text extracted from the original page, in four orientations (0o,90o,180o,270o).
BMC recommends giving a different PRINT/CDAM PARMS 'PREFIX=' parameter to the columnized report, if LAST =Yes is used when viewing the report.
The following are specific requirements for the text page:
-
The text page contains only text lines, with each line beginning with a line number according to the orientation of the text.
-
No empty lines are displayed.
-
Lines in orientation 0o begin with the numeral "0".
-
Lines in orientation 90o begin with the numeral "1".
-
Lines in orientation 180o begin with the numeral "2".
-
Lines in orientation 270o begin with the numeral "3".
The following print stream report page
Figure 468 Print Stream Report Page Example

results in the following print stream report page:
--------- orientation = 000 (degrees)
00005 This is orientation 0
--------- orientation = 090 (degrees)
10007 This is orientation 90
--------- orientation = 180 (degrees)
20010 This is orientation 180
--------- orientation = 270 (degrees)
30017 This is orientation 270
The resulting text page is set according to the Number of Rows and Number of Columns parameters defined in the Report Clique. Because the original text in the document can be any size, if the text is defined with a very small font this may result in many more words than expected displaying on the same line. If this occurs, increase the number of rows and columns.
If text required for decollation is not displayed, increase the value of the Number of Rows and/or Number of Columns parameters, and repeat the decollation.
Checking and Adjusting the Text Report
Check and adjust the text report you created.
Checking the Text Report
When creating the text report, Control-V superimposes a grid on the original bitmap image of the report based on the settings for the Report Clique Number of Rows and Number of Columns parameters (see Control-D Report Clique Definition Screen). The character in each cell in the grid is used to create the contents of the text report.
The size of the cells in the grid can affect the contents of the outputted text report. You should compare the text report against either the printed report or the version you view using Control-D/WebAccess to ensure that no characters required for the decollation were lost.
The following are some problems with the grid cell sizes that may affect the text report output:
-
If grid cells are too large, the resulting report may have cells that contain more than one character, in which case characters are lost in the text report.
The only characters of concern are those that may be used as values in the decollation definition. Any lost characters not used in the decollation definition are irrelevant.
-
If grid cells are too small, extra blank spaces may be inserted into the text report. Extra spaces in the text report is not a serious problem because repeating blanks in the index values are automatically replaced by a single blank.
Adjusting the Text Version
If required characters are missing from the text version of the report, you need to resize the grid by increasing the Number of Rows and Number of Columns parameters in the Report Clique. Optimally, these numbers should be just large enough to hold one character of the smallest font that you use in the decollation definition.
If the orientation of the text is either 90o or 270o, then:
-
Changing the Number of Rows value adjusts what appears to be columns.
-
Changing the Number of Columns value adjusts what appears to be rows.
Defining the Final Decollation Definition
Because decollation of print stream reports with transformation creates a Normalized report instead of the original report in the CDAM, use the following guidelines when defining the decollation mission:
-
Use a DO BACKUP statement to decollate the original report from SPOOL or from DSN to one user with one name. Keep this CDAM for purposes of backup and legal reasons.
-
Use an ON TRNDSN step to decollate the CDAM, distribute the report among recipients, and create indexes. Use this report for viewing and migration.
ON TRNCLASS can also be used to decollate with transformation directly from SPOOL. However, decollation using this method does not save the original report.
Both ON TRNDSN and ON TRNCLASS decollations should use the CLIQUE parameter with the following syntax:
CopyCLIQUE=Report_Clique_NameFor more information on defining a decollation using either the TRNDSN or TRNCLASS parameters, see the discussion of the ON subparameters in ON Statement: Decollating Parameter (Decollating Mission), and the examples for TRNDSN and TRNCLASS illustrated in that section.
An ON TRNCLASS or ON TRNDSN decollation mission (that is, without GROUP set to COLUMNIZED) performs decollation according to the text version of the report, but also creates a CDAM containing a Normalized report.
A Normalized report is a report created during the decollation mission that invokes transformation. Each page of the Normalized report includes the relevant data and references to all resources required for viewing or printing a specific page.
Use the text report you created in the step Creating a Text Report from the Print Stream Report (Second Temporary Decollation Definition), to define necessary lines and columns for WHEN statements, and DO statements such as DO NAME, DO USER, DO REMARK, DO INDEX.
Viewing the Final Version of the Report
View the Normalized report with the modifications you made according to the Text Report. Make further modifications, as necessary.
Decollation of XML Reports
Decollate XML reports according to the following procedure:
-
In the decollation definition, set the PRINT/CDAM parameter ASSOC to XML, either in an ON statement or in the SUBSYS parameter when the report is written directly to CDAM.
-
Specify the encoding for the XML report either as an EBCDIC code page, ASCII code page, or Unicode, in one of the following ways:
-
in the XML header tag, as follows:
Copy<?xml version='1.0' encoding=...?> -
by using the PRINT/CDAM ENCODING parameter (for more information on the ENCODING parameter, see CDAM Control Parameters)
-
-
Because an XML report is usually treated as one page, set the PRINT/CDAM LINECT parameter to a large enough number to prevent the report from being split into pages according to the value of LINECT. For more information on the LINECT parameter, , see CDAM Control Parameters.
-
You can split an XML report into pages by setting the PRINT/CDAM XMLSEP parameter to tagname. All data inside the specified tag name (that is, the tag name within its surrounding angle brackets) is treated as a separate page. This feature is available only for reports with EBCDIC encoding. For more information on the XMLSEP parameter, see CDAM Control Parameters.
-
You can analyze the XML report contents and assign ownership by using the DO SET decollation statement with the variable set to XPath expressions. For more information on setting variables with DO SET, see DDO SET: Decollating Parameter (Decollating Mission).
-
You can view XML reports by invoking the XSLT processor using Control-D/WebAccess Server. This transforms the XML report into an HTML page according to the specifications in the XSL stylesheet file.
If the input XML document contains the following code,
<?xml version="1.0" encoding="IBM-1140" ?>
<invoices>
    <date>14 Apr 2002</date>
    <invoice>
            <company name="ABC Corporation"/>
                  invoice data 1
    </invoice>
    <invoice>
            <company name="XYZ Inc"/>
                  invoice data 2
    </invoice>
</invoices>
and the decollation mission contains the following statements,
ON CLASS  X
   PRINT/CDAM PARAMETERS = ASSOC=XML,XMLSEP=invoice
DO SET %%COMPANY =  </invoice/company/@name>
DO USER = %%COMPANY
DO NAME = INVOICE REPORT
the resulting report entries contain the following:
-
a report for the recipient with the synonym "ABC Corporation" and the report name "INVOICE REPORT"
Copy<invoice>
<company name="ABC Corporation"/>
invoice data 1
</invoice> -
a report for the recipient with the synonym "XYZ Inc" and the report name "INVOICE REPORT"
Copy<invoice>
<company name="XYZ Inc"/>
invoice data 2
</invoice>
When the report entries are retrieved through Control-D/Page on Demand, the following are added to each report entry contents:
Indexing Considerations
Report Design
To maximize the value and utility of Control-V indexing, reports should collect essential identifiers for report pages or sections in well defined, compact locations that can be described by one line number or range and one column number range. Separate indexes should be used for restricted (controlled) and free (uncontrolled) index values.
Retrieval is faster when index values are left justified within an index field. Separate fields should be used for different levels when index terms form a natural hierarchy. For example:
|
bank branch |
account type |
Account # |
|
last name |
first & middle name |
|
|
area code |
phone or fax number |
|
|
country |
state or province |
zip code |
The entire index value (which cannot exceed 50 characters) must be contained on a single line. The entire mask value (which cannot exceed 20 characters) must also be contained on a single line. Column ranges for index and mask values must be on the same page. These values may be the same, may overlap, or may have no overlap.
The presence of a record-level index value must be determined by the presence of a mask value on the same page. The presence of a page-level index value can optionally be determined by the presence of a mask value on the same page.
For example, on a bank statement the mask BRANCH may indicate that digits in a specified nearby location represent the branch number. The mask ACCOUNT NO. may indicate that digits in another specified nearby location are an account number. Placing summary or grand total values on a separate page facilitates their retrieval.
Index Design
Control-V enables users to retrieve parts of reports based on any predefined index path. Define separate index paths for each meaningful way to retrieve a report page or section. It is recommended that each index name be unique. When possible, use page-level, rather than record-level, indexing. For example:
The following index paths may be specified for a life insurance policy file:
-
Path 1 for computing reserves and cash values:
1_pol_type, 1_policy_#, 1_face_amount, 1_riders, 1_rating, 1_issue_age, 1_issue_date -
Path 2 for premium billing:
2_payment_mode, 2_state/country, 2_zipcode, 2_city, 2_bill_address, 2_pol_owner, 2_pol_#, 2_annual_prem -
Path 3 for commission payments:
3_payment_mode, 3_branch_ofc, 3_agent, 3_pol_type, 3_pol_#, 3_issue_date, 3_annual_prem, 3_comm_scale
In path 1 (above), 1_pol_type is a page-level index if only one policy type can occur on a page. Likewise, in paths 2 and 3, payment_mode is a page-level index if only one type of payment mode can occur on a page.
Index names should be as descriptive as possible. Use "acct-name" or "account#" rather than "account," use "part-num" or "part-name" rather than "part," and so on. Parameter MASK must be used to qualify a record-level index value. Whenever possible, also use parameter MASK to qualify a page-level index value. Mask values and index values must be on the same page of the report.
Index design requires an intimate knowledge of report layout and usage. When possible, the programmer responsible for maintaining the report program and a user who knows how the report is used should collaborate in designing indexes for the report.
Migrated vs. DASD-Resident Indexes
Indexes that are seldom used after a report migrates, should themselves migrate. Indexes that are often needed regardless of report location should remain on DASD. Larger indexes should migrate. Smaller indexes should remain on DASD.
If an index is defined as non-resident, its name will only be checked during hit-list processing, but the index file itself will not be opened and checked for an index value. Therefore, the hit list can include reports which have a correspondent index, but do not necessarily contain the requested index value.
Naming Conventions
An index file conforms to the following naming convention:
INDPREF.JOBNAME.DATE.TIME.FILEID
where:
-
INDPREF is the index file prefix. This prefix can have either of two structures, depending on the length of the IXHPREF parameter in the CTVPARM member in the IOA.PARM library:
-
If IXHPREF is 3 characters in length, INDPREF has following structure:
CopyIXHPREF.IXPREFwhere:
-
IXHPREF is the three- character, first-level prefix specified in the IXHPREF parameter in the CTVPARM member. All indexes have the same IXHPREF value.
-
IXPREF is the second-level prefix specified in the IXPREF parameter in the CTVPARM member. All indexes have the same IXPREF value.
-
-
-
If IXHPREF is one or two characters long, INDPREF takes the value of the CDAM file prefix with one of its characters changed to the value specified in the first character of IXHPREF. Parameter IXPREF from CTVPARM is not used in this case.
-
If IXHPREF is one character, the first character of the CDAM prefix is replaced.
For example, if IXHPREF=I and the CDAM file prefix is CTDP.L2, INDPREF is ITDP.L2.
-
If IXHPREF is two characters, the second character is an integer from 1 to 7 representing the position number of the character that was replaced.
For example, if IXHPREF=I6 and the CDAM file prefix is CTDP.L2, INDPREF is CTDP.I2.
-
-
DATE is the letter C, followed by the five-character date in julian format (yyddd).
-
TIME the letter T followed by 6digits indicating the time in hhmmss format.
-
FILEID is the File ID beginning with the letter M, followed by one digit (from 1–9) which indicates the number of the monitor which created the index, followed by the 3-digit sequential number of the index produced in the decollation mission.
A primary migrated index conforms to the following naming convention:
PMIGXPREF.JOBNAME.DATE.TIME.FILEID
where PMIGXPREF is the file prefix. This prefix can have either of two structures, depending on the length of the DSNPREF parameter in the IOASPRM member in the IOA.PARM library. The length of this parameter should be the same as length of the parameter IXHPREF in member CTVPARM.
-
If DSNPREF is 3 characters in length, PMIGXPREF is built as:
CopyDSNPREF.IXPREFwhere IXPREF is the second-level prefix specified in the IXPREF parameter in the CTVPARM member.
-
If DSNPREF is one or two characters long, PMIGXPREF is built by inserting the first DSNPREF character into the original index file prefix.
-
If DSNPREF is one character, it is inserted into the first position.
For example, if DSNPREF=M and the original index file prefix is ITDP.L2, PMIGXPREF is MITDP.L2.
-
If DSNPREF is two characters long, the second character is an integer from 1 to 7, representing the number of the position into which the first DSNPREF character is inserted.
For example, if DSNPREF=M6 and the original index file prefix is CTDP.I2, PMIGXPREF is CTDP.MI2.
-
A secondary migrated index conforms to the following naming convention:
SMIGXPREF.JOBNAME.DATE.TIME.FILEIDwhere SMIGXPREF is the file prefix. This prefix can have either of two structures, depending on the length of the SECPREF parameter in the IOASPRM member in the IOA.PARM library. The length of this parameter should be the same as length of the parameter IXHPREF in member CTVPARM.
-
If SECPREF is 3 characters in length, SMIGPREF is built as:
CopySECPREF.IXPREFwhere IXPREF is the second-level prefix specified in the IXPREF parameter in the CTVPARM member.
-
If SECPREF is one or two characters long, SMIGXPREF is built by inserting the first SECPREF character into the original index file prefix, using the same method as PMIGXPREF is built from DSNPREF.
For example, if SECPREF=S and the original index file prefix is ITDP.L2, SMIGXPREF is SITDP.L2. If SECPREF=S6 and the original index file prefix is CTDP.I2, SMIGXPREF is CTDP.SI2.
For both primary and secondary migration, the DATE field has the following format:
DATE–When an index migrates from disk to the level 01 target media, this field remains prefixed by the letter C. This letter is replaced by the next letter in alphabetical sequence during each stage of the multi-stage migration or refresh. The other qualifiers are copied from the original index name.
Index Size
Index size is a function of index field width, the number of different index values that occur in the report, and how the report is sorted. Sorting affects index size because each index entry contains a separate pair of pointers to the first and last page of each nonconsecutive occurrence of the index value in the report. The indexes in an index path are shorter when the report is sorted by the fields which comprise the index path.
For example, a bank report may contain information about 10,000 accounts divided among 10 account types at 50 branches. If the report is sorted by branch #, account type, and account #, the account type index would have only 10 entries but each entry could point to as many as 50 page ranges. If the same report were sorted by account type, branch #, and account #, the account type index would still have 10 entries but each entry would point to only one page range containing all the branch # values per account type entry.
Using Indexes for Retrieval
Index values can be used to retrieve report pages or sections. All pages or sections which are pointed to by the selected index values are made available for online viewing, printing, and so on, regardless of where the report is stored.
Index values can be specified through the User Reports entry panel, through a Values of Index panel (option X in the Active User Report list followed by option S in the Main Index window), or through a Quick Access panel (option Q in the User Reports entry panel, the Active User Report list, or the Main Index window).
Enter Q in the User Reports entry panel bypass panel field to suppress the display of this entry panel, and immediately display the Quick Access Report list or Quick Access panel when entering the User Reports facility.
Use the Index window to list all main indexes for a report. You can select a main index or display the Quick Access panels from this window.
Use the Values of Index panel to display an alphabetized list of all values that exist in a specified index. Use option V to view report pages pointed to by the selected indexes or use option X to display the names of subindexes under any index value in the list.
Use a Quick Access panel to optionally specify subindex values. Place an asterisk or prefix in a subindex value field to display the Values of Index panel for that subindex. When the Quick Access panel contains the desired index values, press Enter to view report pages pointed to by those values.
Testing Indexes
After report indexes have been defined, they should be tested to be sure they index the report output in the way expected. The best way to test indexes is to run the decollating missions containing them.
If no indexes are produced, rerun the decollation mission on a few pages of the report with index value masks set to an asterisk. Examine the index values produced by the modified index specification. Determine if an error was made in calculating the line and column ranges for the index values and/or mask values.
Printing Considerations
Printing Organization
Organizing the printing of bundles is a potentially complicated process. Bundle organization can be seen from several different points of view, each possibly conflicting with the others. These points of view and recommended solutions are discussed below.
Computer Operator’s Point of View
Printing is a process which is governed by physical constraints:
-
There are several types of printers. Some reports can only be printed on specific printers. For example: Reports which contain logical character sets and/or graphics cannot be printed by an impact printer. Reports which must be produced with carbon paper copies cannot be printed by a laser printer.
-
There are several types of paper: wide, narrow, blue form, carbon, yellow, and so on.
-
With laser printers (for example, 3800) it is possible to use physical FLASH. This requires manual intervention by the operator before printing starts.
-
With some laser printers, the process of switching from one character set to another may take 10 to 20 seconds.
-
In impact printers, the ribbon may have to be replaced.
The physical constraints described above tend to negate the main purpose of a report distribution system, which is to print all the reports of one user in one bundle.
It is physically impractical to print one bundle for a user containing different types of paper (for example). The operator cannot replace the paper in the printer every few pages. Therefore, it is clear that some physical constraints must be considered when planning the printing process.
In summary, from the operator’s point of view, it is desirable to print all the blue paper together, narrow paper together, and so on.
Dispatcher and Distributor’s Point of View
Report dispatchers have different needs. They would like all reports of a user packaged in one bundle. If this is physically impossible, they want the minimum number of bundles per user.
The dispatchers want bundles printed according to their distribution network. Let’s consider this issue further. When regular printing takes place (without a report distribution system), the entire report must be printed in order to print the last user in the report.
Suppose, for example, that a report is sorted according to branches, and the newest branch in the bank (branch 812) appears last in all reports. Furthermore, the courier who delivers the material to this new branch must leave before all the other couriers, because the branch is located very far away.
In this case, unwanted delays occur when the printer is busy printing reports which could be printed at a later time (all the report pages before those of branch 812), instead of printing reports (for branch 812) which are needed immediately. What is needed is he capability to print bundles according to distribution priorities derived from the delivery schedule.
A bank, for example, has a distribution organization. Reports belonging to different recipients located in the same area are packaged together and special couriers have to leave not later than a specified time in order to reach their destination in time. The following is a simplified example:
Assume that the distribution area is divided between distribution couriers and destination points as follows:
|
North County Courier #1 latest 5 A.M. |
Northeast County Courier #2 latest 5:30 A.M. |
|
Central Branch Courier #5 latest 7 A.M. |
Management Pickup at 7:30 A.M. |
|
South County Courier #3 latest 6 A.M. |
Airport Courier #4 latest 6 A.M. |
Each courier takes a few packages containing reports to be distributed within that courier’s area. The courier should not leave after the specified time. (In the above example, management is physically located in the same building where reports are printed. Management reports are not delivered, but most be ready for pickup by 7:30 A.M.)
As we can see from the diagram, the preferred printing order from the point of view of the dispatchers and distributors is: Courier #1, #2, #3, #4, #5 and Management. Printing in this order increases the probability that the reports get to their destination on time.
The order described above is the normal preferred printing order. However, it is sometimes necessary to print in a different order. For example: The airport is about to be closed very early because of weather conditions. Therefore, the airport courier should leave earlier, so those reports should be printed first. A solution for such requirements can be very helpful to the data center in providing high level service to its customers.
Printing Organization
The suggested printing organization should answer the problems of the operators, the dispatchers, and the distributors, to the extent that is physically possible, given the printing constraints discussed above.
A printing mission should be defined for every physical printing constraint (that is, paper type, flash, and so on). The name of the printing mission should be meaningful. For example:
STD
132PAPER
80PAPER
BLUEPAPR
CARBON10
CARBON18
FLASH272
FLASH273
Different missions have to be defined only for actual physical constraints. Logical printing characteristics do not require a separate bundle. For example, it is possible to mix different CHARS and MODIFY parameters in the 132PAPER printing mission.
Printing missions are defined using the Online facility (option M). Each printing mission can be composed of many categories. In our sample case, each printing mission is composed of the following categories:
C#1-NORTH-COUNTY
C#2-NORTHEAST-COUNTY
C#3-SOUTH-COUNTY
C#4-AIRPORT
C#5-CENTRAL-BRANCH
MANAGEMENT-BOX
Each category represents a distribution area. In the definition of each category we can use INCLUDE/EXCLUDE statements for all the report recipients which are located in the distribution area. Normally, it is not necessary to specify the names of all the users in the bank. Since the bank’s structure and the bank’s hierarchy (as reflected in the Recipient Tree) generally correspond to the real distribution of the recipients, it is usually sufficient to specify the name of the parent in the tree. For example, specifying the recipient NORTH Regional Management automatically includes all its descendants in the tree (that is, all the branches in the north county). If one of those branches can be reached more conveniently by the central branch courier, that branch (and its departments) can be EXCLUDEd from the NORTH-COUNTY category, and INCLUDEd in the CENTRAL BRANCH category.
The operator control screen contains one line for each category. Example:
132PAPER  C#1-NORTH-COUNTY            PRINTING ENDED OK
132PAPER  C#2-NORTHEAST-COUNTY        PRINTING
132PAPER  C#3-SOUTH-COUNTY            WAITING FOR PRINTER
132PAPER  C#4-AIRPORT                 WAIT SCHEDULE
132PAPER  C#5-CENTRAL-BRANCH          WAIT SCHEDULE
132PAPER  MANAGEMENT-BOX              WAIT SCHEDULE
FLASH272  C#1-NORTH-COUNTY            PRINTING ENDED OK
FLASH272  C#2-NORTHEAST-COUNTY        PRINTING ENDED OK
FLASH272  C#3-SOUTH-COUNTY            PRINTING ENDED OK
FLASH272  C#4-AIRPORT                 PRINTING ENDED OK
FLASH272  C#5-CENTRAL-BRANCH          PRINTING ENDED OK
FLASH272  MANAGEMENT-BOX              PRINTING ENDED OK
Using the Online facility, the operator is always aware of the status of the night’s processing. The operator can request to see a subset of the printing missions list by using the online query window (for example, only blue paper, only management box). The operator can control each bundle independently, and can hold it, change its priority, and so on.
It is not mandatory to define multiple categories for each printing mission. Some printing missions can contain only one category under which all the reports are printed. The sort order of the users in the bundle can be controlled using the bundle parameter SORT. This method is usually used for reports which are produced on special types of paper and are all delivered to one recipient (for example, receipts, bills).
Using this method, the number of bundles is minimized and the operator has full control over the process.
Using OUTPARM for Global Control of Printing Characteristics
The Control-V "Global Control of Printing Characteristics" option provides the ability to override the default printing characteristics (specified at decollation time) for all (or some) of the reports and banners to be printed by Control-V. For more information, see the Control-D and Control-V chapter of the INCONTROL for z/OS Administrator Guide.
Controlling the Printing Sequence
Every bundle is a category in a printing mission. It is possible to use the standard runtime scheduling parameters in order to control the sequence by which bundles are printed. For example, if you specify higher priority for the couriers that have to leave earlier, they are printed before other bundles with lower priorities (for example, NORTH-COUNTY has higher printing priority than the SOUTH-COUNTY).
It is also possible to define mission dependencies using the prerequisite condition concept. For example: the 132PAPER mission for the management box starts printing only if the SOUTH-COUNTY/80PAPER mission has finished.
Printing missions can be triggered automatically or manually. Consider the following scenario:
-
The job that produces the report to be printed on blue paper has been decollated by Control-V.
-
The operator is notified with a highlighted, unrollable message to place the blue paper on the printer and to let Control-V know when the printer is ready. This is done using the Shout facility.
-
The operator places the paper in the printer, defines it for exclusive use by Control-V and starts the printer under Control-V (if it wasn’t already open). For more information, see the Control-D and Control-V chapter of the INCONTROL for z/OS Administrator Guide.
-
The operator enters the manual conditions list and specifies A (Add) next to the prerequisite condition BLUE-PAPER-READY. As a result, the printing mission starts executing.
Workload Considerations
It is sometimes impractical to wait until all the 132-character width reports are decollated and then to print all of them in bundles, because it takes too long to complete. In such cases, it is possible to make two "printing rounds" for 132-character width paper: one at midnight and one in the morning. Although it means one more bundle to handle, this method ensures that the reports are printed on time.
Weekend Distribution
The distribution network may work differently on weekends. Instead of six couriers, only three couriers are used, and the areas are divided in a completely different way (for example, part of the northeast county is delivered by the airport courier). In such cases, it is possible to create special printing mission categories for weekend processing. They contain different INCLUDE and EXCLUDE parameters from the printing missions used for daily processing.
The weekend category and the daily category should have different basic scheduling criteria (for example, different WDAYS). They are then automatically scheduled by Control-V. Refer to the Control-D and Control-V chapter of the INCONTROL for z/OS Administrator Guide for information about how to schedule printing missions.
Report Decollating Missions and Printing Missions: The Link
The means by which a report is printed are defined in the report decollating mission. For example:
WHEN LINE 00001 - 00003 COL 00020 - 00080
   STRING ACCOUNTS RECEIVABLE - DAILY
  DO PRINT BY 132PAPER
  DO ....
WHEN LINE 00005 - 00005 COL 00020 - 00080
   STRING ACCOUNTS RECEIVABLE - BILLS
  DO PRINT BY BLUEPAPR
  DO ....
As you can see, the job produces two reports. One must be printed on regular 132-character paper. The other must be printed on a special paper type nicknamed "BLUEPAPR."
The printing mission name can be modified in the Permanent and Active User Report lists.
Specifying Report Destination
When defining reports in Control-V, the printing destination of the reports should be taken into consideration. Control-V provides several ways to define the printing destinations to print user bundles (containing all reports for a specific recipient) or specific reports. For more information, see Destination – Control-V Search Order.
Destination consists of two values – a node and a user ID – each value containing up to eight characters. However, the value of the DEST parameter for ON statement DEFAULTS and PRINT/CDAM PARMS is a single 8-character value.
Sending Entire User Bundle to a Specific Destination
When all reports assigned to a specific recipient should be sent to a specific destination, designate the printing destination in the DEF DEST field for that recipient in the Recipient Tree.
Sending Specific Reports to Specific Destinations
When specific reports (as opposed to an entire user bundle) should be sent to specific destinations, specify the destination in the DEST field of the report in the User Report list. The DEST field can be updated either in the Permanent User Report list for a permanent specification, or in the Active User Report list for a one-time specification.
When using this method, subparameter SEARCH of the DO USER statement in the report decollating mission for this report must be defined as either:
-
(Permanent): Control-V automatically assigns to the report the destination specified in the Permanent User Report list.
-
(Active): Control-V automatically assigns to the report the destination specified in the Active User Report list.
If the report DEST field in the Active User Report list is manually updated for a one-time specification after the report is already decollated, it is not necessary to specify the SEARCH subparameter in the report decollating mission of the job.
For more information about parameter SEARCH, utility CTDCP2A, and how this method works, refer to the Control-D and Control-V chapter of the INCONTROL for z/OS Administrator Guide.
Sending Reports to the Original Destination from Spool
When the original destination of a report, as it appears on the system spool, should be the destination of the report, enter *SPOOL in the DEST field of the JOB DEFAULTS or ON Statement Defaults in the report decollating mission. This method is very useful for generic decollating missions because the job name is usually not known in advance.
Sending Reports to a Specific Destination
To route the whole report to a specific destination, the CDAM DEST parameter can be specified either in the PRINTING/CDAM PARMS field of the report decollating mission, or as a SUBSYS subparameter in the JCL of the job producing the report. In either case, DEST *SPOOL must be specified in the DEST field of the JOB DEFAULTS or ON Statement Defaults field of the report decollating mission. For more information, see Destination – Control-V Search Order.
Sending Reports to a Specific External Writer
To route the whole report to a specific external writer, the External Writer name should be specified either in the PRINT/CDAM PARMS field of the report decollating mission, or as a subparameter of SYSOUT in the JCL of the job producing the report. In either case, the %%EWTR parameter must be specified in the DEST field of the DECOLLATION DEFAULTS or ON Statement Defaults field of the report decollating mission.
Sending Unidentified Pages to a Specific Destination
To print all unidentified pages at a specific destination, specify that destination in the DEST field of the ON Statement DEFAULTS (applies to all unidentified pages in the particular ON statement) or the JOB DEFAULTS in the decollating mission of the job (applies to all unidentified pages not specified in ON statements in the job).
Destination: Control-V Search Order
Control-V searches for a specified or default print destination in the following order and uses the first non-blank value that is found:
-
DEST field of parameter OVERRIDE in the printing mission.
-
DEST parameter in the OUTPARMS library.
-
DEST field in the Print Option window (using option P in the User Report List screen).
-
DEST field for a specific report in the Active or Permanent User Report list, depending on the SEARCH parameter destination in the report decollating mission.
-
If *SPOOL is specified in the DEST field of ON statement DEFAULTS:
-
The DEST field of PRINT/CDAM PARMS.
-
The original SYSOUT destination.
-
-
If *SPOOL is specified in the JOB DEFAULTS DEST field:
-
The DEST field of PRINT/CDAM PARMS.
-
The original SYSOUT destination.
If any value other than *SPOOL is specified, the destination is applicable to unidentified reports only.
-
-
DEF DEST field in the Recipient Tree.
-
DEST field of parameter PRINTER in the printing mission.
-
DEST of the printer defined in installation parameter CTDPARM.
 Communities
 Support Center
 YouTube
 Twitter
 Facebook
 LinkedIn