This chapter includes the following topics:
Control-M/Analyzer
Control-M/Analyzer is a flexible, automated tool providing complete quality control in a modern information processing environment. Within a completely integrated facility, the powerful Control-M/Analyzer functions analyze and balance data, and immediately report errors and inconsistencies.
Control-M/Analyzer is the professional tool for operations staff, end users, analysts, and managers. Coupled with other INCONTROL® products, Control-M/Analyzer makes automated operations a reality. End user concerns about data integrity are resolved with the extensive data manipulation and checking capabilities of Control-M/Analyzer.
The Control-M/Analyzer Tutorial
In the framework of a hands-on demonstration, you will be guided through the major online functions of Control-M/Analyzer. In addition, you will have an opportunity to go through a structured learning exercise to become familiar with Control-M/Analyzer rules. By learning and practicing with these rules, in combination with the online functions of Control-M/Analyzer, you will solve the control and balancing problems of a sample organization.
Preparation
Begin by performing the following procedures to ensure that the Getting Started environment is installed correctly and ready for your use.
-
To set up the Getting Started environment, ensure that you have run step 8.6, Getting Started, using the INCONTROL Installation and Customization Engine (ICE) application. This step displays member PREPGSB for editing, and runs the resultant job.
-
After the job has executed successfully, you are ready to proceed. If you want to investigate the results of this job, contact your system administrator or refer to the INCONTROL for z/OS Installation Guide for instructions.
-
If your system administrator has provided you with procedures and library names that are different from the Control-M/Analyzer Installation default, note them here for future reference:
Table 1 Procedures and Libraries for Your Installation
Procedure or Library
Installation Non-Default Name
TSO Logon Procedure
RULE Library
MISSION Library
JCL Library
Sample Reports Library
-
For any members that reside in the IOA SAMPLE library, you must do the following in order for them to be resolved correctly:
-
Copy the member to a work library.
-
Edit and submit the IOAINSJ job from the IOA JCL library. For more information on this job, see the INCONTROL for z/OS Administrator Guide.
-
-
Enter the IOA Primary Option Menu, using any online environment supported by Control-M/Analyzer, such as TSO, TSO/ISPF, ROSCOE, CICS, IMS/DC, VTAM, IDMS, or COM-PLETE, or use the procedure provided by your system administrator.
Figure 1 IOA Primary Option Menu
Copy--------------------- IOA PRIMARY OPTION MENU ------------------(1)
OPTION ===> USER N06
IOA CONTROL-D/V CONTROL-O
4 COND/RES A MISSION STATUS OR RULE DEFINITION
5 LOG M MISSION DEF OM MSG STATISTICS
6 TSO R REPORT DEF OS RULE STATUS
7 MANUAL COND T RECIPIENT TREE OL AUTOMATION LOG
8 CALENDAR DEF U USER REPORTS OA AUTOMATION OPTS
IV VARIABLE DATABASE F PC PACKET STATUS OC COSMOS STATUS
DO OBJECTS OK KOA RECORDER
CONTROL-M & CTM/Restart CONTROL-M/Analyzer CONTROL-M/Tape
2 JOB SCHEDULE DEF BB BALANCING STATUS TR RULE DEFINITION
3 ACTIVE ENV. BM MISSION DEF TP POOL DEFINITION
C CMEM DEFINITION BV DB VARIABLE DEF TV VAULT DEFINITION
BR RULE DEFINITION TI INQ/UPD MEDIA DB
BA RULE ACTIVITY TC CHECK IN EXT VOL
COMMANDS: X - EXIT, HELP, INFO OR CHOOSE A MENU OPTION 15.48.22The menu that you see may have other options in addition to those shown above. This depends on how your computer center has set up the Control-M/Analyzer and INCONTROL environment.
Database Variables
The first facility discussed is the Control-M/Analyzer Database facility.
-
Select option BV and press Enter. The Control-M/Analyzer Database Facility entry panel is displayed.
Figure 2 Control-M/Analyzer Data Base Facility Entry Panel
Copy---------- CONTROL-M/Analyzer DATA BASE FACILITY - ENTRY PANEL --------------(BV)
COMMAND ===>
SPECIFY GROUP, VARIABLE NAME
GROUP ===> (Blank for Group selection list)
VARIABLE ===> (Blank for Variable selection list)
("*" for Variable/Group prefix)
USE THE COMMAND "SHPF" TO SEE PFK ASSIGNMENT 08.09.34-
In Control-M/Analyzer, work is organized into groups. A group usually contains Control-M/Analyzer balancing jobs and variables with a common purpose. A group is functional in nature, and helps reflect actual divisions in the workplace. Some group examples are: ACCOUNTING, INVENTORY, MIS_DEPT.
-
Use of groups within Control-M/Analyzer facilitates the work and provides several important features:
-
Looking at Rule Activity and the Active Balancing File – Rules can be listed according to a specific group. Only relevant data are shown, providing quick access to needed information.
-
Reviewing the IOA Log – Same as "Looking at Rule Activity and the Active Balancing File."
-
Group Feature Common with Control-M Jobs and Control-D Missions – This common feature between Control-M/Analyzer rules, Control-M jobs, and Control-D missions makes it easy to track an application throughout the IOA environment.
-
This guide now examines a subset of the Control-M/Analyzer database—a group defined for the example company, INTRAC.
To provide a comprehensive and realistic illustration of Control-M/Analyzer rules, the examples in this guide use a fictional company called the Intelligent Transport Company (INTRAC). Any resemblance to actual organizations in existence is purely coincidental and unintentional.
-
-
Place the cursor in the GROUP field.
-
Type INTRAC.
Figure 3 Control-M/Analyzer Database Group INTRAC
Copy------------ CONTROL-M/Analyzer DATA BASE FACILITY - ENTRY PANEL ------------(BV)
COMMAND ===>
SPECIFY GROUP, VARIABLE NAME
GROUP ===> INTRAC (Blank for Group selection list)
VARIABLE ===> (Blank for Variable selection list)
("*" for Variable/Group prefix)
USE THE COMMAND "SHPF" TO SEE PFK ASSIGNMENT 08.09.34 -
Ensure that the VARIABLE field is blank and press Enter.
-
When the variable field is left blank, Control-M/Analyzer shows a list of all database variables defined for the group INTRAC.
Figure 4 Control-M/Analyzer Database Facility List of Variables Screen
CopyLIST OF VARIABLES CONTROL-M/Analyzer DATA BASE GROUP: INTRAC
COMMAND ===> SCROLL===>CRSR
OPT NAME ----------------------------------------------------------------------
COST01
COST02
COST03
INVAMT01
INVAMT02
INVAMT03
PROCESS_MONTH
===== >>>>>>>>>>>>>>>>>> NO MORE VARIABLES IN GROUP <<<<<<<<<<<<<<<<< =====
OPTIONS: S SELECT I INSERT V VIEW G GRAPH 08.09.34
-
Notice the OPT field on the left side of the screen. Available options that can be typed in this OPT field are listed on the bottom of the screen. Each option performs an action on the associated database variable.
-
-
Place the cursor in the OPT field, to the left of the field with variable name INVAMT01.
-
Type S and press Enter to select this variable. The Control-M/Analyzer Variable Definition screen for the variable INVAMT01 is displayed.
Figure 5 Control-M/Analyzer Variable Definition Screen
Copy------------------ CONTROL-M/Analyzer VARIABLE DEFINITION -------------(BV.S)
COMMAND ===> SCROLL===> CRSR
+-----------------------------------------------------------------------------+
| NAME INVAMT01 GROUP INTRAC |
| CREATED 08/08/00 - 09:22:04 BY N61A TYPE (B-BATCH,O-ONLINE) |
| DESC DAILY-INVOICES-DIVISION-1 |
| =========================================================================== |
| MAXIMUM ACTIVE GENERATIONS 0025 GEN TYPE I (I-INDEPENDENT,H-HIERARCHICAL) |
| CURRENT ACTIVE GENERATIONS 0006 |
| OLDEST -5 DATE 08/08/00 |
| LATEST 0 DATE 08/08/00 |
| =========================================================================== |
| TYPE VAR |
| MASK |
| |
============= >>>>>>>>> BOTTOM OF VARIABLE DEFINITION <<<<<<<<<<< =============
PLEASE FILL IN VARIABLE DEFINITION 08.14.59Table 2 Parameters that Define a Database Variable
Parameter
Description
Value in Example
NAME
A name for the variable.
INVAMT01
GROUP
The group to which it belongs
INTRAC
DESC
A description of the variable
DAILY-INVOICES-DIVISION-1
MAXIMUM ACTIVE GENERATIONS
The number of generations of data to maintain.
25
The Maximum Active Generations keeps track of up to 1000 generations or versions of a variable. You may choose to keep multiple generations to be able to go back in time and recover data, or to reference multiple versions of data.
Control-M/Analyzer automatically maintains the other information in the parameters on this screen. For a description of the other parameters on this screen, or other screens throughout this guide, refer to the Control-M/Analyzer User Guide.
VIEW Option
In this exercise, you will learn about the List of Variables screen VIEW option.
-
Press PF03/PF15, corresponding to the END command, to return to the List of Variables screen.
-
Place the cursor in the OPT field to the left of the same variable INVAMT01, and type V.
-
Press Enter to view this variable. The following screen appears with the associated generations, or versions, of the Database Variable INVAMT01:
Figure 6 Generations of Database Variable INVAMT01
Copy-------<G>-------- GROUP INTRAC VAR INVAMT01 -------(BV.V)
COMMAND ===> SCROLL===> CRSR
O GROUP NAME --------- VARIABLE NAME ------ GENERATION ------------------------
INTRAC INVAMT01 000
Value : 367014
User Key : Run Id :
Creation Date : 08/08/00 12:03:48 By User : M66 Type : B
-------------------------------------------------------------------------------
INTRAC INVAMT01 001
Value : 367014
User Key : Run Id :
Creation Date : 08/08/00 10:58:37 By User : M66 Type : B
-------------------------------------------------------------------------------
INTRAC INVAMT01 002
Value : 367014
User Key : Run Id :
Creation Date : 08/08/00 10:55:59 By User : M66 Type : B
-------------------------------------------------------------------------------
INTRAC INVAMT01 003
Value : 367014
User Key : Run Id :
Creation Date : 08/08/00 10:34:10 By User : M66 Type : B
-------------------------------------------------------------------------------
OPTIONS: U UPDATE D DELETE 08.16.35In this example, INVAMT01 has the following four generations: 000, 001, 002, and 003. Each generation of INVAMT01 includes the following information: a value, displayed in the Value field, creation date and time each generation of INVAMT01 was created, displayed in the Creation Date field, and a user name for the user that created the variable, displayed in the By User field.
Users with security clearance can update, delete or add information on this screen.
These multiple generations of the variable ensure that a Control-M/Analyzer rule can be rerun. Control-M/Analyzer can restore the data as it existed at a prior date and time (that is, an earlier generation of the variable) before a database update has occurred, providing an audit trail for the Database Variable.
You can create a new generation or edit an existing generation as necessary, as illustrated in Example Problems and Solutions.
INSERT Option
In this exercise, you will learn about the List of Variables screen INSERT option to insert a new variable into the Control-M/Analyzer database.
-
Press PF03/PF15 to return to the List of Variables screen.
-
Place the cursor in the OPT field to the left of variable INVAMT01, and typeI.
-
Press Enter to insert a new variable. The following screen is displayed with the variable name in the NAME field blanked out. Notice that other information about the variable, such as the group name, displayed in the GROUP field, description, displayed in the DESC field, and maximum generations, displayed in the MAXIMUM ACTIVE GENERATIONS field, is already filled in.
Figure 7 Inserting a New Database Variable
Copy------------------ CONTROL-M/Analyzer VARIABLE DEFINITION ---------------(BV.S)
COMMAND ===> SCROLL===> CRSR
+-----------------------------------------------------------------------------+
| NAME GROUP INTRAC |
| CREATED 11/12/00 - 08:18:12 BY M86 TYPE O (B-BATCH,O-ONLINE) |
| DESC DAILY-INVOICES-DIVISION-1 |
| =========================================================================== |
| MAXIMUM ACTIVE GENERATIONS 0025 GEN TYPE I (I-INDEPENDENT,H-HIERARCHICAL) |
| CURRENT ACTIVE GENERATIONS |
| OLDEST DATE |
| LATEST DATE |
| =========================================================================== |
| TYPE VAR |
| MASK |
| |
============= >>>>>>>>> BOTTOM OF VARIABLE DEFINITION <<<<<<<<<<< =============
PLEASE FILL IN VARIABLE DEFINITION 08.18.12When you insert a new variable, Control-M/Analyzer copies the definition information from the Database Variable where your cursor had been positioned on the List of Variables screen. In this case, the information has been copied from variable INVAMT01. This feature allows you to save many keystrokes when you are creating a new variable from another variable that has a similar definition. Once created, you can modify the information in the new Database Variable as needed.
-
Enter the variable name TOTAL1 in the NAME field.
-
Press PF03/PF15 to exit this function. The following prompt is displayed:
Figure 8 Insert Database Variable Exit Prompt
Copy------------------- CONTROL-M/Analyzer VARIABLE DEFINITION --------------(BV.S)
COMMAN +-----------------------------------------------------------+ ===> CRSR
+----- | PLEASE SELECT EXIT OPTION | --------+
| NAME | | |
| CREA | SAVE CREATE | NLINE) |
| DESC | | |
| ==== | VARIABLE TOTAL1 | ======= |
| MAXI | | CHICAL) |
| CURR +-----------------------------------------------------------+ |
| OLDEST DATE |
| LATEST DATE |
| =========================================================================== |
| TYPE VAR |
| MASK |
| |
============= >>>>>>>>> BOTTOM OF VARIABLE DEFINITION <<<<<<<<<<< =============
PLEASE FILL IN VARIABLE DEFINITION 08.18.12 -
By entering Y in the CREATE field, you would actually create a new variable called TOTAL1 in the database. Because you do not require this variable, type N in the CREATE field and press Enter.
GRAPH Option
In this exercise, you will learn about the List of Variables screen GRAPH option.
-
Place the cursor in the OPT field to the left of the INVAMT01 variable, and type G.
-
Press Enter. The View Graph – By Variable Generations screen is displayed.
Figure 9 View Graph – By Variable Generations Screen
Copy-------------------- VIEW GRAPH - BY VARIABLE GENERATIONS --------------(BV.G)
COMMAND ===> SCROLL===> CRSR
SCALE 1 : 7341 GROUP INTRAC VARIABLE INVAMT01
GENERATION VALUE +---+---10----+---20----+---30----+---40----+---50
GEN 000 367014
GEN 001 367014
GEN 002 367014
GEN 003 367014
GEN 004 367014
GEN 005 367014
====== >>>>>>>>>>>>>>> NO MORE ENTRIES IN THE LIST <<<<<<<<<<<<<<< ======
COMMANDS: REFRESH (VIEW DATA) END (RETURN TO PREVIOUS SCREEN) 08.28.58In this example, each of the INVAMT01 generations is shown. Each line includes the GENERATION number, its VALUE, and space for a graphical representation of changes to the value from generation to generation. In this case, because each generation of INVAMT01 has the same value, no graphical representation is shown.
The scale of the graph can be changed and the entire screen can be refreshed. For more information on this feature, see the discussion of the View Graph by Variable Generations screen in the Control-M/Analyzer User Guide.
Exiting the Database Variable Facility
You can return to the Primary Option menu in the following ways:
-
Pressing PF03/PF15 (or entering the END command) and exiting each screen until you reach the Primary Option menu.
-
Using the Multi-Screen Control feature. This allows Control-M/Analyzer you to go from one function directly to another without having to go through the IOA Primary Option Menu.
-
When going directly from one function to another, the exact location and data on the screen you are exiting from are stored. If you return to the function using the Multi-Screen Control feature, you are returned to the same screen in the same condition as when you left it.
-
You use the Multi-Screen Control feature by placing the cursor in the COMMAND line, typing an equal sign (=), typing the IOA Primary Option Menu option, and then pressing Enter. For example, entering =BV brings you to the Database Variable Definition screen.
-
This feature of Control-M/Analyzer can be used to jump immediately to any of the online menu options. You will now use this feature to jump directly to the Primary Option menu.
-
In the COMMAND line, at the top of the screen, type =1.
-
Press Enter to return directly to the IOA Primary Option menu.
-
-
You have now completed an online review of the Database facilities of Control-M/Analyzer. The tutorial continues with a brief look at Control-M/Analyzer rules.
Rules
In this exercise you will locate rules, learn what information is available about rules, and learn what a rule looks like. In Chapter 2, you will examine rules in more depth to learn how to build them in Control-M/Analyzer.
-
From the Primary Option menu, type BR and press Enter. The Control-M/Analyzer Rule Definition entry panel is displayed.
Figure 10 Control-M/Analyzer Rule Definition Entry Panel
Copy------------------- CONTROL-M/Analyzer RULE DEFINITION - ENTRY PANEL ------(BR)
COMMAND ===>
SPECIFY LIBRARY, RULE
LIBRARY ===> CTB.PROD.RULES
RULE ===> (Blank for rule selection list)
USE THE COMMAND "SHPF" TO SEE PFK ASSIGNMENT 08.40.15-
In the Rule Definition entry panel you will examine the library of rules which exists for the example company, INTRAC.
-
-
If the library name in the LIBRARY field in this example is different from your Control-M/Analyzer RULES library name, correct the example. The RULE field should be blank.
-
Press Enter to display the List of Rules screen, which displays the rules in the Control-M/Analyzer RULES library.
Figure 11 List of Rules Screen
CopyLIST OF RULES IN CTB.PROD.RULES ------------(BR)
COMMAND ===> SCROLL===> CRSR
OPT NAME ------------ VV.MM CREATED CHANGED SIZE INIT MOD ID
ARSETVAR 01.14 00/09/10 00/11/30 16:55 31 18 0 N14
ARWARN01 01.00 00/11/12 00/11/03 13:57 34 34 0 N14
ARWARN02 01.56 00/08/05 00/11/07 14:43 54 46 0 N19A
ARWARN03 01.48 00/08/05 00/11/08 10:50 34 46 0 M32A
ARWARN04 01.66 00/09/03 00/11/27 17:48 122 17 0 N34
ARWARN05 01.11 00/09/10 00/09/27 13:51 78 49 0 N34
ARWARN06 01.69 00/08/05 00/11/12 12:12 97 46 0 N19
ARWARN4A 01.66 00/09/05 00/11/12 12:12 122 17 0 N19
OPTIONS: S SELECT B BROWSE D DELETE I INSERT N NEW 08.41.23
Locate the rules shown in the above example in the list of rules on your screen.Screen, you can press the standard PF07/PF19(UP) and PF08/PF20(DOWN) keys to scroll forward and backward through the list of rules.
By default, only member names are listed on the screen. However, if the default has been modified at time of installation, statistical information is displayed for each member name, as shown in the screen example above.
The screen has several options for performing functions on any of the rules displayed. These options are shown at the bottom of the screen, including:
-
S (SELECT) – Select a rule to update
-
B (BROWSE) – Select a rule to browse
-
D (DELETE) – Delete a rule
-
I (INSERT) – Insert a new rule, which is a copy of an existing rule
-
N (NEW) – Create a new rule
-
Browsing Rules
-
Place the cursor in the OPT field to the left of the rule named ARWARN01, and type B.
Figure 12 Control-M/Analyzer Rules BROWSE Option
CopyLIST OF RULES IN CTB.PROD.RULES ------------(BR)
COMMAND ===> SCROLL===> CRSR
OPT NAME ------------ VV.MM CREATED CHANGED SIZE INIT MOD ID
ARSETVAR 01.14 00/09/10 00/11/30 16:55 31 18 0 N14
B ARWARN01 01.00 00/11/12 00/11/03 13:57 34 34 0 N14
ARWARN02 01.56 00/08/05 00/11/07 14:43 54 46 0 N19A
ARWARN03 01.48 00/08/05 00/11/08 10:50 34 46 0 M32A
ARWARN04 01.66 00/09/03 00/11/27 17:48 122 17 0 N34
ARWARN05 01.11 00/09/10 00/09/27 13:51 78 49 0 N34
ARWARN06 01.69 00/08/05 00/11/12 12:12 97 46 0 N19
ARWARN4A 01.66 00/09/05 00/11/12 12:12 122 17 0 N19
OPTIONS: S SELECT B BROWSE D DELETE I INSERT N NEW 08.41.23 -
Press Enter to browse this rule. The details of the rule are displayed on the Control-M/Analyzer Rule Definition screen.
Figure 13 Control-M/Analyzer Rule Definition Screen
CopyLIBRARY : CTBP.PROD.RULES RULE : ARWARN01
COMMAND ===> SCROLL===> CRSR
+-----------------------------------------------------------------------------+
| OWNER M66 GROUP INTRAC |
| UPDATED 24/04/00 - 12:00:39 BY IOA6100 |
| DESC SHOUT TO USERS IF DIVISIONAL AR DATA NOT IN |
| OPTIONS |
| =========================================================================== |
| EXECUTE CHECK UPON C |
| ON DATA |
| IF %%SYSTIME >= 120000 AND %%SYSTIME < 130000 C |
| DO PRINT = DIV. INVOICES NOT IN, PLEASE CHECK IMMEDIATELY F C |
| DO PRINT = ********* ACTION REQUIRED WITHIN 30 MINUTES ******* F C Y |
| ** |
| DO SHOUT TO TSO-M66 URGENCY U |
| = DIV. INVOICES NOT IN, PLEASE CHECK IMMEDIATELY ************* |
| DO TERMINAT = NOTOK COD 0009 |
| IF %%SYSTIME >= 130000 AND %%SYSTIME < 150000 C |
| DO PRINT = DIV. INVOICES STILL NOT IN, URGENT!!! F C |
| DO PRINT = ***************** HELP NEEDED NOW ***************** F C Y |
| ** |
| DO SHOUT TO TSO-M66 URGENCY U |
| = DIV. INVOICES STILL NOT IN, URGENT ACTION REQUIRED********* |
PLEASE FILL IN RULE DEFINITION. 14.18.42Control-M/Analyzer uses rule definitions to examine files and reports in detail, to analyze data, and to take various actions based on the balancing execution results.
Rule Definition Screen Descriptive Information
Descriptive information for the rule appears on the top half of the screen, including
-
the LIBRARY in which the rule is located
-
In this case, the library name is CTB.PROD.RULES
-
the RULE name
-
In this case, the rule name is ARWARN01.
-
the OWNER of the rule
-
In this case, the rule owner is M66.
-
the GROUP to which the rule belongs
-
In this case, the group name is INTRAC.
-
Other descriptive information appears in the DESC and OPTION fields.
Rule Definition Screen Instructions
The rule instructions begin with an EXECUTE statement. Here you program Control-M/Analyzer to input data from files or reports, extract information, and execute balancing actions.
The rule example in Figure 13 is programmed to
-
examine the system time
-
print a message based on the result, and send a Shout message to an online user
Defining Rules
In Chapter 2, you will examine several rules and then define a new rule yourself. This exercise briefly illustrates how to define a rule.
-
Press PF03/PF15 to return to the List of Rules screen.
-
Place the cursor in the OPT field to the left of the rule named ARWARN01.
-
Type N and press Enter. The Rule Definition screen is displayed.
Figure 14 Rule Definition Screen for a New Rule Definition
CopyCTB303E FILL IN THE REQUIRED FIELD RULE :
COMMAND ===> SCROLL===> CRSR
+-----------------------------------------------------------------------------+
| OWNER GROUP |
| UPDATED 11/12/00 - 08:56:08 BY M86 |
| DESC |
| OPTIONS |
| =========================================================================== |
| EXECUTE UPON C |
| ON |
======= >>>>>>>>>>>>>>> END OF RULE DEFINITION PARAMETERS <<<<<<<<<<<<<<< =====
PLEASE FILL IN RULE DEFINITION. 08.56.08
Exiting the Rule Definition Facility
To exit the Rule Definition facility at this time, you must cancel the creation of the new rule you just created as follows:
-
Place the cursor in the COMMAND field.
-
Type CANCEL, and press Enter. You are returned to the List of Rules screen.
Rule Activity
You can use the Control-M/Analyzer Rule Activity facility to obtain information about a job which executes a rule.
-
If you are not working in the Primary Option menu, enter =1 at the COMMAND field.
-
From the Primary Option Menu, enter BA in the OPTION field. The Control-M/Analyzer Rule Activity selection panel is displayed.
Figure 15 Control-M/Analyzer Rule Activity Selection Panel
Copy--------------------- CONTROL-M/Analyzer - RULE ACTIVITY --------------------(BA)
COMMAND/OPTION ===>
SELECT BY:
GROUP ===> INTRAC Group name or * for all groups
USERID ===> User name or prefix
JOBNAME ===> Job name or prefix
STEPNAME(S) ===> Step name(s)
REMARK ===> Remark or prefix
RULE ===> Rule name
CATEGORY ===> Site-defined category or mask
DATE FROM ===> TO Job date
TIME FROM ===> TO Job time
SELECT BY STATUS:
OK ===> Y
Not OK ===> Y
In tolerance ===> Y
DISPLAY OPTIONS:
Bypass panel ===> N
Display type ===> A
FILL IN THE SELECTION CRITERIA, AND PRESS ENTER 08.57.48
It is preferable to enter the Rule Activity facility through the selection panel, rather than going directly to the Rule Activity screen using the Multi-Screen Control feature. Because the Multi-Screen Control feature often displays a large amount of information about all of the active Control-M/Analyzer rules, you would normally want to use the Rule Activity selection panel to display only a specific rule or group of rules.
Changing Rule Activity Screen Defaults
In this exercise, you will change the Rule Activity screen default display options so that you see only rules associated with the group INTRAC.
-
Type INTRAC in the GROUP field.
-
Type D (for default display) in the DISPLAY TYPE field and press Enter. The Rule Activity List screen is displayed only for those rules in the INTRAC group.
Figure 16 Rule Activity List Screen for Group INTRAC
CopyRULE ACTIVITY <D> GROUP INTRAC USERID JOBNAME
COMMAND ===> SCROLL===> CRSR
O JOBNAME JOBID STEPNAME DATE START ENDED RULE STATUS CODE
I610INGS 24883 STEP4 CONTROLB 07/12/00 12:03 12:03 ARSETVAR OK 0000
I610INGS 24883 STEP5 CONTROLB 07/12/00 12:03 12:03 ARWARN01 OK 0000
I610INGS 24883 STEP6 CONTROLB 07/12/00 12:04 12:04 ARWARN04 NOTOK 0999
I610INGS 24883 STEP7 CONTROLB 07/12/00 12:04 12:04 ARWARN4A OK 0009
I610INGS 24883 STEP8 CONTROLB 07/12/00 12:04 12:04 ARWARN01 OK 0000
====== >>>>>>>>>>>>>>>> B O T T O M O F L I S T <<<<<<<<<<<<<< ======
OPTIONS: V VIEW L LOG R REPORT B ROLL BACK P PRINT 09.04.16
The Rule Activity List screen includes the status of all rules that have executed, or attempted to execute, a rule for group INTRAC.
Your screen may appear differently, depending on your computer center's activity and the rule names used within group INTRAC.
Displaying Rule Details
-
To see all of the details for the rules listed in the Rule List Activity screen, Type DISPLAY A in the COMMAND field and press Enter.
Figure 17 Rule Activity List Screen – Display Option A
CopyRULE ACTIVITY <A> GROUP INTRAC USERID JOBNAME
COMMAND ===> SCROLL===> CRSR
O JOBNAME JOBID STEPNAME GROUP OWNER INV#
I610INGS 24883 STEP4 CONTROLB INTRAC M66 0001
Rule : ARSETVAR Mission: (NOMISS) Category : (NO-CATEGORY)
Date : 07/12/00 Start : 12:03 End : 12:03
Status : OK Code : 0000 Committed: 0006 Variables
Remark :
Report : Y
-------------------------------- end of data ----------------------------------
I610INGS 24883 STEP5 CONTROLB INTRAC M66 0002
Rule : ARWARN01 Mission: (NOMISS) Category : (NO-CATEGORY)
Date : 07/12/00 Start : 12:03 End : 12:03
Status : OK Code : 0000 Committed: 0000 Variables
Remark :
Report : Y
-------------------------------- end of data ----------------------------------
I610INGS 24883 STEP6 CONTROLB INTRAC M66 0003
Rule : ARWARN04 Mission: (NOMISS) Category : (NO-CATEGORY)
Date : 07/12/00 Start : 12:04 End : 12:04
Status : NOTOK Code : 0999 Committed: 0000 Variables
Remark :
Report : Y
OPTIONS: V VIEW L LOG R REPORT B ROLL BACK P PRINT 09.07.39-
This display shows the following information:
-
Whether the rule was invoked with or without a mission
-
In this display, no missions were used to invoke the rule.
-
How many variables were committed by this rule
-
If a report exists for this rule
-
-
If the information is displayed beyond one screen, use the UP and DOWN commands, or press the PF07/PF19 and PF08/PF20 keys, respectively, to scroll forward and backward through the display.
-
You can also set the number of lines for which the display will scroll, using one of the following methods:
-
In the SCROLL field, located in the upper right corner of the screen, specify one of the following values:
-
PAGE – Scroll a full page
-
HALF – Scroll half a page
-
CRSR – Scroll a page starting from the line in which the cursorispositioned
-
The default value in the SCROLL field can be changed for a single instance by typing one of the valid scrolling values in the COMMAND field, and then pressing either PF07/PF19 or PF08/PF20.
-
Type MAX in the COMMAND field to scroll the maximum amount for the display, either to the very top or very bottom of the display.
-
To scroll to the very top of the display, after typing MAX in the COMMAND field, either enter the UP command or press PF07/PF19. This scrolls the display to the first line of the first screen of information.
-
To scroll to the very bottom of the display, after typing MAX in the COMMAND field, either enter the DOWN command or press PF08/PF20. This scrolls the display to the first line of the last screen of information.
-
Exploring Screen Options
To explore the options shown on the bottom of the screen you must first reset the screen display to the default view, as follows:
-
Type DISPLAY D (for default display) in the COMMAND field and press Enter.
-
Place the cursor in the OPT field at the far left of the line that includes rule ARSETVAR.
-
Type L for Log and press Enter to display the Log Messages for Jobs screen, which will display several log messages relating to the same rule name, IOAINSGS. Enter the UP and DOWN commands, or press their respective PF07/PF19 and PF08/PF20 keys to scroll backward and forward through the log messages.
-
The IOA Log contains automatically generated messages that record every significant event in the life of a mission or rule. The Log includes information showing
-
when the Log message was issued
-
original scheduling date of a mission or date on which the rule was run
-
the user ID or owner of the rule or mission
-
which rule was executed
-
usually, several associated log messages, as discussed above
-
There is a log message noting when the rule was invoked, when it ended, and when the runtime environment ended.
-
REPORT Option
Another option that is frequently used is the REPORT option.
-
Press PF03/PF15 or enter the END command to return to the Rule Activity screen.
-
Place the cursor in the OPT field at far the left of the line that includes rule ARWARN01.
-
Type R and press Enter. The Control-M/Analyzer Report Viewing screen is displayed.
Figure 18 Control-M/Analyzer Report Viewing Screen
Copy--------------------- CONTROL-M/Analyzer REPORT VIEWING -------------------(BA.R)
COMMAND ===> SCROLL===> CRSR
-------------------------------------------------------------------------------
*** CONTROL-M/ANALYZER SUMMARY OF INVOCATION REPORT ***
***---------------------------------------------------------------***
*** GROUP : INTRAC JOBNAME : IOAINSGS /JOB 7175 ***
*** MISSION : (NOMISS) RULE : ARWARN01 ***
*** CATEGORY: (NO-CATEGORY) OWNER : M66 ***
*** RUN ON : 11/12/00 - 10:55 ***
***---------------------------------------------------------------***
*
** ENTERING BLOCK: CHECK OF TYPE DATA
*
PRT: TIME IS NOT BETWEEN 12 P.M. AND 6 P.M.
PRT: YOU’RE OK FOR NOW, BUT DO NOT RELAX
==SHOUT : 'TIME IS NOT BETWEEN 12 P.M. AND 6 P.M --- RELAX ***********' To: TS0
*** CONTROL-M/ANALYZER INVOCATION ENDED OK USERCODE=0000 ***
======= >>>>>>>>>>>>>>>>>>>> END OF REPORT <<<<<<<<<<<<<<<<<<<< =====
PRESS END TO RETURN. LEFT AND RIGHT TO SEE MORE. 07.28.57
Control-M/Analyzer creates an Invocation Report for each rule that it executes. Rules can be very complex, and may include many ON blocks that perform various balancing operations on data. The report includes information to help you manage and debug a rule after it has been invoked. This includes information automatically inserted by Control-M/Analyzer, as well as messages that are produced by parameters, such as DO PRINT or DO SHOUT, that you may have included in a rule definition.
The actual screen you see may differ slightly from the example screen shown. The rule ARWARN01 produces different messages depending on the time of day that it was run.
The example report for rule ARWARN01 includes the following information:
-
The ENTERING BLOCK line indicates that the ON block called CHECK was processed, as shown in the line beginning with the words "ENTERING BLOCK."
-
Two lines of information were printed, as shown in the next two lines, beginning with the word "PRT."
-
The message was sent to a TSO user, as shown at the end of the next line.
-
The rule ended OK, with a user code of 0000, as shown in the last line of the report.
VIEW Option
The VIEW option enables you to check the status of variables after a rule has been invoked.
-
Press PF03/PF15 or enter the END command to return to the Rule Activity screen.
-
Place the cursor in the OPT field, to the far left of the job named ARWARN4A.
-
Type V and press Enter to display the Variables Committed for Rule screen.
Figure 19 Variables Committed for Rule Screen
Copy-------<G>---------------- VARIABLES COMMITTED FOR RULE -----------------(BA.V)
COMMAND ===> SCROLL===> CRSR
O GROUP NAME --------- VARIABLE NAME ------ GENERATION ------------------------
INTRAC COST03 000
Value : 319302.000
User Key : Run Id :
Creation Date : 11/12/00 11:06:06 By User : M66 Type : B
-------------------------------------------------------------------------------
INTRAC INVAMT03 000
Value : 36874.810
User Key : Run Id :
Creation Date : 11/12/00 11:06:06 By User : M66 Type : B
-------------------------------------------------------------------------------
INTRAC COST02 000
Value : 541873.000
User Key : Run Id :
Creation Date : 11/12/00 11:06:06 By User : M66 Type : B
-------------------------------------------------------------------------------
INTRAC INVAMT02 000
Value : 679025.520
User Key : Run Id :
Creation Date : 11/12/00 11:06:06 By User : M66 Type : B
-------------------------------------------------------------------------------
07.34.54
This screen displays key information about any Database Variables that were affected by the execution of rule ARWARN4A.
In this example, the first variable listed is named COST03. It was updated with a value of 319302, and is currently generation 000, the most recent value of this variable.
A rule always creates a variable value as generation 000. Any previous values existing for this variable then become the next older generation (001, 002, and so on).
Further down this screen are other variables that were updated by the rule. By entering UP and DOWN commands, or pressing the corresponding PF07/PF19 and PF08/PF20 keys, you can examine all the variables listed on this screen.
The next topic examines the Balancing Mission definition.
Balancing Mission
A Control-M/Analyzer rule can be invoked directly from a job step or application program, or triggered through a balancing mission.
Use a balancing mission when you need to specify criteria for running a rule. If the criteria are met, the rule specified by the mission is scheduled for execution. Criteria may specify:
-
Scheduling, including
-
Dates and times in which to execute a rule
-
Different categories of the same mission on different occasions
-
For example, a daily category is scheduled every day, but a monthly category is scheduled at month end. With this facility, different rules may be scheduled for execution on these different occasions.
-
Runtime conditions
-
An event or condition that must exist prior to the rule execution
For example, the accounting application may require rule BALINV to be run every day to balance an invoice file. On the weekend, the balanced invoice files are updated by inclusion of several Control-M/Analyzer variables containing weekly totals. Rule UPDATE performs this function.
By using the Mission Definition facility, you also add a level of operational security to the balancing task. For example, you can define a mission which groups rule BALINV and rule UPDATE together, and schedules rule BALINV to run daily and rule UPDATE to run weekly. A job can be defined that refers to this mission rather than to either one of these rules. By doing this, the UPDATE rule cannot be mistakenly run on a weekday.
This exercise demonstrates how a rule is invoked by defining and ordering such a mission.
-
Enter the Balancing Mission Definition entry panel using one of the following methods:
-
If you are working in another screen other than the Balancing Mission Definition screen, enter =BM in the COMMAND line.
-
If you are not working in the Primary Option Menu, enter =1. From the Primary Option Menu, enter BM in the COMMAND line.
-
The Control-M/Analyzer Mission Definition entry panel is displayed.
Figure 20 Control-M/Analyzer Mission Definition Entry Panel
Copy------------ CONTROL-M/Analyzer MISSION DEFINITION - ENTRY PANEL ------------(BM)
COMMAND ===>
SPECIFY LIBRARY, MISSION NAME, CATEGORY
LIBRARY ===> CTB.PROD.BALMIS
MISSION ===> (Blank for mission selection list)
CATEGORY ===> (Blank for category selection list)
SHOW DOCUMENTATION ===> N (Y/N)
AUTO-SAVE DOCUMENTATION ===> Y (Y/N)
USE THE COMMAND "SHPF" TO SEE PFK ASSIGNMENT 07.38.57
-
-
If the mission library name in the LIBRARY field is not CTB.PROD.BALMIS, as shown in the example, correct it to the library name used at your site. Leave the MISSION and CATEGORY fields blank.
-
Press Enter to display the Mission List screen.
CopyMISSION LIST IN CTB.PROD.BALMIS ------------(BM)
COMMAND ===> SCROLL ===> CRSR
OPT NAME ------------ VV.MM CREATED CHANGED SIZE INIT MOD ID
ADMIN
ARMISS01
====== >>>>>>>>>>>>>>>> NO MORE MISSIONS IN LIBRARY <<<<<<<<<<<<<< =====
OPTIONS: S SELECT O ORDER F FORCE B BROWSE D DELETE 07.41.48Figure 21 Mission List Screen
CopyMISSION LIST IN CTB.PROD.BALMIS ------------(BM)
COMMAND ===> SCROLL ===> CRSR
OPT NAME ------------ VV.MM CREATED CHANGED SIZE INIT MOD ID
ADMIN
ARMISS01
====== >>>>>>>>>>>>>>>> NO MORE MISSIONS IN LIBRARY <<<<<<<<<<<<<< =====
This screen shows the list of missions defined for library BALMIS. Locate the ADMIN and ARMISS01 missions on this list.
Options of the Mission List Screen
The Mission List screen has several options that you can perform on a mission. These options are shown at the bottom of the screen. In this exercise, you will select one of the missions to view it in more detail.
-
Position the cursor in the OPT field, to the left of the mission named ADMIN.
-
Type B and press Enter to display the Category List screen for this mission.
Figure 22 Category List Screen
CopyCATEGORIES OF LIB CTB.PROD.BALMIS BAL MIS ADMIN
COMMAND ===> SCROLL ===> CRSR
OPT NAME ----------------- DESCRIPTION ------------------------------ BROWSE -
DAILY DAILY BALANCING MISSION FOR ACCOUNTS RECEIVABLE
WEEKLY END OF WEEK SUMMARY REPORT
MONTHLY MONTHLY REPORTING MISSION FOR A/R
====== >>>>>>>>>>>>>>>> NO MORE CATEGORIES IN THE MISSION <<<<<<<<<<<<<< =====
OPTIONS: S SELECT O ORDER F FORCE C COPY 07.43.36
A mission can be divided into multiple parts, each with different scheduling criteria. Each of these parts are referred to as a category.
The ADMIN mission is divided into the following three categories: DAILY, WEEKLY, and MONTHLY (see Figure 23).
Figure 23 Missions, Divided into Categories
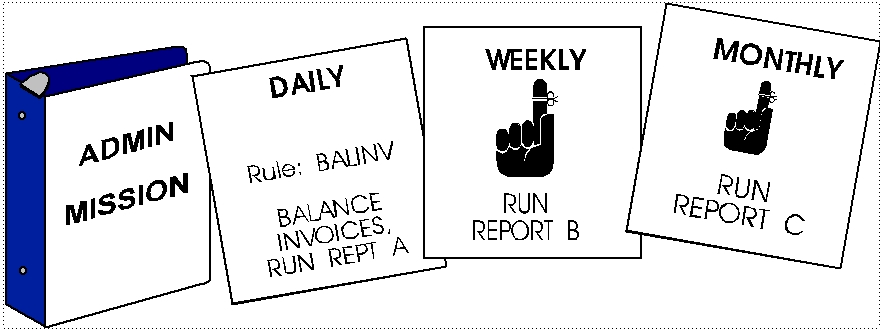
The names of missions and their categories should be descriptive of their functionality. For example, the ADMIN mission is where you look for rules and scheduling pertaining to administration. The category names DAILY, WEEKLY, and MONTHLY are missions to be run on a daily, weekly, and monthly basis, respectively.
Actions that can be performed for each category are shown on the bottom of the screen.
These actions are similar to the actions on the Mission List screen. This means that you can perform similar actions on the mission as a whole, or on just one category within the mission.
Viewing the Mission Definition
In this exercise you will examine the DAILY category.
-
Place the cursor in the OPT field to the left of the mission category named DAILY.
-
Type S and press Enter. The Mission Definition screen for the DAILY category is displayed.
Figure 24 The Mission Definition Screen for Category DAILY
Copy-- CONTROL-M/Analyzer CATEGORY DAILY BAL MISSION ADMIN ---(BM.S)
COMMAND ===> SCROLL===> CRSR
+---------------------------------- BROWSE -----------------------------------+
| CATEGORY DAILY MISSION ADMIN |
| JOB M18GO STEP , SCOPE JOB |
| RULENAME BALINV RULELIB CTB.PROD.RULES |
| OWNER M18B GROUP INTRAC |
| DESC DAILY BALANCING MISSION FOR ACCOUNTS RECEIVABLE |
| DOCMEM ADMIN DOCLIB |
| =========================================================================== |
| DAYS DCAL |
| AND/OR O |
| WDAYS 1,2,3,4,5 WCAL |
| MONTHS 1- Y 2- Y 3- Y 4- Y 5- Y 6- Y 7- Y 8- Y 9- Y 10- Y 11- Y 12- Y |
| DATES |
| CONFCAL SHIFT RETRO N MAXWAIT 00 |
| MINIMUM PDS |
| =========================================================================== |
| IN CTB-ADMIN-DATA-OK ODAT |
| TIME FROM TO NOT LATER THAN PRIORITY |
| =========================================================================== |
| SET VARS |
======= >>>>>>>>>> END OF BALANCING PARAMETERS FOR THIS CATEGORY <<<<<<< ======
USE THE DOC COMMAND TO SHOW/HIDE BALANCING DOCUMENTATION 07.50.40
General Information Parameters: Matching a Job with a Mission
-
The top section of the Mission List screen contains the General Information parameters. These parameters provide general information about the mission as well as information that matches a job with a mission.
-
In this example, the JOB field indicates that the mission must be invoked by JOB M18GO. Control-M/Analyzer performs the following steps to match JOB M18GO with this mission:
-
JOB M18GO contains a step which invokes Control-M/Analyzer. When it is executed, the MISSION parameter in the JCL EXEC statement instructs Control-M/Analyzer to look for the ADMIN mission.
-
Control-M/Analyzer looks in its Active Balancing file for the ADMIN mission. Putting a mission in the Active Balancing file is described in Active Balancing Environment.
-
Control-M/Analyzer determines, from this mission definition, that it must execute rule BALINV.
-
Basic Scheduling Parameters
-
The middle section of the screen contains the Basic Scheduling parameters for the mission. The Control-M/Analyzer scheduling capabilities are extensive. As shown in the example definition, this mission is scheduled for weekdays 1through5, and all months. For more information on Basic Scheduling parameters, see the discussion of mission definition parameters in the Control-M/Analyzer User Guide.
-
-
Runtime Scheduling Parameters
-
Following the Basic Scheduling information, there are two lines containing Runtime Scheduling parameters. In this mission, you see that condition CTB-ADMIN-DATA-OK must exist at runtime, when this mission is invoked, to execute the rule.
-
-
SET VARS: Presetting a Control-M/Analyzer Variable
-
The last line, SET VARS, presets a Control-M/Analyzer variable to a value before executing the rule. The mission does not set any variable values.
-
Press PF03/PF15 or enter the END command. The following confirmation window is displayed:
Figure 25 Balancing Mission Definition Exit Confirmation Window
CopyCATEGORIES OF LIB CTB.PROD.BALMIS BAL MIS ADMIN
COMMAND ===> SCROLL ===> CRSR
OPT NAME --- +-------------------------------+ -------- BROWSE -
F DAILY <-----------| CONFIRM Y ODATE 111200 | TS RECEIVABLE
WEEKLY +-------------------------------+
MONTHLY MONTHLY REPORTING MISSION FOR A/R
====== >>>>>>>>>>>>>>>> NO MORE CATEGORIES IN THE MISSION <<<<<<<<<<<<<< =====
OPTIONS: S SELECT O ORDER F FORCE C COPY 07.53.42 -
Type Y in the CONFIRM field and press Enter to return to the Category List screen.
-
-
-
-
Ordering and Forcing Missions
A mission can be placed in the Active Balancing file automatically, by a special procedure. For more information about this special procedure, see Preparing for Production: Application You can also manually put a mission in the Active Balancing file by "ordering" it.
The following exercise illustrates how to manually order the DAILY category of mission ADMIN to be placed in the Active Balancing file.
Two relevant options, ORDER and FORCE, are available on this screen. While they take similar actions, the criteria followed by these options are different. The ORDER option places the mission on the Active Balancing file according to its defined schedule. The FORCE option forces the mission to be placed on the Active Balancing file, regardless of its schedule. In this example, you will order the mission using the FORCE option.
-
Place the cursor in the OPT field to the left of the mission category named DAILY.
-
Type F and press Enter to force the ordering of this mission category.
-
If a pop-up confirmation window appears, type Y to confirm the order.
-
After a brief period, the Control-M/Analyzer Mission Order Messages screen is displayed with a confirmation message for the order. This message indicates that the mission has been ordered, and it is now placed in the Active Balancing file.
Figure 26 Control-M/Analyzer Mission Order Messages Screen
Copy------------------- CONTROL-M/Anlayzer MISSION ORDER MESSAGES -------------(BM.O)
COMMAND ===> SCROLL===> CRSR
-------------------------------------------------------------------------------
07.56.51 BAO501I CTBBAO STARTED
07.56.52 BAO528I MEMBER ADMIN ID=0001D ODATE 131200 PLACED ON ACTIVE BALANC
07.56.52 BAO525I CTBBAO ENDED
====== >>>>>>>>>>>>>>>>> END OF MESSAGE LIST <<<<<<<<<<<<<<<<< =====
PRESS END TO RETURN. LEFT AND RIGHT TO SEE MORE. 07.56.52
-
Active Balancing Environment
Use the Control-M/Analyzer Active Balancing Environment screen to check all active missions. Generally, this facility should be used to check the status of a mission, while the Rule Activity facility should be used to check the status of a rule.
Active Balancing Environment Screen
Enter the Active Balancing Environment screen using one of the following methods:
-
If you are working in another screen other than the Active Balancing Environment Definition screen, enter =BB in the COMMAND line.
-
If you are not working in the Primary Option Menu, enter =1. From the Primary Option Menu, enter BB in the COMMAND line.
The Active Balancing Environment screen is displayed.
Figure 27 Active Balancing Environment Screen
------------ CONTROL-M/Analyzer ACTIVE BALANCING ENVIRONMENT -----<D>--------(BB)
COMMAND ===>                                                    SCROLL===> CRSR
O RULE     ODATE  SCP OWNER    JOBNAME ---------- STATUS ----------------------
  ARWARN01 101092 JOB M66      *        ENDED OK CODE=0000
                                        RUN-0001,OK-0001,NOTOK-0000,TOLER-0000
  ARSETVAR 111200 UNS M66      N520INGS ENDED NOTOK CODE=4091
  ARWARN01 111200 UNS M66      N520INGS ENDED OK CODE=0000
  ARWARN04 111200 UNS M66      N520INGS ENDED NOTOK CODE=4091
  ARWARN4A 111200 UNS M66      N520INGS ENDED NOTOK CODE=4091
  ARSETVAR 111200 UNS M66      N52AHEL  ENDED NOTOK CODE=4091
  BALINV   131200 JOB M18B     M18GO    WAIT ACTIVATION
======= >>>>>>>>>>>>>>>>>>>> BOTTOM OF ACTIVE RULES <<<<<<<<<<<<<<<<<<< =======


OPTIONS:  ? WHY  H HOLD  D DEL   F FREE  L LOG                         13.46.12
If your data center is actively testing or using Control-M/Analyzer, your screen may show a great deal of information—in fact, much more information than desired at this point in the exercise. Before you examine the Active Balancing Environment screen in detail, you will use the Active Balancing Environment SHOW command. This command allows you to control the amount of information that is displayed.
SHOW Command
-
In the COMMAND line, type SHOW and press Enter to display the Active Balancing Environment screen with the SHOW window open
Figure 28 Active Balancing Environment Show Window
Copy------------- CONTROL-M/ANALYZER ACTIVE BALANCING ENVIRONMENT ----<D>--------(BB)
COMMAND ===> +---------------------------------------------------------+
O RULE ODATE | PLEASE SELECT SHOW OPTION |
ARSETVAR 111200 | RULE |
| JOBNAME |
ARWARN01 111200 | MISSION |
ARWARN04 111200 | CATEGORY |
ARWARN4A 111200 | GROUP |
ARSETVAR 111200 | |
BALINV 131200 | IN PROCESS Y | ENDED Y | STATE Y |
======= >>>>>>>>>> | -------------------+-----------------+--------------- |
| WAIT ACTIVATION Y | ENDED OK Y | HELD Y |
| BALANCING Y | ENDED NOTOK Y | DELETED Y |
| | ENDED TOLER Y | FREED Y |
| === SCOPE === |
| SNG STP JOB ALL UNS |
| Y Y Y Y Y |
| COND |
| IN CONDITIONS YES Y NO Y |
| OWNER |
+---------------------------------------------------------+
OPTIONS: ? WHY H HOLD D DEL F FREE L LOG 07.58.45This screen provides many choices for viewing only the information you want. For example, you can simplify the display to show only those rules and missions belonging to group INTRAC which did not end NOTOK.
-
Place the cursor in the GROUP field, and type INTRAC.
-
Place the cursor in the ENDED NOTOK field, and type N, as shown in Figure29.
Figure 29 Setting the GROUP and ENDED NOTOK Fields in the Show Window
Copy------------- CONTROL-M/ANALYZER ACTIVE BALANCING ENVIRONMENT ----<D>--------(BB)
COMMAND ===> +---------------------------------------------------------+
O RULE ODATE | PLEASE SELECT SHOW OPTION |
ARSETVAR 111200 | RULE |
| JOBNAME |
ARWARN01 111200 | MISSION |
ARWARN4A 111200 | GROUP INTRAC |
ARSETVAR 111200 | |
BALINV 131200 | IN PROCESS Y | ENDED Y | STATE Y |
======= >>>>>>>>>> | -------------------+-----------------+--------------- |
| WAIT ACTIVATION Y | ENDED OK Y | HELD Y |
| BALANCING Y | ENDED NOTOK N | DELETED Y |
| | ENDED TOLER Y | FREED Y |
| === SCOPE === |
| SNG STP JOB ALL UNS |
| Y Y Y Y Y |
| COND |
| IN CONDITIONS YES Y NO Y |
| OWNER |
+---------------------------------------------------------+
OPTIONS: ? WHY H HOLD D DEL F FREE L LOG 07.58.45 -
Press Enter. The Active Balancing Environment screen now displays only those INTRAC group jobs ending with a status other than NOTOK.
Figure 30 Results of the Sample Show Window Selections
Copy-------------- CONTROL-M/ANALYZER ACTIVE BALANCING ENVIRONMENT ---<D>--------(BB)
COMMAND ===> SCROLL===> CRSR
O RULE ODATE SCP OWNER JOBNAME ---------- STATUS ----------------------
ARSETVAR 111200 UNS M66 IOAINSGS ENDED OK CODE=0000
ARWARN01 111200 UNS M66 IOAINSGS ENDED OK CODE=0000
ARWARN4A 111200 UNS M66 IOAINSGS ENDED OK CODE=0009
ARWARN01 111200 JOB M66 * WAIT ACTIVATION
ARWARN01 111200 JOB M66 * ENDED OK CODE=0000
RUN-0001,OK-0001,NOTOK-0000,TOLER-0000
BALINV 131200 JOB M18B M18GO WAIT ACTIVATION
======= >>>>>>>>>>>>>>>>>>>> BOTTOM OF ACTIVE RULES <<<<<<<<<<<<<<<<<<< =======
OPTIONS: ? WHY H HOLD D DEL F FREE L LOG 08.05.23
You have narrowed the scope of the Active Balancing Environment display. You are now able to monitor the status of the active balancing missions that you selected. In the STATUS field for each mission, you can see that these mission requests are either awaiting execution, being executed, or have recently completed execution.
In this example, you see two status types:
-
The result of missions that were invoked
-
Missions either end with a status of OK or NOTOK. In this example, missions that ended had a status of OK because you previously excluded all rules that ended NOTOK. Whether a rule ends OK or NOTOK depends on the user’s definition criteria for a given mission.
-
Missions that have a WAIT ACTIVATION status
-
WAIT ACTIVATION indicates missions waiting for a job to be run that specifies that mission’s name.
On a color monitor, you are able to see how the Management by Color approach helps you separate the various tasks by result.
WHY Option
In an earlier exercise, you ordered a mission called ADMIN, which contained the rule called BALINV. Your next task will be to find out why this mission is waiting to be activated, and has not yet executed.
-
Position the cursor in the OPT field to the left of the rule named BALINV.
-
Type ? and press Enter to display the WHY List screen.
Figure 31 WHY List Screen
Copy------------------------- ADMIN IS WAITING FOR: ----------------------(BB.?)
COMMAND ==> SCROLL==> CRSR
CONDITION CTB-ADMIN-DATA-OK ODATE 1312
======= >>>>>>>>>>>>>>>>> END OF ‘’WHY’’ LIST <<<<<<<<<<<<<<<<< ======
PRESS END PFK TO RETURN TO STATUS SCREEN 08.09.54The WHY List screen informs you that the ADMIN mission is waiting for prerequisite condition CTB-ADMIN-DATA-OK to be satisfied. For further information about prerequisite conditions and how they are used, see the IOA environment discussion in the Control-M/Analyzer User Guide.
-
Press PF03/PF15 or enter the END command to return to the Active Balancing Environment screen to explore other options.
DISPLAY Command
There is other information available on the Active Balancing Environment screen that can help explain the status of a mission before, during, and after its invocation. The DISPLAY command can be used to change the DISPLAY option in order to display all information about each mission.
-
In the COMMAND field, type DISPLAY A and press Enter to show the DISPLAY A option of the Active Balancing Environment screen.
Figure 32 Active Balancing Environment Screen – Display A
Copy------------- CONTROL-M/Analyzer ACTIVE BALANCING ENVIRONMENT ---<<A>--------(BB)
COMMAND ===> SCROLL===> CRSR
O RULE ODATE SCP OWNER JOBNAME ---------- STATUS ----------------------
ARSETVAR 101092 UNS M66 IOAINSGS ENDED OK CODE=0000
GROUP: INTRAC RUN-0001,OK-0001,NOTOK-0000,TOLER-0000
CATEGORY: (NO-CATEGORY)
MISSION: (NOMISS) DESC:
JOB STEPNAME:
PROC STEPNAME: STEP4
ARWARN4A 111200 UNS M66 IOAINGS ENDED OK CODE=0009
GROUP: INTRAC
CATEGORY: (NO-CATEGORY)
MISSION: (NOMISS) DESC:
JOB STEPNAME:
PROC STEPNAME: STEP7
ARWARN01 131200 JOB M66 * WAIT ACTIVATION
GROUP: INTRAC
CATEGORY: DAILY
MISSION: ARMISS01 DESC: SHOUT WAR
NING IF DIVISIONAL AR DATA NOT IN BY
JOB STEPAME:
OPTIONS: ? WHY H HOLD D DEL F FREE L LOG 08.14.39 -
Press PF08/PF20 or enter the DOWN command to scroll forward until you see mission ARMISS01.
-
With this detailed display, you can determine which mission category was ordered. This information is important when you are testing the application to determine if you have correctly set up its parameters. It is also a useful monitoring function for operations staff to keep track of Control-M/Analyzer activities.
-
Other information provided with this display option includes the mission description, the job step name, and the procedure step name.
-
This concludes the tour of the Active Balancing Environment. Next, you will examine the IOA Conditions/Resources screen, and see how it can help modify job flow.
-
IOA Conditions/Resources Screen
All INCONTROL products use a common facility to control the flow of jobs. The facility, called the IOA Conditions/Resources screen, also provides a way for INCONTROL products to communicate with each other.
You will now explore this function, and see how to integrate Control-M/Analyzer with other INCONTROL functions.
Enter the IOA Conditions/Resources screen using one of the following methods:
-
If you are working in a screen other than the IOA Conditions/Resources screen, enter =4 in the COMMAND line.
-
If you are working in a screen other than the Primary Option Menu, enter =1. Then, from the Primary Option Menu, enter 4 in the COMMAND line.
The IOA Conditions/Resources screen is displayed.
Figure 33 IOA Conditions/Resources Screen
-------------------------- IOA CONDITIONS/RESOURCES ------------------------(4)
COMMAND ===>                                                   SCROLL ===> CRSR
PREFIX  ===>                COND Y CONTROL Y RES Y STAT Y      DATE 1401 - 1701
OPT TYPE      CONDITION/RESOURCE    IOAID  USE QUANTITY  MAX  *P   RBA    DATE
    RESOURCE  RES-1                         B    0004    0004
    RESOURCE  RES-2                         B    0004    0004
    RESOURCE  RIQ-MALT28-DC-HLD             B    0010    0010
    RESOURCE  RRR1                          B    0002    0002
    RESOURCE  TAPE                          B    0010    0010
    CONTROL   MYCONTROL                     E                    (00000)
    CONTROL   MYCONTROL9                    E                    (00000)
    CONTROL   MYCONTROL6                    E                    (00000)
    COND      MORD-A-OUT                                                  1401
    COND      MORD-B-OUT                                                  1401
    COND      $LONG-CONDITION-TEST-QM00018-2                              1401
    COND      COND1                                                       1401
    COND      COND2                                                       1401
    COND      ICH-NI-SAN                                                  1501
    COND      E05-MANUAL                                                  1501
    COND      E05-READ1-END                                               1501
    COND      E05-WRITE-END                                               1501
    COND      K15JOBC-CAN-START                                           1701
    COND      AAAA                                                        STAT
OPTIONS:  D DELETE  C CHANGE             COMMANDS: ADD                 11.54.07
The number of items you see on your IOA Conditions/Resources screen depends on the options that were chosen at your site.
Viewing Relevant Conditions
You can enter a prefix to limit the display to specific condition codes. When specifying a prefix, only those conditions with names that begin with that prefix are displayed. The following example illustrates this process.
-
In the PREFIX field, type CTBDEMO.
-
In the DATE field, type 1010 1010 and press Enter. The screen now displays only those conditions with a CTBDEMO prefix and within a date range of 1010 - 1010.
Figure 34 Viewing Relevant Conditions on the IOA/Resources Screen
Copy-------------------------- IOA CONDITIONS/RESOURCES ------------------------(4)
COMMAND ===> SCROLL ===> CRSR
PREFIX ===> CTBDEMO COND Y CONTROL Y RES Y STAT Y DATE 1010 - 1010
OPT TYPE CONDITION/RESOURCE IOAID USE QUANTITY MAX *P RBA DATE
COND CTBDEMO-ARDATA-NOTIN 1010
COND CTBDEMO-PROD-ENDED 1010
COND CTBDEMO-CICS-PROD-UP 1010
COND CTBDEMO-AR-ENDED-OK 1010
COND CTBDEMO-START-BACKUP 1010
======== >>>>>>>>>>>>>>>> B O T T O M O F L I S T <<<<<<<<<<<<<<<< ========
OPTIONS: D DELETE C CHANGE COMMANDS: ADD 08.26.15 -
Press PF07/PF19 or enter the UP command to scroll backward to the top of the list.
Adding Conditions
An IOA condition can be used as a prerequisite for executing a job. For example, you may not want to update the accounts receivable master file until the invoice report is balanced. You can add such a condition to a Control-M/Analyzer balancing rule. The rule would then not allow the accounts receivable master file be updated until the balancing for the invoice report is OK, or within tolerable levels.
You may name a condition anything you like. However, it is recommended that you use a logical name so the operations staff can monitor events and easily understand what is happening, based on a condition name.
In the following example, the condition named INVOICE-ENDED-OK is called. If the invoice report balancing rule ends with everything in balance and OK, the rule will add the INVOICE-ENDED-OK condition with an ADD COND action.
Figure 35 Conditions as Prerequisites for Executing Jobs

When you add a condition, it appears in the IOA Conditions/Resources screen. The Control-M job that executes the Accounting Update step checks the IOA Conditions/Resources list to determine if the condition exists. Before the rule can be executed, not only must the condition exist, but it also must have the correct date associated with it.
Conditions are powerful tools for controlling job flow and determining which jobs will be executed, based on the conditions found in the balancing exercise.
Conditions may be added by other INCONTROL products, or they may be added manually. The following exercise explains how to manually add conditions.
Manually Adding Conditions
Assume that in an organization the operations staff waits for an external tape containing divisional data before starting a job. Once the tape arrives, a condition is added to the Conditions/Resources list.
-
In the COMMAND line, type ADD COND and press Enter.
-
A window is displayed that enables you to enter the name and date of a new condition.
Figure 36 ADD COND Window
-
Copy
-------------------------- IOA CONDITIONS/RESOURCES ------------------------(4)
COMMAN +---------------------------------------------------------+  L ===> CR-R

PREFI| |     PLEA-E FILL IN COND NAME, DATE AND PRE-- ENTER      |  1010 - 1011

OPT TY |                                                         |  BA    DATE

    CO |     NAME ===>                       DDMM ===>           |        1010

    CO |                                                         |        1010

    CO +---------------------------------------------------------+        1010

    COND      CTBDEMO-AR-ENDED-OK                                         1010

    COND      CTBDEMO-START-BACKUP                                        1010

======== >>>>>>>>>>>>>>>> B O T T O M   O F   L I S T <<<<<<<<<<<<<<<< ========


OPTIONS:  D DELETE  C CHANGE             COMMANDS: ADD                 13.03.48
-
-
In the NAME field of the window that is opened, type CTBDEMO-DATA-ARRIVED.The cursor moves to the DDMM field.
If you had entered a name with fewer than 20 characters, you would press Tab to move to the DDMM field.
-
In the DDMM field, type 1010.
Figure 37 Name and Date for a New Condition
Copy-------------------------- IOA CONDITIONS/RESOURCES ------------------------(4)
COMMAN +---------------------------------------------------------+ L ===> CR-R
PREFIX | PLEA-E FILL IN COND NAME, DATE AND PRE-- ENTER | 1010 - 1011
OPT TY | | BA DATE
CO | NAME ===> CTBDEMO-DATA-ARRIVED DDMM ===> 1010 | 1010
CO | | 1010
CO +---------------------------------------------------------+ 1010
COND CTBDEMO-AR-ENDED-OK 1010
COND CTBDEMO-START-BACKUP 1010
======== >>>>>>>>>>>>>>>> B O T T O M O F L I S T <<<<<<<<<<<<<<<< ========
OPTIONS: D DELETE C CHANGE COMMANDS: ADD 13.03.48 -
Press Enter to display the updated list of conditions with a message at the top of the screen.
Figure 38 Updated List of Conditions
CopyCTM587I COND CTBDEMO-DATA-ARRIVED ODATE 1010 ALREADY EXISTS ------------(4)
COMMAND ===> SCROLL ===> CRSR
PREFIX ===> CTBDEMO COND Y CONTROL Y RES Y STAT Y DATE 1010 - 1011
OPT TYPE CONDITION/RESOURCE IOAID USE QUANTITY MAX *P RBA DATE
COND CTBDEMO-DATA-ARRIVED 1010
COND CTBDEMO-ARDATA-NOTIN 1010
COND CTBDEMO-PROD-ENDED 1010
COND CTBDEMO-CICS-PROD-UP 1010
COND CTBDEMO-AR-ENDED-OK 1010
COND CTBDEMO-START-BACKUP 1010
======== >>>>>>>>>>>>>>>> B O T T O M O F L I S T <<<<<<<<<<<<<<<< ========
OPTIONS: D DELETE C CHANGE COMMANDS: ADD 13.18.53
The new condition is now displayed on the list.
If you do not see this new condition displayed, continue to press PF08/PF20, or enter the DOWN command until you have scrolled to the bottom of the display.
If another user has already entered this condition, Control-M/Analyzer issues a warning message indicating that the condition already exists. The preceding example includes such a warning message. You may continue with the tutorial without entering this condition.
This concludes the tour of the Conditions/Resources facility of Control-M/Analyzer. The last online function that you will explore is the IOA Log facility, which contains an audit trail of INCONTROL product events.
IOA Log
INCONTROL products share a common audit trail, which is stored in the IOA Log. This common database is a major advantage if you are trying to track problems that may occur.
Often, a job or an application will use several of the INCONTROL products during its life cycle in the system. For example, a job may be scheduled by Control-M. The job may start by executing a Control-M/Analyzer rule to balance a file. Further down the job stream, a report may be sent to Control-D, and a user may be notified.
When something unexpected happens during processing, you can look in the IOA Log to determine where the problem may have occurred. Depending on your security authorization, you may wish to explore the audit trail of specific events.
The IOA Log facility provides complete flexibility in choosing what you want to see or hide.
-
Enter the IOA Log screen using one of the following methods:
-
If you are working in a screen other than the IOA Log screen, enter =5 in the COMMAND line.
-
If you are working in a screen other than the Primary Option Menu, enter =1. Then, from the Primary Option Menu, enter 5 in the COMMAND line.
-
The IOA Log screen is displayed.
Figure 39 IOA Log Screen
CopyFILTER: ---------------- IOA LOG -------------------------------(5)
COMMAND ===> SCROLL===> CRSR
SHOW LIMIT ON ==> DATE 150101 - 180101
DATE TIME ODATE USERID CODE ------ M E S S A G E --------------------
180101 130027 180101 N98A SPY254I JOB JOB1 N98JOB /25398 OID=001KW SCANNED
180101 130027 180101 N98A SEL256I JOB JOB1 N98JOB /25398 OID=001KW JOB
RELEASED CONTROL TEST1 MODE E
180101 130027 180101 N98A SEL208I JOB JOB1 N98JOB /25398 OID=001KW ENDED
"OK"
180101 130027 180101 N98A SEL203I JOB JOB1 OID=001KX ELIGIBLE FOR RUN
180101 130028 180101 N98A SUB133I JOB JOB1 N98JOB /25399 OID=001KX
SUBMITTED FROM LIBRARY (P) N98.LIB.JCL
180101 130030 180101 N98A SPY28GI JOB JOB1 N98JOB /25399 OID=001KX TAPE
DRIVE UNITS USED=00 00
180101 130030 180101 N98A SPY281I JOB JOB1 N98JOB /25399 OID=001KX START
01018.1300 STOP 01018.1300 CPU 0MIN
00.02SEC SRB 0MIN 00.00SEC 0.00 2AOS35
180101 130030 180101 N98A SPY254I JOB JOB1 N98JOB /25399 OID=001KX SCANNED
180101 130031 180101 N98A SEL256I JOB JOB1 N98JOB /25399 OID=001KX JOB
RELEASED CONTROL TEST1 MODE E
180101 130031 180101 N98A SEL208I JOB JOB1 N98JOB /25399 OID=001KX ENDED
"OK"
======== >>>>>>>>>>>>>>>> NO MORE LOG MESSAGES <<<<<<<<<<<<<<<< =======
CMDS: SHOW, GROUP, CATEGORY, SHPF 13.52.33
-
The number of messages you see, and for which INCONTROL products the messages are generated, depends on the options that were chosen for your site.
The IOA Log screen includes the following information:
Table 3 Fields of the IOA Log Screen
|
Field |
Description |
|---|---|
|
DATE |
The date on which the Log message was issued |
|
TIME |
The time at which the Log message was issued |
|
ODATE |
Original scheduling date of the mission |
|
USERID |
User ID, or owner, of the mission issuing the message, or of the user writing to the log |
|
CODE |
INCONTROL message code |
|
MESSAGE |
The INCONTROL message |
SHOW Command
To make the IOA Log more useful for a given task, you may want to look at only part of the IOA Log screen information. You can show fewer fields with the SHOW command, as you did in previous functions.
-
In the COMMAND line, type SHOW and press Enter.
-
The IOA Log show screen is displayed with options that allow you to define which fields you want to display in the IOA Log screen.
Figure 40 IOA Log Show Screen
CopyFILTER: +-------------------- IOA LOG SHOW SCREEN ------------------(5)+
COMMAND ===> | FILTER SAVE (Y/N) DESC: |
SHOW LIMIT O | CM : D JOB M JOB SHOUT USER GENERAL D INT M INT STAT |
DATE TIME | Y Y Y Y Y N N N |
180101 13002 | CO+CMEM: GENERAL SHOUT JOBS |
180101 13002 | Y Y Y |
| CD+CV : SBSYS REP MIS SHOUT USER GENERAL DAILY MONIT STAT |
180101 13002 | Y Y Y Y Y Y N N N |
| CB : RUNTIME SHOUT DAILY GENERAL STATISTICS |
180101 13002 | Y Y Y Y Y |
180101 13002 | CT : GENERAL SHOUT REAL-TIME UTILITIES |
| Y Y Y Y |
180101 13003 | CODE |
| URGENCY: REGULAR Y URGENT Y VERY-URGENT Y |
180101 13003 | TASK TYPE CM: JOB CYC EMR STC CST EST ECJ ECS WRN TBL TBC |
| Y Y Y Y Y Y Y Y Y Y Y |
| CD: REP PRT BKP/MIG RST EMR NOEMR CYC NOCYC |
180101 13003 | Y Y Y Y Y Y Y Y |
180101 13003 | USERID |
| MEM/MIS |
180101 13003 | JOBNAME |
| CATEGORY |
======== >>> | GROUP |
CMDS: SHOW, +--------------------------------------------------------------+
-
-
In the USERID field, type your user ID.
The screen may appear slightly different from this example, depending upon which INCONTROL products have been installed at your site.
-
The options in the top half of the screen allow you to choose INCONTROL products for which you want to view messages, and which category of messages you want to see displayed. Any combination of these options is valid.
-
In the bottom of the screen, you can select to view log activity by USERID, MISSION, JOB NAME, CATEGORY, or GROUP.
-
-
In the GROUP field, type INTRAC, and press Enter.
-
The Log now displays only those messages for your user ID and the group INTRAC. Had there been many more users in your environment, this would greatly simplify your search for messages pertaining only to your user ID.
-
This concludes the tour of the Control-M/Analyzer IOA Log facility. In addition, you have completed the tour of the Control-M/Analyzer online functions.
-
In the next chapter you will use a case study to develop your skills in understanding and writing Control-M/Analyzer rules.
-
-
In the COMMAND line, type =1 to return to the Primary Option menu.
 Communities
 Support Center
 YouTube
 Twitter
 Facebook
 LinkedIn