Marking User Bundles
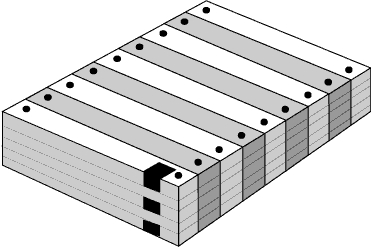
In data centers that do not have job separator machines, all printed (centralized printing) user bundles are separated manually. Page marking becomes an important issue in this manual process, so that it is easy to differentiate between user bundles.
Figure 38 Several User Bundles Separated By Page Markers
Page marking for user bundles is performed differently from one printer type to the next. AFP page printers can be separated into two main categories:
-
Cut sheet printers (for example, 3812, 3816, 3820, and so on).
-
Continuous forms printers (for example, 3800-3, 3835, 3900, and so on).
Cut Sheet Printers
The following topics are covered in this section:
Using Special Stationery
Most AFP cut sheet printers have two bins. One is the primary bin, and the other is the alternate bin. The primary bin is used for the paper (usually plain white) required to print reports. The alternate bin is used for special stationery, different from that in the primary bin (for example, blue paper, or a larger size stationery than the stationery in the primary bin). The Bundle Start/End banners and the User Start/End banners must be instructed to print using the alternate bin. In this way, it is simple to differentiate between the bundles. A special FORMDEF is required for the banners to print using the alternate bin. To assign banners to print using the special FORMDEF, see Using the OUTPARM Option for Banners.
The special FORMDEF must consist of two Copy Groups. One Copy Group must be defined to print from the primary bin for Report Start/End banners. The other Copy Group must be defined to print from the alternate bin for Bundle Start/End banners and User Start/End banners. Following is an example of how to define such a FORMDEF using PPFA (Page Printer Formatting Aid – an IBM product for defining PAGEDEFs and FORMDEFs).
FORMDEF     BANNER
REPLACE  YES ;
COPYGROUP   PAGEB1
BIN      1 ;
SUBGROUP COPIES 1 ;
COPYGROUP   PAGEB2
BIN      2 ;
SUBGROUP COPIES 1 ;
In the above PPFA definition example, the FORMDEF name is BANNER. The Copy Group name PAGEB1 is printed using the primary bin (Bin 1). The Copy Group name PAGEB2 is printed using the alternate bin (Bin 2).
This method of page marking (using special stationery) is the recommended method for AFP cut sheet printers. This method cannot be used for continuous forms printers.
Printing on the Page Perforation
On cut sheet printers, in addition to the previously described method, there are two additional alternatives for initiating page markers:
-
Using a special electronic overlay.
-
Using a CTX/PTX in the banner.
Using a Special FORMDEF (with Electronic Overlay)
When using a special FORMDEF, this same FORMDEF is used for all banners. For this reason, we recommend defining this FORMDEF with two Copy Groups. Use one Copy Group for all banners except the User Start Banner, and a second Copy Group for the User Start Banners. Make the first (default) Copy Group the Copy Group for all banners except the User Start Banner.
Using a CTX/PTX Structured Field
A simple method of initiating page markers is by inserting an AFP Structured Field to initiate a box or a thick line on the edge of the User Banner pages. Following is an example of the CTX/PTX for printing a thick line. This CTX/PTX can be added to the User Banner (in the IOA BANNERS library) and placed wherever required (in the first column).
X'5A0015D3EE9B0000002BD304C7000007E40A80000600'The remaining part of the line must be padded with blanks (X‘40’).
Continuous Forms Printers
There are two types of AFP continuous forms printers:
-
3800-X (excluding the 3800-1, that does not support AFP).
-
All the other AFP continuous forms printers (for example, 3900, 3835, and so on).
The 3800 printers cannot print on the page perforation. This is a hardware limitation. The only way to initiate a page mark on the page perforation is using PSF services. A sample PSF exit (PSF Exit 4) that initiates a box on the perforation of the page is supplied with Control-D. By specifying a special string within a banner, the box does or does not appear. In general, all pages of one user bundle are printed with the box appearing on the page perforation, and all pages of the next user bundle are printed without the box on the page perforation. In this way, it is easy to differentiate between user bundles. For a detailed description of how to use this option, refer to member DOCDPAGM in the IOA DOC library.
For all continuous forms printers that support MFCS, this is the recommended method. All other AFP continuous forms printers can use the same method as the cut sheet printers (but not the special stationary method). AFP printers (except the 3800) do not have the limitation of printing on the page perforation. As a result, most of the methods described for cut sheet printers can also be used for these printers.
When choosing to print the page mark on the page perforation, especially for continuous forms printers, JES must be prevented from printing the regular JES page marking. It is confusing to have two different types of page marking on one bundle. To achieve the suppression of the regular JES page marking, a standard JES operator command to the printer can be used. Following is an example of the JES2 printer operator command that is required to suppress JES2 page marking:
$T PRTnnnn,MARK=NO,COPYMARK=CONSTANT,$=N,$EPDS=NThe following JES3 printer operator command suppresses JES3 page marking (applies to the ESA version of JES3 and all subsequent releases):
*S devname,MK=N,COPYMARK=N ("*" is the JES3 command prefix)Steps for Preparing a Page Marker
To make page marking only for a specific banner (for example, the user Start/End banner), you must perform the following steps:
-
Define a logical overlay using OGL Language. The overlay must contain the specific shape for the page marker.
-
Assume that the overlay name is OVMRK. That name is defined in the OGL definition. You need to define (using PMF or PPFA) a FORMDEF containing the overlay name.
-
Define a FORMDEF (for example, BANFRM) that includes two Copy Groups. The first Copy Group (for example, NOMRK) is the default Copy Group. The second Copy Group (for example, OVMRK) includes the OGL overlay.
-
In the OUTPARMS library, a special member called $$BANCHR must be created (if it does not already exist).
Suppose the user wants to mark the user banner of a specific printing mission (for example, STD), a mask (for example, PRT*), or all printing missions (for example,*). This example is for all printing missions of that user.
In the first column write the following:
Copy+++* (for all printing missions)
OUTPUT=BANUSR -
Add an OUTPUT statement in the CTDPRINT, named BANUSR (as specified in the $$BANCHR). This OUTPUT statement must include the FORMDEF parameter that was defined previously as BANFRM. The OUTPUT statement card name can be any name you choose, as long as the name is equivalent in the OUTPUT parameter and in the CTDPRINT procedure.
-
If the page marking appears on the beginning of the user banner ($$USERST – banner page member) or the end of the user banner ($$USEREN – banner page member), you must add an IMM AFP structure field command to the appropriate member. This command enables you to change the current active Copy Group. In other words, write from the first column the IMM structure field AFP command (in hex code) in the banner member that you want the overlay (page marker) to appear (the last 8 bytes represent the Copy Group name with the overlay):
Copyx'5A0010D3ABCC000002D6E5D4D9D2404040' -
More information about the different types of banner page members can be found in the Control-D and Control-V chapter of the INCONTROL for z/OS Administrator Guide. The members are located in the library allocated to DD statement DABANNER of CTDPRINT.
-
Check if the DD statement named DAOUTPUT exists in the CTDPRINT procedure and that the OUTPARMS library is allocated to that statement.
-
Check if the correct value was assigned to the parameters in the CTDX003. For additional information refer to the INCONTROL for z/OS Administrator Guide. The value of the BANNER parameter must be NO. The OUTPARM parameter value is determined by the way you work with the OUTPARMS library. The Control-D OUTPARMS library is used with this option. Each member in this library refers to a job name (for example,the member name is the job name), or each member refers to a user id (for example, the member name is the recipient name). Please note that all member names must refer either to job names or to user ids – the two cannot be mixed. Either way, the OUTPARM parameter must be specified with one of these values.
-
Do not set the CHUNKSIZE parameter to 0 in conjunction with the use of OUTPARM in banner pages. This can cause the banner and the report to be printed with the same characteristics (for example, same FORMDEF).
-
Now all banners, other than the user banner, are printed according to the default without any page marking (with the first Copy Group NOMRK). Then when a user banner, that must have a different page marking, is about to print, the IMM AFP command changes the Copy Group to that specific banner only.
Bar Codes in Banners
Control-D is capable of printing bar codes on banner pages. The bar codes are usually used by additional hardware components, such as job separator machines or shrink packaging machines.
Any data, whether banner variables or any other user supplied data, can print in bar code format. Bar codes are usually required on the Start-User bundle banner (member $$USERST in the IOA BANNERS library) so the explanations and examples below use this banner. Note that bar codes can be printed on any or all Control-D banners, not only on the user bundle banner.
AFP provides three basic methods for printing bar codes:
-
BCOCA: This method can be used on printers that support IBM’s Bar Code Object architecture. Using AFPDS X‘5A’ bar code records, the required bar code can be printed. This method requires special software and is only supported on specific AFP printers. For additional information regarding AFPDS bar code records, refer to the IBM publication AFP Data Stream Reference S544-3202.
-
DRAWRULE Commands: Using regular AFPDS X‘5A’ DRAWRULE commands, the required bar code can be printed. This method requires drawing the bar codes manually, not a simple task. When using variable data (such as a recipient name), this task becomes even more difficult.
-
Bar Code Fonts: IBM offers a set of special bar code fonts; each bar code font is intended for a specific purpose. This method is the simplest and most commonly used on AFP printers. The bar code font method is supported on all AFP supported printers. It also provides a simple method for printing variable data in bar code (an IBM conversion routine). This is the recommended method for printing bar codes on Control-D banners. For additional information regarding IBM AFP bar code fonts, refer to the IBM publication Bar Code Fonts User’s Guide S544-3190.
Many possible techniques exist for printing bar codes on Control-D banners. The general concept is to decide which data need to be printed in bar code format and to print those data using a bar code font. For example, if the recipient (user) name needs to be printed in bar code format, the Control-D banner variable %USER% must be used for retrieving the recipient name and placing the recipient name in position (that is, line and column) on the banner page where the bar code is required. This line is then assigned to print with a bar code font (character set). Following is a description of possible techniques for assigning this line (or just the recipient name) to print with a bar code font.
Using CTX/PTX for Printing Bar Codes
This technique is based on the use of CTX/PTX (Composed Text / Presentation Text) structured fields. This technique is very similar to the TRC technique. The main difference is that a special second column is not required in the user banner for selecting the special bar code font. Using this technique it is also possible to limit the bar code font to text in a specific range (columns) on a line. This makes it simple to print other text on the same line that is not in bar code.
The list of fonts can appear (as with the TRC technique) in the CHARS parameter, or in parameters CHAR1, CHAR2, and so on, using the OUTPARM option or in the Font List of the active PAGEDEF used when printing the banner.
The CHARS parameter or the PAGEDEF parameter (if not specified in the $$BANCHR member) must be added with the desired value in an OUTPUT statement in CTDPRINT. There is no need to indicate the TRC printing parameter. When using the OUTPARM option, the CHARS parameter can be added in the $$BANCHR member, so that an OUTPUT statement is not required in CTDPRINT.
Note that when using the CHARS parameter (or parameters CHAR1, CHAR2, and so on), up to four fonts can be specified. When using a PAGEDEF, as many as 127 fonts can be specified. Normally, up to four fonts are sufficient.
If you selected the method that does not require an OUTPUT statement, skip to Adding the CTX/PTX to the Banner Member.
If there is a need to inform Control-D that banners must print using a special OUTPUT statement, one of the following methods can be used:
Use the OUTPARM option.
Perform a modification to the Control-D Banner Exit CTDUX003.
The following is an example of the OUTPUT statement that must be added to CTDPRINT and referred to from the OUTPARM option or from exit CTDUX003.
.
.
.
//BANNER  OUTPUT  CHARS=(GT12,BRCD)
.
.
.
In the above example, font GT12 is the data center’s default font and font BRCD is the special bar code font.
Following is an example of the OUTPUT statement that must be added to CTDPRINT and referred to from the OUTPARM option when using a PAGEDEF. Note that it is also possible to specify the PAGEDEF in the OUTPARM option.
.
.
.
//BANNER  OUTPUT  PAGEDEF=BNRCD
.
.
.
In the above example, PAGEDEF BNRCD is the special PAGEDEF that contains the required Font List.
Adding the CTX/PTX to the Banner Member
The user banner (member $$USERST in the IOA BANNERS library) must be updated with the CTX/PTX instruction on the line on which the bar code is to be printed. Then the banner variable %USER% must be added on the same line. If any additional data are required in print in bar code format, it can be added in the banner.
Following is an example of the CTX/PTX line that must be added to the user banner. Notice that it is in Hex format.
X'5A002CD3EE9B0000012BD303F10216DA'where
00 2C          Length of the record.
D3 EE 9B       Structured field identifier (CTX/PTX).
2B D3 03 f1 02 Set the font identifier (for example, 02).
16             Length of the followed data (for example,
recipient name).
The data (for example, %USER%) must start after X‘DA’ in regular character format.
If only the recipient name must be printed in bar code, the above example can be copied exactly as it appears into the banner member.
Using TRC for Printing Bar Codes
This technique is based on the Table Reference Characters (TRC) option. This option allows printing of output, using different fonts for each line of output data. The font to be used to print a specific line is specified in the second column of each line of output data – in our case, the second column of the user banner. If 0 is specified, the first font in the associated Font List is used to print this line. If 1 is specified, the second font in the Font List is used to print this line. If a blank is specified, then the first font is used (the default font). In our case, the first font is the regular default font used in the data center (required for regular text in the banner). The second font is the special bar code font. A complete description of this option appears in section "Specifying Fonts Using the CHARS Parameter" of the IBM 3800 Programmers Guide (SH35-0061).
The Font List can be specified as follows:
-
Using the CHARS parameter with up to four fonts listed.
-
Using parameters CHAR1, CHAR2, and so on, in the OUTPARM option.
Using a special PAGEDEF containing a Font List (with the TRCREF command of PPFA).
When using the CHARS parameter, the Font List with the desired font names must be added to an OUTPUT statement in the CTDPRINT procedure.
When using parameters CHAR1, CHAR2, and so on, in the OUTPARM option, the Font List with the desired font names must be specified in the $$BANCHR member in the OUTPARMS library.
When using a special PAGEDEF, the PAGEDEF name must be specified in member $$BANCHR in the OUTPARMS library. It is also possible to specify an OUTPUT statement name in member $$BANCHR and specify the PAGEDEF name in the OUTPUT statement in CTDPRINT. That way, one of the OUTPUT statements in the CTDPRINT procedure specifies the printing characteristics of the banner.
In addition to the Font List, an indication that the banners are required to be printed using the TRC option must be added to the OUTPUT statement.
Control-D must be informed that banners are to be printed using a special OUTPUT statement. This can be accomplished by:
-
Using the OUTPARM option. This is the recommended method.
-
Performing a modification to the Control-D banner exit CTDUX003. Although this method requires a minor local modification, remember that the previous method is more dynamic.
Following is an example of the OUTPUT statement that must be added to CTDPRINT and referenced from the OUTPARM option or from exit CTDUX003.
.
.
.
//BANNER  OUTPUT  TRC=YES,CHARS=(GT12,BRCD)
.
.
.
In this example, font GT12 is the default font and font BRCD is the special bar code font. Setting TRC to YES is the same as setting OPTCD to J in the DD DCB parameter.
The user banner (member $$USERST in the IOA BANNERS library) must be updated with the TRC indication in the second column of the line that is required to print the bar code. Then the banner variable %USER% must be added on the same line. If any additional data need to be printed in bar code format, they can be added in the banner.
Recommended Technique for Printing Bar Codes
The recommended technique for printing bar codes in banners is the CTX/PTX technique. This is the simplest to implement. It is also recommended that you use the OUTPARM option, so that an OUTPUT statement is not required in CTDPRINT.
Using Large Fonts in Banners
The method described above for printing bar codes can be used for printing specific information in a banner with a large font. Any data, whether banner variables or any other user supplied data, can be printed using large fonts. Large fonts can be printed on any or all Control-D banners. Most of the large fonts are IBM licensed fonts and must be specially ordered from IBM/Pennant. More information about large fonts can be found in the ABOUT TYPE: IBM’s Technical Reference for 240-Pel Digitized Type (SH544-3516).
 Communities
 Support Center
 YouTube
 Twitter
 Facebook
 LinkedIn