![]()
![]()
![]()
![]()
|
|
|
|
|
Control-M Workload Change Manager (WCM) is a web-based interface in Control-M specific for defining, updating and managing workloads. The purpose is to enable non-Control-M expert personnel to create and update complex workflows and pass them to an approver/reviewer for validation, additional updates, return to the initiator and/or implementation into a production environment. The same access rights and permissions granted to the requester in the client/Control-M GUI are also granted in the Control-M WCM web client. However, there are additional capabilities enabled in Control-M WCM which can guide and direct requesters to provide specific, targeted, site specific and/or application specific information. Normally required fields can be omitted for later updating by the “approver”/”reviewer” and field-specific information can be required. Forcing the requester to match the application name to a portion of the job name or to force the inclusion of runbook instructions or any number of other site standards and customizations gives the organization the opportunity to enforce the creation and maintenance of workload back to the Developer. This eliminates user-developed processes and forms for requesting jobs, spreadsheets used for that purpose and much of the back-and-forth email traffic required in the absence of Control-M WCM.
This document will outline the use of WCM as well as how to set site standards and customizations for enforcing job naming and other site-specific requirements.
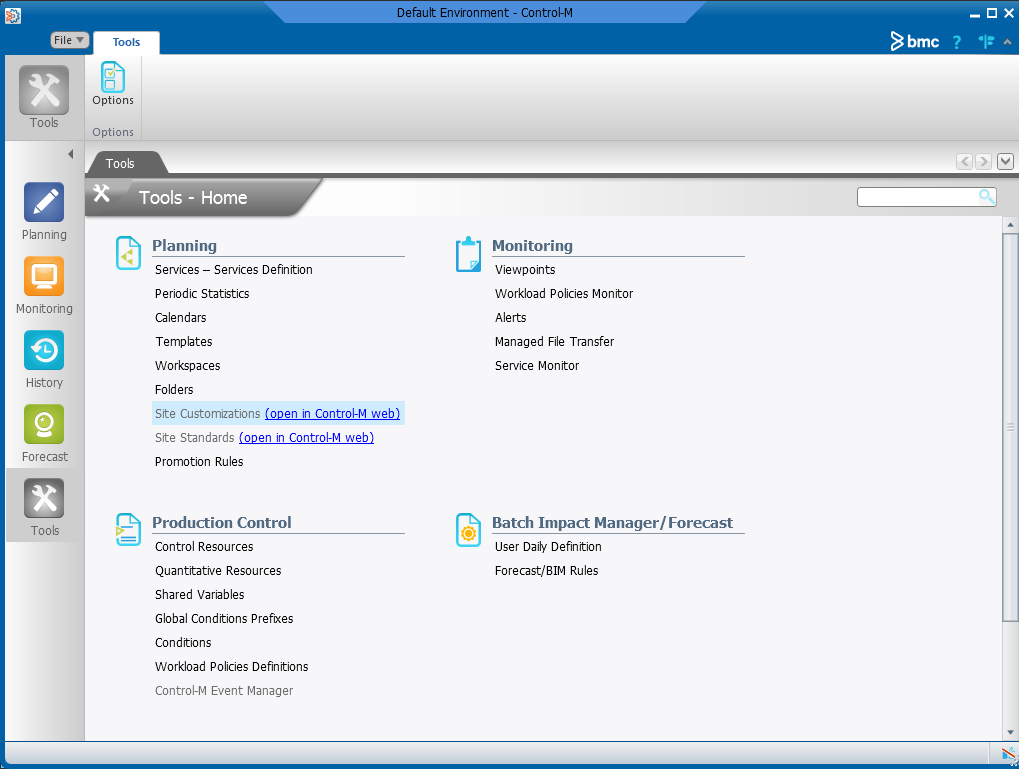
The screen shot below is from the Tools domain in the Control-M client. The focus will be on the site standards and site customizations in the Planning section:
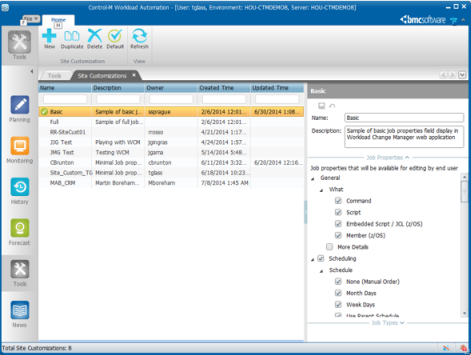
The screen above displays the Basic site customization. On the right are the Job Properties and Job Types options. The screen allows a Control-M administrator to select the job properties or job types he or she wishes the requester to be permitted to provide. For example, if the requester is a Java developer, perhaps the only job types they can request should be BPI jobs.
In any event it is important to establish and publish standards so that all requesters know what is expected and what fields will be required.

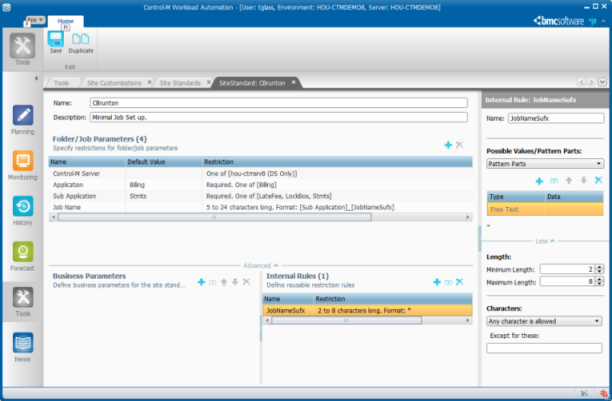
Setting and enforcing Site Standards for items like jobnames, application names, script locations, rerun/restart instructions and other site-specific information can be managed in the Site Standards section. Here a standard can be created from scratch, opened for modification, duplicated and modified and/or deleted. The site standard chosen below requires certain fields to start with specific characters, namely TKG_.
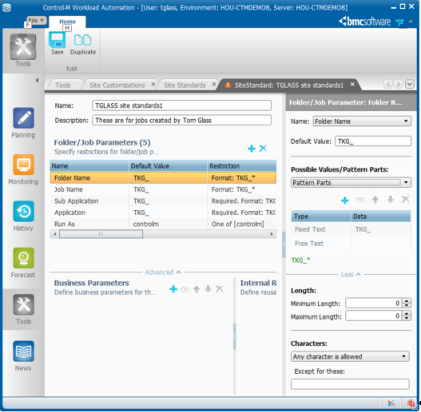
A large portion of the value of Control-M Workload Change Manager is in its ability to enforce standards. Having good naming standards for jobs, applications, folders, users and other fields enables much easier security management and enforcement. Using LDAP, Active Directory and/or SAF security models is much easier if you have proper standards. In large shops it is and has been required for years; in smaller, newer shops it is considered an ITIL best practice to establish and enforce standards. WCM facilitates that. The image above shows setting fields to match a pattern. The length, content and format of each field can be set and enforced. Fields can use established patterns, dropdown lists and/or combinations of values or patterns. For detailed information on each field see the Control- M online help.
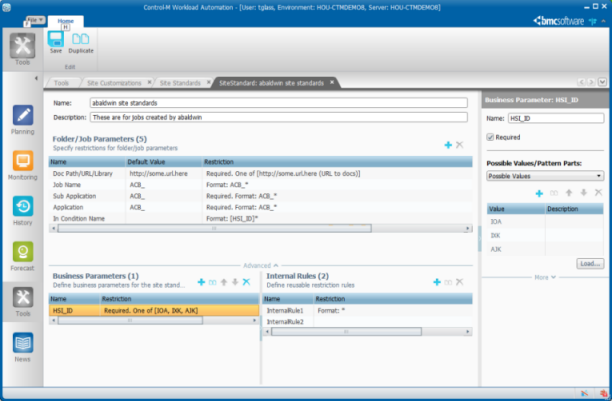
There are also Business Parameters and Internal Rules for Advanced standards enforcement. In the example below, an Administrator has set a business parameter rule to require a field to have one of three optional values. The other rule has also set an internal rule to require a job suffix to be created which is from 2-8 characters. The sky is the limit as far as building these standards; however, a good best practice is to keep it as simple as possible while still meeting the requirements.
As was previously mentioned Control-M Workload Change Manager is a web-based portal for defining new and modifying existing workload. Use the same credentials to access the web page you would use to log into the Control-M thick client. The permissions will be the same; however, the site standards and customizations will also affect what you are permitted to do.

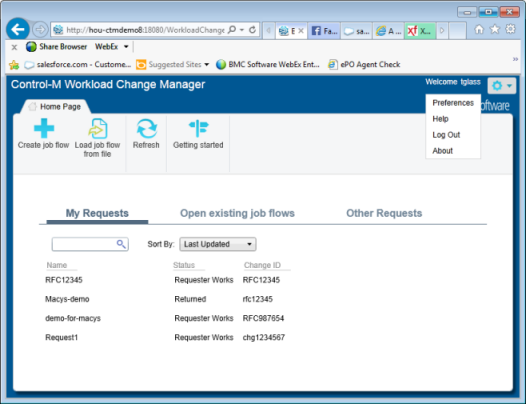
The Control-M Workload Change Manager Home page appears.
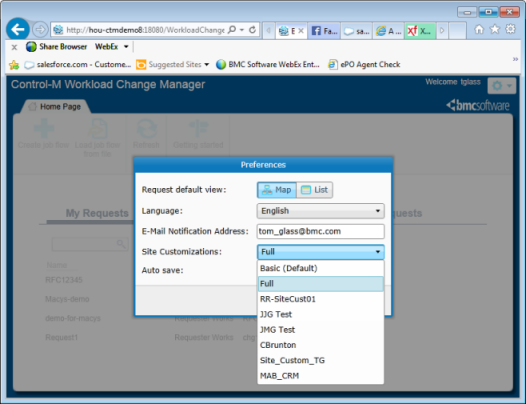
I’ve clicked the settings dropdown in the upper right corner by my name; this is where I select the Site Standards I will use. Keep in mind this is still a v1.0 product; very likely in future releases this setting will be assigned as part of the security profile, but for now it is a setting for the user.

This screen is designed to allow Requestors to associate their change to a ticket, either a trouble ticket or a change ticket. The name of the request is free-form as are all the top three fields. The Request name should be indicative of the purpose of the request; again naming standards are a good idea here, but are not enforceable at this level. Putting the ticket number in the Change ID field is a good best practice; it ties the change to a ticket for audit purposes. Always a good idea. The email is for the user who you wish to receive notifications that the change has been acted upon.
The Settings are dropdown lists.
The screen below appears:
Just like in the Planning domain in the Control-M thick client, do the following:
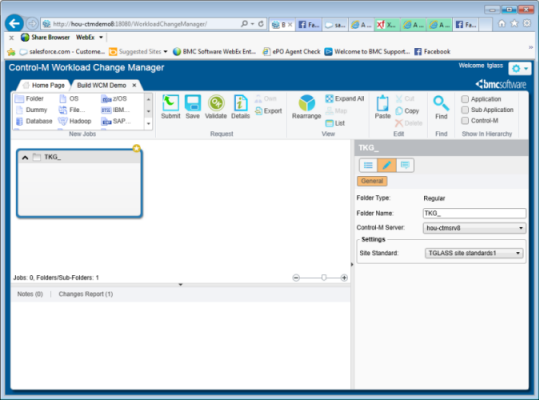
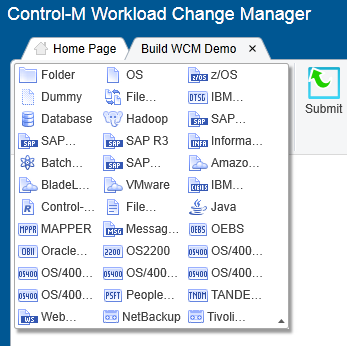
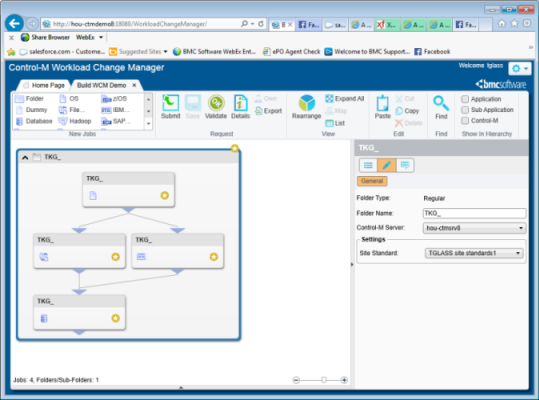
In this, job types may be missing due to site customizations. As was commented on above, the SAP developer may only see Folder, OS job and any SAP job types. The Java developer may see only Java jobs, web services jobs and message jobs. The point is the list is tailored for the user as are the specific fields and field content. The creation and enforcement of site standards is a significant differentiator for Control-M WCM; no other job scheduler has such a capability. Once the workflow is designed it should look something like this:
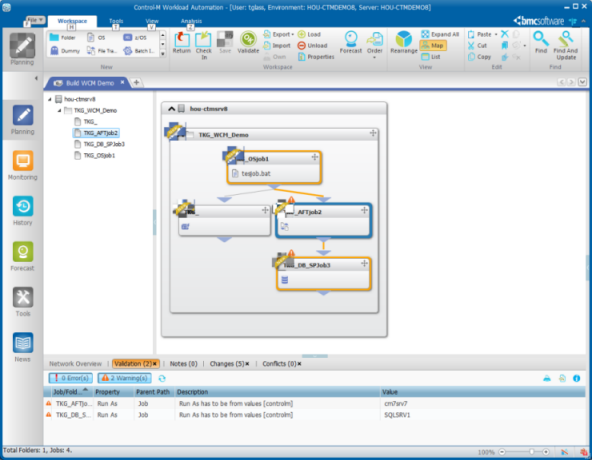
Once you save the workflow, it will prompt you for missing/required values. Each of the jobs shows an icon indicating missing/required fields. See the example below:

Here the file path was provided and the file name is also required. Once that filed is entered the orange warning triangle will go away. The Validation report in the lower left also shows any errors or warnings. Until all these are addressed this workflow cannot be submitted only saved and worked on until all required/missing fields are supplied. Once changes are made click the Validate button to verify you have included the required/missing information.
Once all the jobs are completed, you may click Submit to pass the work on to the person who will be verifying and/or installing it. If you still have warnings or errors, it will ask if you still want to submit it. If you have provided everything you know, click submit; if not complete the form(s) and try again.
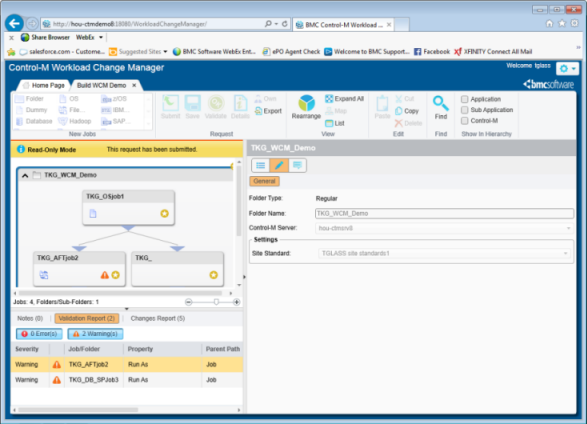
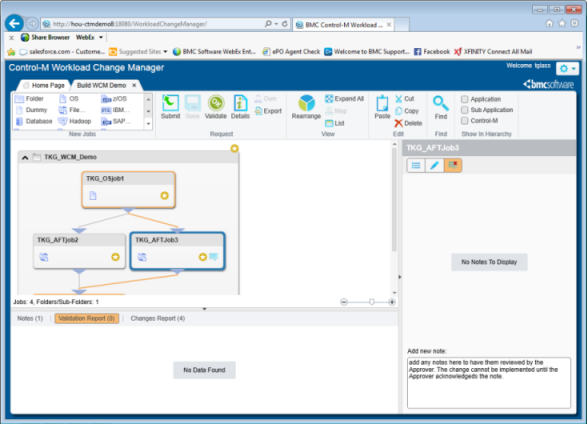
This example below shows the jobs submitted with warnings. Now the Reviewer will take ownership of the workflow and will either provide the missing information or return it to the requester for additional information.
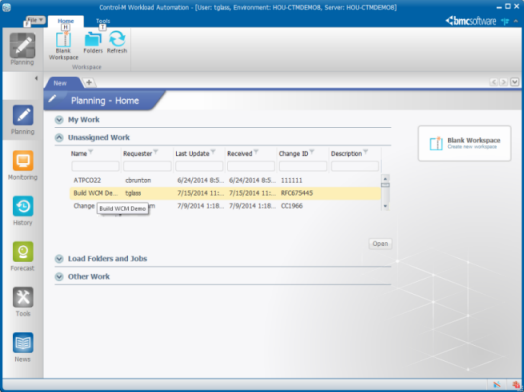
This highlighted WCM Demo work is what we created above. Once you double-click on it the next screen opens
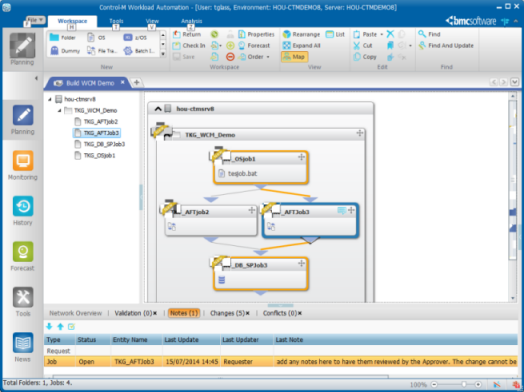
You see the jobs from WCM here in the Control-M EM with the same warnings. To make changes click the Take Ownership button in the upper right.

Once the values are corrected this workflow can be Checked In or it can be returned for correction. Another best practice use for the Return option is to return the work to the requester after changes have been updated for the Requestor to validate and approve them. Once that is done the requestor can resubmit the work and the Approver can then check it in.
Another nice feature in WCM is the Note option. Each field has an option for the Requestor to add notes as an explanation of intent or requirement. The Approver/Reviewer cannot Check In the work until the Notes are all reviewed and acknowledged.
Parent Topic |