![]()
![]()
![]()
![]()
|
|
|
|
|
The Control-M for PeopleSoft Application plug-in is a direct integration to the PeopleSoft Process Scheduler, which can extract and insert jobs into the Process Request Tables. The Application Plug-in connection profile enables access to the PeopleSoft system including User ID and password as well as the connection string to PeopleSoft, which is stored and encrypted in the the Control-M database.
The following procedure describes how to create or modify a connection profile.
To create or modify a connection profile:
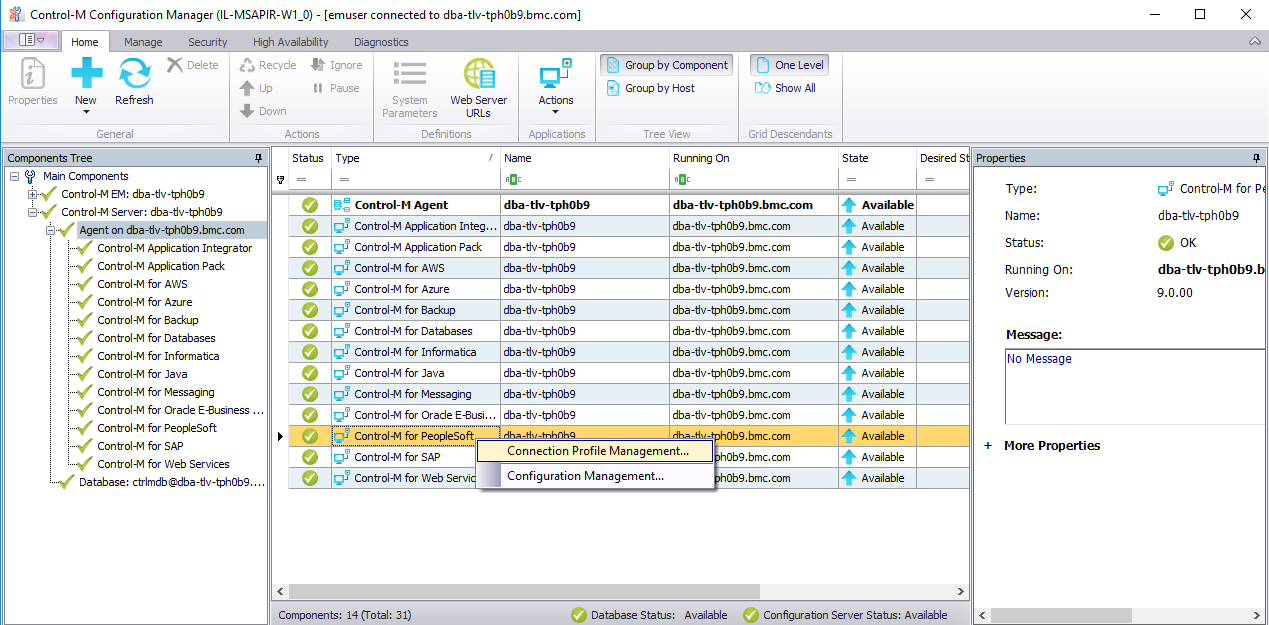
The following window appears:
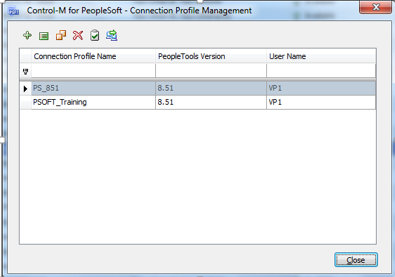
This window displays all the connection profiles, which enables you to add or delete profiles, copy profiles and validate the connection.
The following window appears:
NOTE: Naming standards are important. Name the profile something indicative of its purpose to the PeopleSoft instance to which connects. This makes it easier when selecting the profile you need to define a job. In this example we are select PS_851. We have used this example to correspond the PeopleTools version we use.
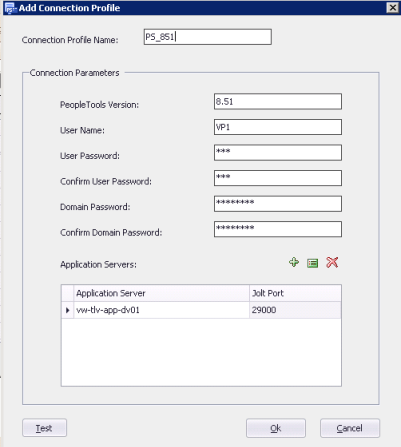
This connection profile requires the PeopleTools version, the user name, user password and domain password. The application server is displayed at the bottom of the window.
The following window appears:

The new Application Server is added:
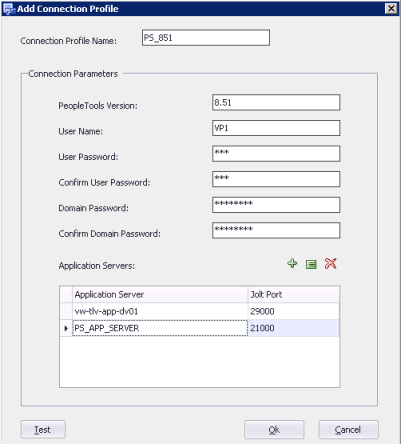
The Server connects to PeopleSoft using the credentials you just provided and reports success or failure in a pop-up window.
You may now exit the CCM.
To create a new job flow:
The job palette enables you to select the types of jobs you may use. This list is controlled by role-based security and job type templates, some of which you can exclude.

Control-M creates the job and places it in a folder:
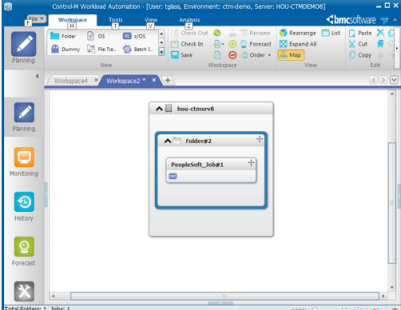
Folders are logical groupings used to encapsulate workflows for various reasons. Customer-specific, function specific, geographically specific, application specific are some examples of reasons to group jobs. You may also wish to create an application and/or sub-application to further quantify your workflow.
The following folder appears:
The folder can now be renamed to something indicative of the flow’s function, like Customer_Payroll or some other appropriate name.
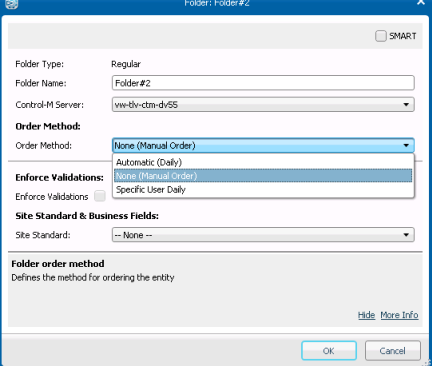
NOTE: SMART folders may have scheduling criteria, such as RUN DAILY, RUN FRIDAY, RUN WORKDAYS. Feel free to experiment with various options.
This example has a single job - PeopleSoft_Job#1;
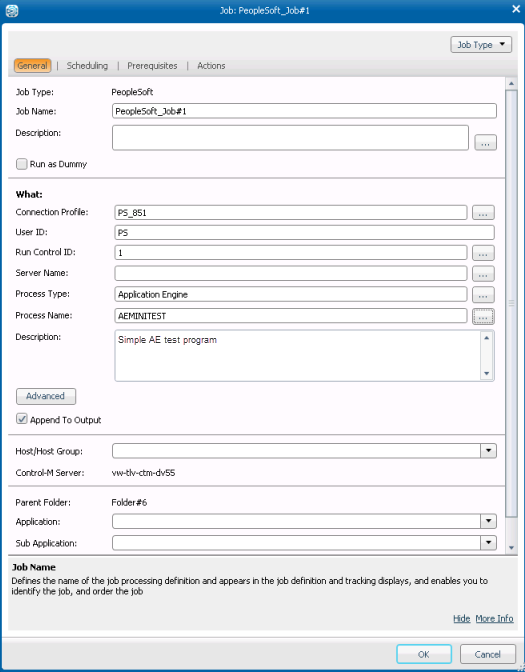
The window below opens and we can begin building the job based on the criteria supplied by our request for from the PeopleSoft requestor.
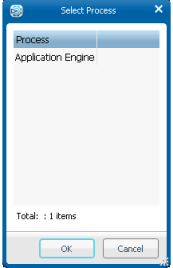
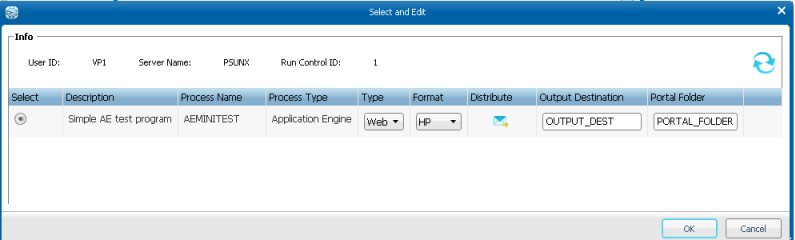
The example below shows the Process Type selection list. Select the Process type and click OK.
The example below shows the Process Name:
The Advanced window appears:
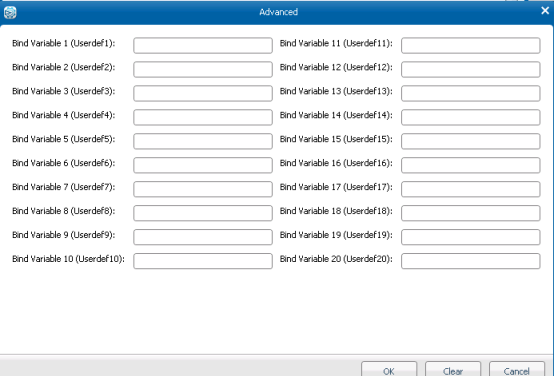
You set up to 20 bind variable options. You may hard-code the values or use Control-M variables to populate the fields automatically. Control-M has 40 or so predefined variables from dates to fields in the job definition. You may also set your own based on job status, SQL queries or other methods.
The example below has a Windows job, followed by three PeopleSoft jobs which execute in the order they appear, with two eligible job running in parallel, and finally another Windows job. The “Payroll” job at the end is a Control-M Batch Impact Manager Service job.
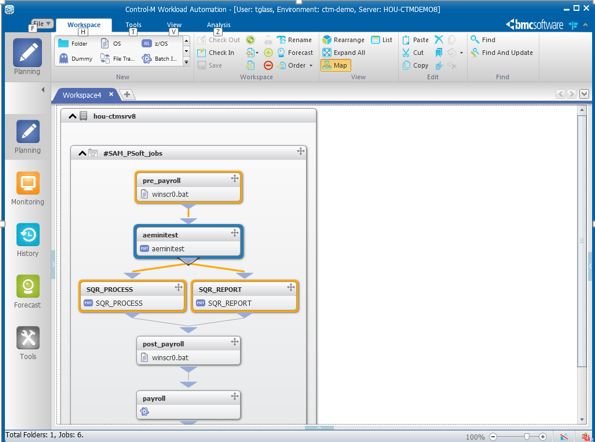
Its purpose is to notify appropriate users that the workflow’s service levels are on track and that any failures or exceptions will be reported to the appropriate personnel. Once you have completed your workflow, save the folder for later or check it in if you have finished.
Parent Topic |