The Control-M for SAP R3 Application plugin has a direct integration to SAP NetWeaver and can extract and insert jobs into the NetWeaver schedule request tables. The Application plugin connection profile, enables access to SAP including the User ID, and password as well as the connection string to SAP, which is stored and encrypted in the Control-M database.
The following procedure describes how to create or modify a connection profile.
To create or modify a connection profile:
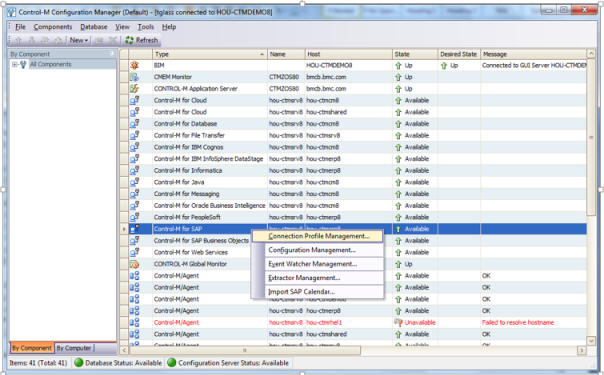
The following window appears:
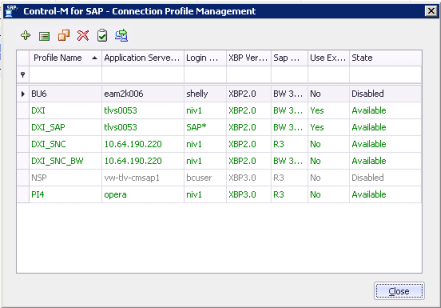
This window displays all the connection profiles, which enables you to add or delete profiles, copy profiles and validate the connection.
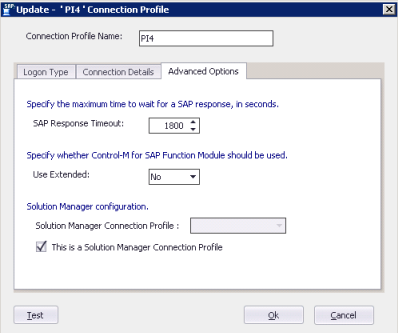
The following window appears:
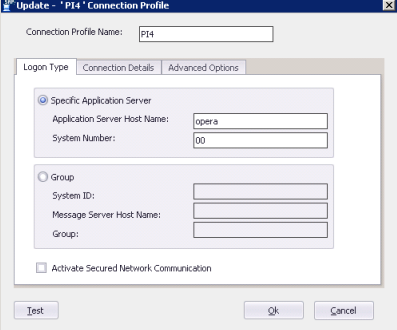
NOTE: Naming standards are important. Name the profile something indicative of its purpose to the SAP instance to which it connects. This will make it easier when selecting the profile you need to define a job.
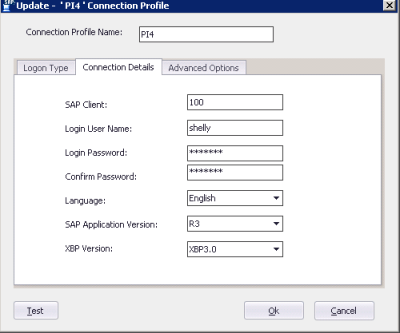
In this example we select PI4. This example is connected to an SAP r3 version. This connection profile requires the either a specific SAP application server and system number or an SAP group. In this example we are using a specific SAP App Server.
You may now exit the CCM.
To create a new job flow:
The job palette enables you to select the types of jobs you may use. This list is controlled by role-based security and job type templates, some of which you can exclude
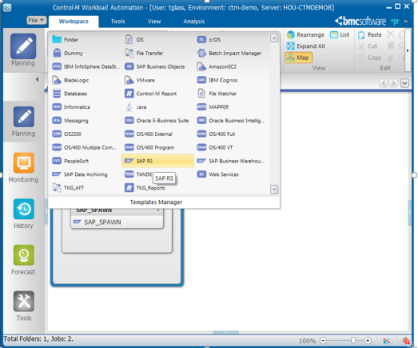
Control-M creates the job and place it in a folder:
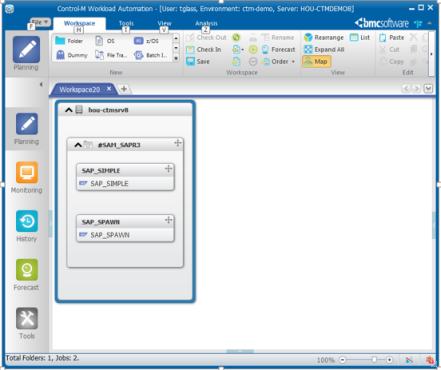
Folders are logical groupings used to encapsulate workflows for various reasons. Customer-specific, function specific, geographically specific, application specific are some examples of reasons to group jobs. You may also wish to create an application and/or sub-application to further quantify your workflow.
The following folder appears:
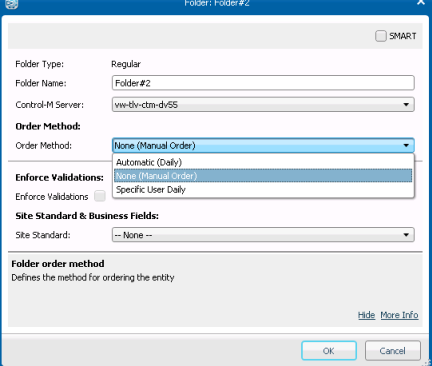
The folder can now be renamed to something indicative of the flow’s function, like Customer_Payroll or some other appropriate name.
NOTE: SMART folders may have scheduling criteria, such as RUN DAILY, RUN FRIDAY, RUN WORKDAYS. Feel free to experiment with various options.
This example has a single job SAP_SIMPLE
The Properties window appears. Below you see the job definition details:
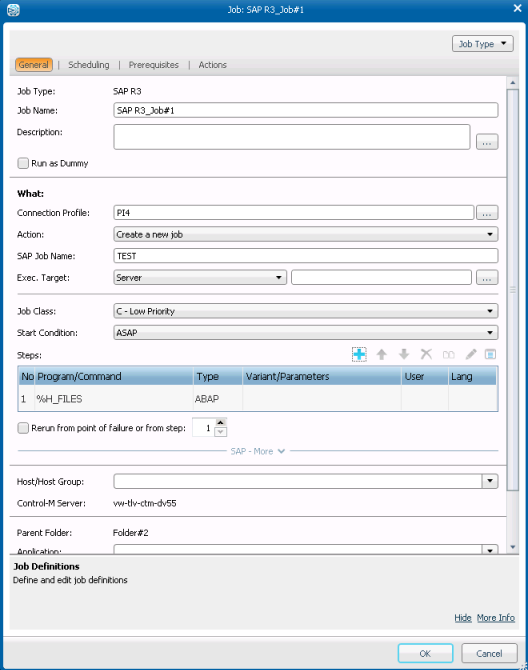
We added the Connection Profile from the one created earlier.
The Control-M for SAP connects to the SAP instance. You can change the program/command and load the list of jobs from SAP for this job. You may add variants, users and change the language.
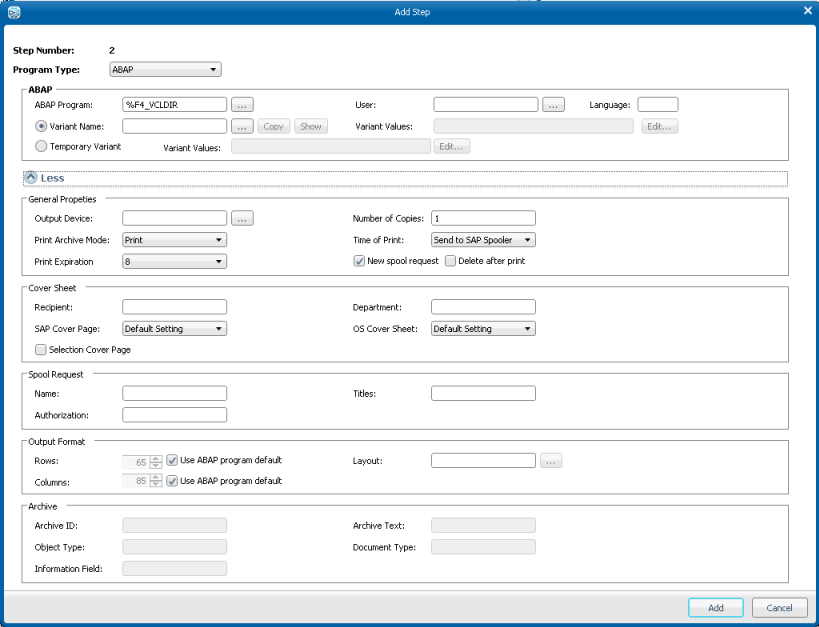
Control-M for SAP connects to SAP so you can select the option(s) appropriate for the field.
In the Job log field, if you select Copy to Sysout, Control-M appends these to STDERR/STDOUT and are viewable in Control-M’s Monitoring domain.
Click OK to save the job definition.
Monitoring jobs:
In this example we have clicked on the Monitoring Domain. We have used a customizable filter to eliminate all but the SAP jobs we are interested in from our display.
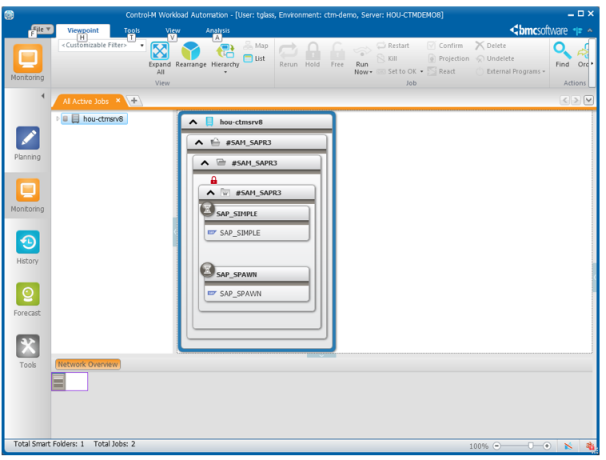
We see by the red lock ![]() that the folder containing our SAP jobs is held. If we select the folder and click Free, so the jobs run. Since we are running each of these jobs manually to see what they do, we select the option to hold each of the jobs from the lest to the left and select the Free option to release the hold on the folder. After that we can run our jobs one at the time and observe their behavior as they run.
that the folder containing our SAP jobs is held. If we select the folder and click Free, so the jobs run. Since we are running each of these jobs manually to see what they do, we select the option to hold each of the jobs from the lest to the left and select the Free option to release the hold on the folder. After that we can run our jobs one at the time and observe their behavior as they run.
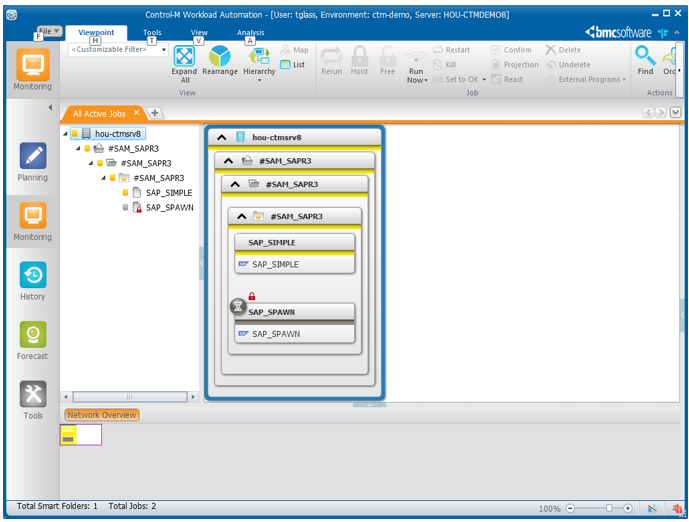
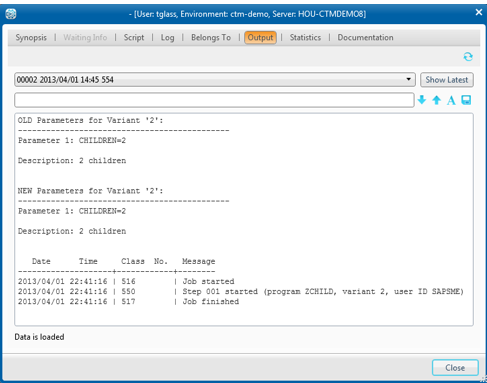
We can observe the jobs executing in Control-M and Control-M will keep jobs alive as they spawn child processes until all those child processes complete successfully. If a child process fails and we’ve selected the Job completion status will depend on application status” selector then the job will fail if a child process fails. Below is an example of an SAP job’s output:
SAP Events
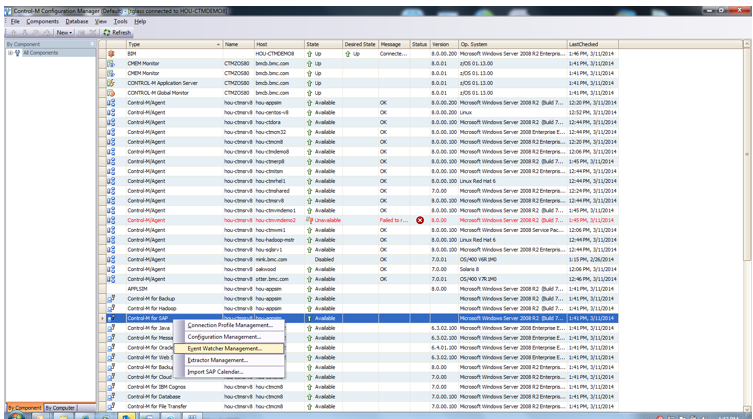
To monitor an SAP event:
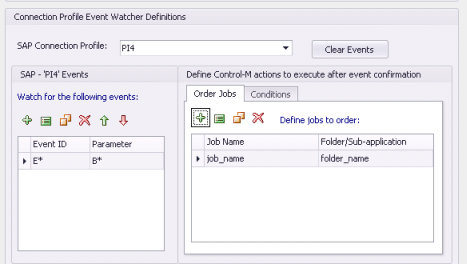
For each event you define, you set jobs/conditions. You can set multiple jobs/conditions per event. The jobs/conditions are triggered on the specific event that is tied to them in the folder.
Parent Topic |