![]()
![]()
![]()
![]()
|
|
|
|
|
The following steps are for illustration purposes. To use non-demo certificates for Control-D/WebAccess Server or Control-D/File Transfer Option (FTO), do the following in the distributed systems side:
keytool -genkey -alias ctdagent –keyalg RSA -keystore keystore_file_path -storepass
keystore_password -keypass keystore_password -dname distinquished_name
The password for storepass and keypass must be identical.
Where distinquished_name (X.509 attributes of the certificate) are:
Example:
keytool -genkey -alias ctdagent -keyalg RSA -keystore ctdagent.keystore1 -storepass sarina -keypass sarina -dname "C=IL, CN=Control-D_Agent, ST=NotApplicable, L=NotApplicable, O=BMC, OU=DBA"
keytool -certreq -alias ctdagent -keystore keystore_file_path –storepass keystore_password -file certfilename.crs
Example:
keytool -certreq -alias ctdagent -keyalg RSA -keystore ctdagent.keystore1 -storepass sarina -file ctdagentCerttest.crs
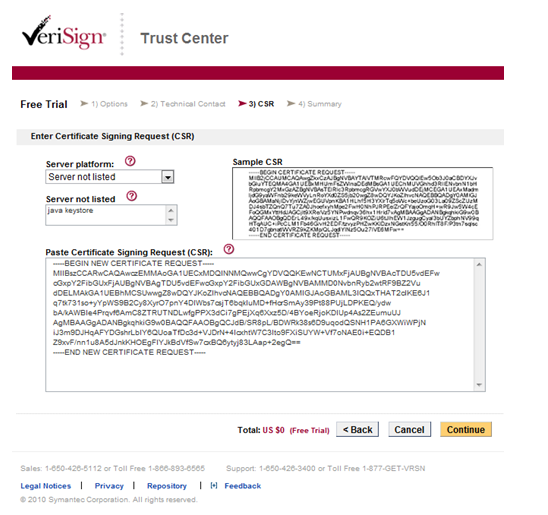
Use a private or commercial trusted CA to sign the certificate. In the following sample we will connect to VeriSign http://www.verisign.com/ to get a trial certificate.
The CSR you have previously generated is a string of text generated by your server. Provide this string to VeriSign during the enrollment process.
Note: When enrolling for your certificate, you will be prompted to select a server platform. In our case select: Server not listed and type Java keystore.
Figure 52 VeriSign Trust Center
Perform the instructions described in the mail that you receive.
Install the Trail Root CA and the Trail Intermediate CA certificate on the server’s keystore.
Download the root CA certificate from the link that you receive by mail and save it with the following name: rootCA.cer
Download the intermediate CA certificate from the link and save it with the following name: intermediateCA.cer
keytool –import –alias RootCA –keystore <your_keystore_filename> -trustcacerts –file rootCA.cer
Example:
> keytool -import -alias RootCA -keystore ctdagent.keystore1 -file rootCA.cer -trustcacerts
Enter keystore password: tsarina
Owner: CN=VeriSign Trial Secure Server Root CA - G2, OU="For Test Purposes Only. No assurances.", O="VeriSign, Inc.", C=US
Issuer: CN=VeriSign Trial Secure Server Root CA - G2, OU="For Test Purposes Only. No assurances.", O="VeriSign, Inc.", C=US
Serial number: 168164a428ca12dfab12f19fb1b93554
Valid from: 4/1/09 3:00 AM until: 4/1/29 2:59 AM
Certificate fingerprints:
MD5: E0:19:F5:FC:C0:9A:13:0E:38:B7:BF:0D:02:40:D3:C2
SHA1: 51:51:B8:63:8A:4C:1F:15:54:56:ED:37:C9:10:35:CA:D3:01:B9:36
Trust this certificate? [no]: yes
Certificate was added to keystore
keytool –import –alias IntermediateCA –keystore <your_keystore_filename> -trustcacerts –file intermediateCA.cer
Copy the certificate from your mail and paste it into a text file using notepad or vi.
Enter the following command to import your trail SSL certificate:
keytool –import –alias <your_aliasname> –keystore <your_keystore_filename> -trustcacerts –file <your_certificate_filename.DER>
Note: The alias name in this command must be the same as the alias name used during the generation of the private key and CSR. The signed certificate must be in X.509 DER (Definite Encoding Rule) format.
Example:
keytool -import -alias ctdagent -keystore ctdagent.keystore1 -file signedcert.der -trustcacerts
To use non-demo certificates for Control-D, perform the following on the mainframe systems side:
The following sample illustrates server (IOAGATE) authentication only.
This level is specified by setting SSL=Yes and CLIAUTH=No (the default when SSL=Yes) in the ECAPARM member.
The following certificates must be in place for this support:
The following sample flow illustrates IOAGATE’s keys generated by RACF and signed by certificate authority outside the mainframe. In our example, we use the VeriSign site:
RACDCERT CERTAUTH GENCERT SUBJECTSDN(CN('Control-D_Agent') O('BMC')
C('IL') L(‘NotApplicable’) SP(‘NotApplicable’)) KEYUSAGE(CERTSIGN) WITHLABEL('GATECA')
A digital certificate with a private key must be generated for the IOAGATE user.
RACDCERT ID(STCUSER) GENCERT SUBJECTSDN(CN(' Control-D_Agent')
O('BMC') C('IL') L('NotApplicable') SP('NotApplicable'))WITHLABEL('IOAGATE') SIGNWITH(CERTAUTH LABEL('GATECA')) KEYUSAGE(HANDSHAKE)
RACDCERT ID(STCUSER) ALTER (LABEL('IOAGATE')) TRUST
The following command will generate a certificate request and write it to hlq.GENREQ:
RACDCERT ID(STCUSER) GENREQ (LABEL('IOAGATES')) DSN('ilprefa.GENREQ')
The following command assumes that the certificate has been uploaded into data set hlq.NEWCERT.PEM:
RACDCERT ID(STCUSER) ADD('IOAQ.Q71MN.NEWCERT.PEM') TRUST WITHLABEL('IOAGATES')
You will receive a mail from Verisign. Install the intermediate certificate according to the mail. The following commands import the intermediate certificate:
RACDCERT CERTAUTH ADD('ilprefa.CACERT.PEM') WITHLABEL('CACERTV')
RACDCERT ID(STCUSER) CONNECT(CERTAUTH LABEL('CACERTV') RING(IOAGATERING)USAGE(CERTAUTH))
RACDCERT ID(STCUSER) CONNECT(ID(GATEUSER) LABEL('IOAGATES')RING(IOAGATERING))
Parent Topic |